


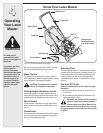
7
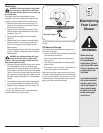
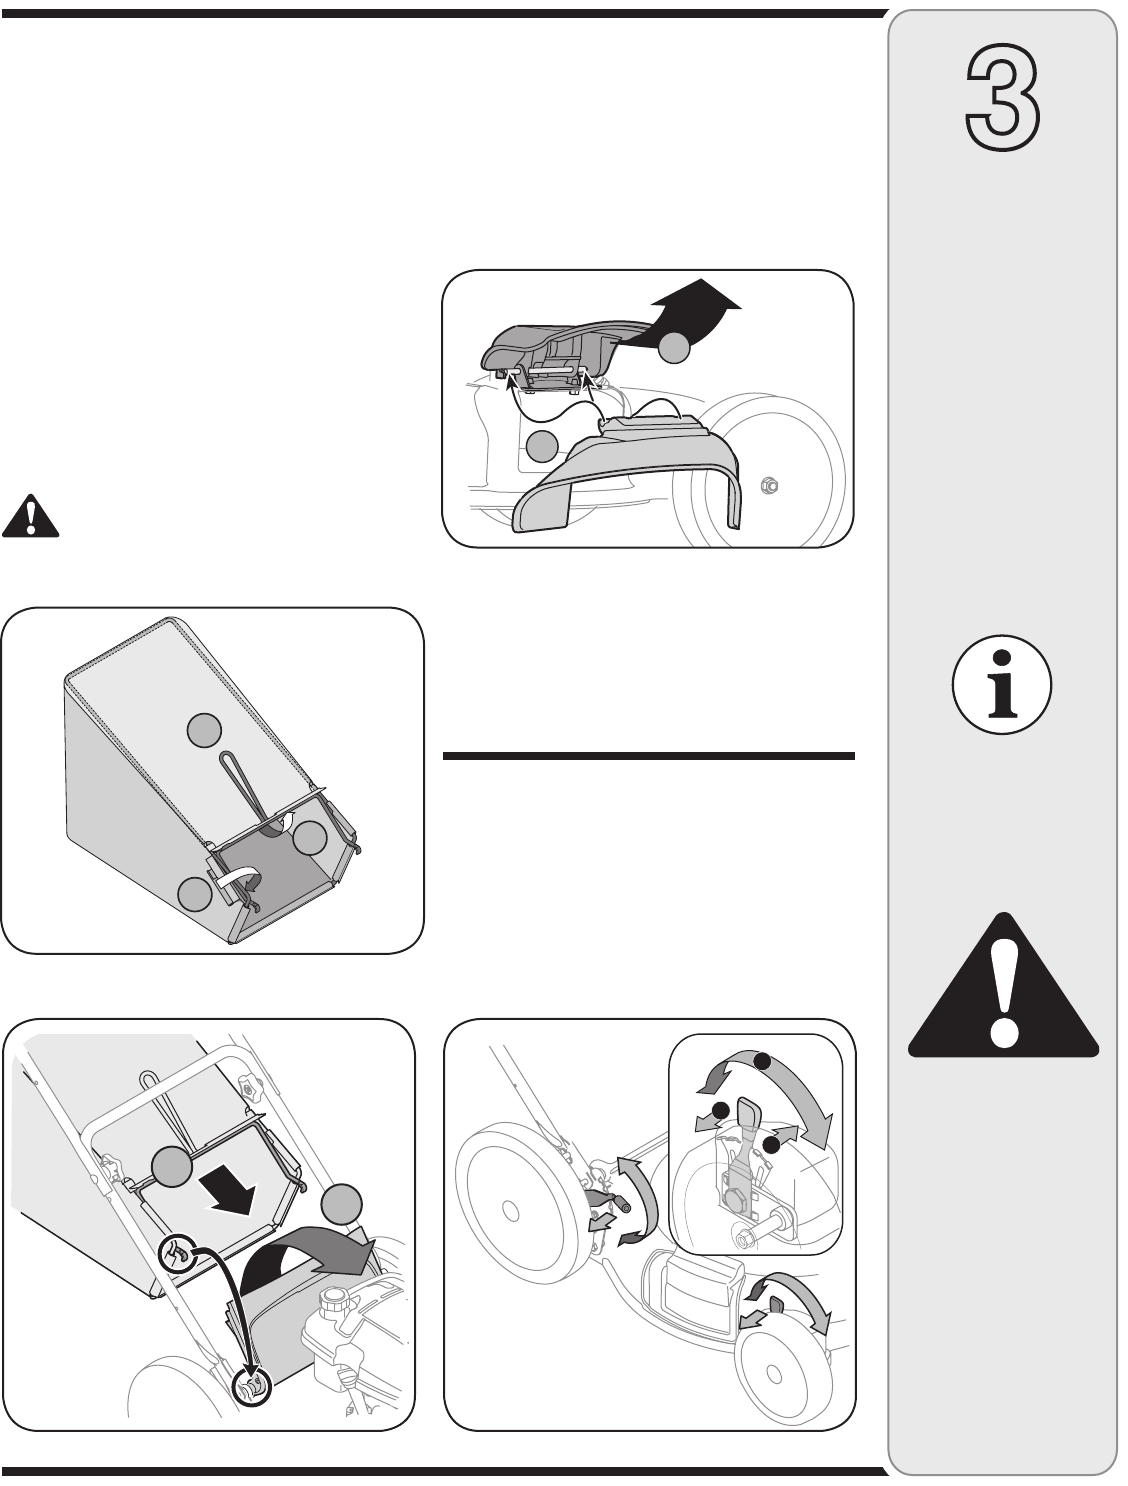
8. Your mower is shipped as a mulcher. To convert to
side discharge, make sure grass catcher is off of the
unit and rear discharge door is closed.
a. On the side of the mower, lift the mulching plug,
Figure 3-7.
b. Slide two hooks of side discharge chute under
hinge pin on mulching plug assembly. Lower the
mulching plug. Do not remove side mulching plug
at any time, even when you are not mulching.
5. To secure cables to the handle, insert posts on cable
ties into holes provided on the lower handle. Pull cable
ties tight and trim excess.
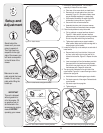
6. Follow steps below to assemble the grass catcher.
Make certain bag is turned right side out before
assembling (warning label will be on the outside)
a. Place bag over frame so that its black plastic side
is at the bottom.
b. Slip plastic channel of grass bag over hooks on the
frame, Figure 3-5. All the plastic channels except
center top of bag attach from outside of bag.
c. Attach center top of bag from inside of bag.
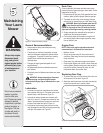
7. Follow the steps below to attach the grass catcher:
a. Lift rear discharge door, Figure 3-6.
b. Place grass catcher on the pivot rod. Let go
of discharge door so that it rests on the grass
catcher.
WARNING: Never operate mower unless the
hooks on the grass catcher are firmly seated
on the pivot rod and the rear discharge door rests
firmly against top of the grass catcher.
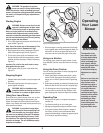
When adjusting the
cutting height, all wheels
must be positioned at
the same height.
3
Setup and
Adjustment
Never operate mower
without the mulching
plug, the grass catcher,
or the discharge chute
properly installed.
WARNING
Figure 3-6: Attach the grass catcher.
A
B
Figure 3-7: Lift mulch plug and install side discharge chute.
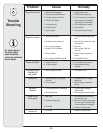
Adjustments
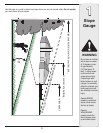
An adjusting plate and thumb lever at each wheel
provides cutting height adjustment.
1. Depress lever towards wheel.
2. Move it to any one of the positions for desired cutting
height, Figure 3-8. Make sure that each wheel is
positioned at the same height.
3. Release lever towards mower deck.
1
2
3
Figure 3-8: Use levers to adjust cutting height.
B
A
Figure 3-5: Assemble the grass catcher.
A
C
B