


5
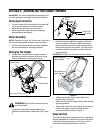
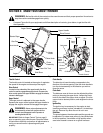
SECTION 2: ASSEMBLING YOUR SNOW THROWER
IMPORTANT:
This unit is shipped with the engine full of
oil. After assembly, see page 8 for fuel and oil details.
Removing From Carton
• Cut the corners of the carton and lay the sides flat
on the ground. Remove all packing inserts.
• Move the snow thrower out of the carton.
• Make certain the carton has been completely
emptied before discarding it.
Before Assembly
NOTE: Reference to right, left, front or rear of the unit is
from the operating position unless otherwise stated.
• Cut the cable tie that secures the upper handle to
the chute assembly for shipping purposes.
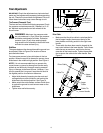
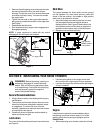
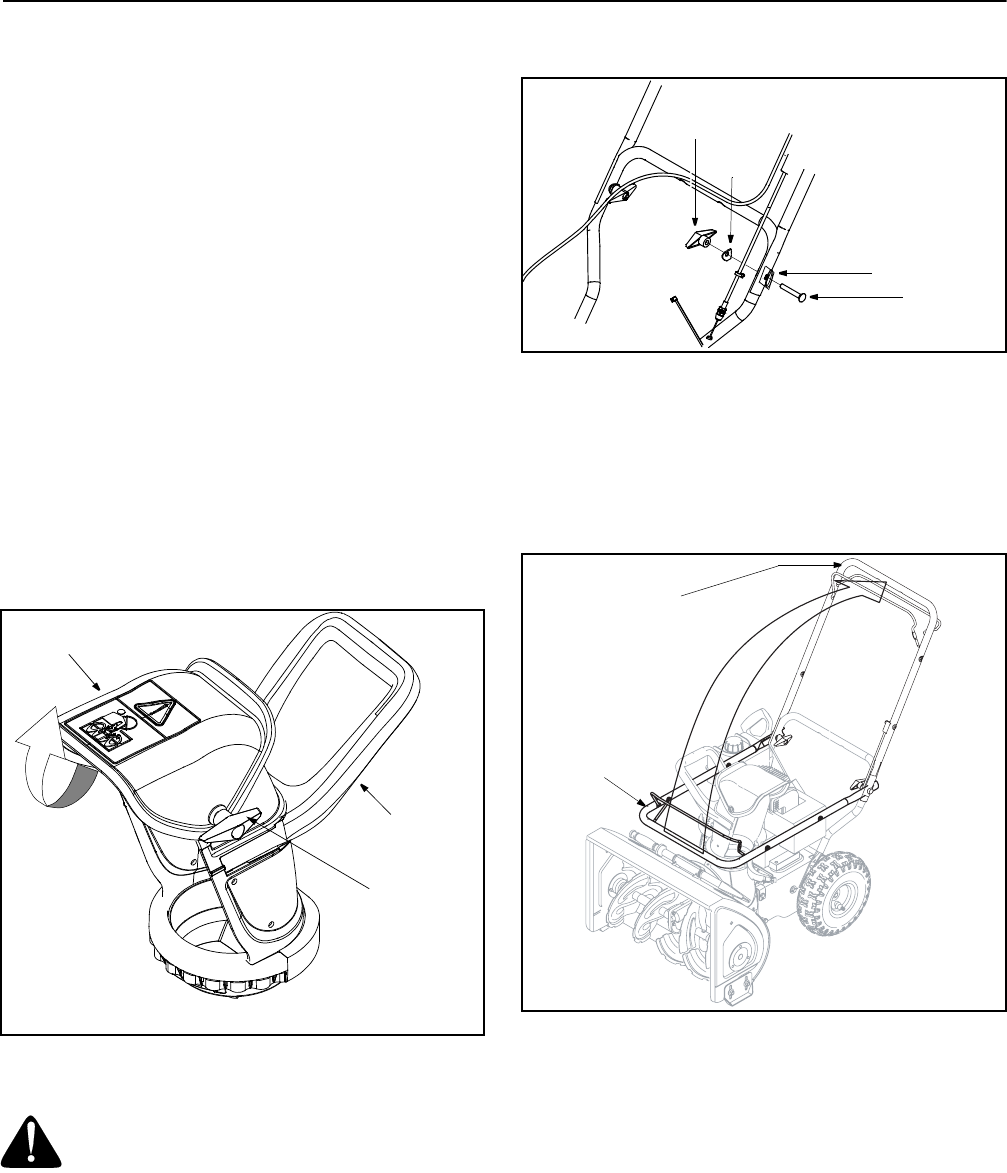
Setting Up The Handle
• Loosen the chute knob on the upper chute and
pivot the upper chute upwards as far as it will go.
Follow the direction of the arrow in Figure 1.
Figure 1
• Loosen the handle knob, saddle washer and
handle tab on each side of the handle. See Figure
2.
Figure 2
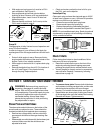
• Hold both controls against the upper handle and
pull up as shown in Figure 3. Make sure that the
upper handle locks over the lower handle and the
handle tabs align with the handle. You may have to
carefully maneuver the upper handle to clear the
chute assembly.
CAUTION: Be careful not to bend or kink the cables.
Figure 3
• Tighten the handle knobs on each side of the
handle. Refer to Figure 2.
• Rotate the chute by the chute handle to the desired
operating position.
• Tighten the chute knob on the upper chute making
sure the flat washer and the carriage bolt are
correctly positioned. Refer to Figure 1.
Clean-Out Tool
This tool and the electric extension cord, if so equipped,
may be fastened with a cable tie to the rear of the auger
housing for shipping purposes. In that case, cut the
cable tie and remove the extension cord now.
WARNING: Do not lift the snow thrower by
the chute handle.
Chute Handle*
Chute Knob
* Meant only to rotate the chute
Upper Chute
Hex Bolt
Handle Tab
Handle
Knob
Saddle
Washer
Initial position of
Upper Handle
Final position of
Upper Handle