


Identify
This procedure allows you to use AutoStar to identify
objects you have found in the night sky using the
Arrow keys. If the object is not in AutoStar’s database,
AutoStar displays information about an object in its
database that is closest to the one you queried about.
Important Note: The telescope must be
successfully aligned before the Identify feature
can be used. Once aligned, it cannot be
physically moved from that location. Moving
the telescope disrupts the telescopes frame
of reference to the night sky and will prevent it
from identifying objects.
In this procedure, you will center an object you wish to
have identifi ed by AutoStar in the telescope eyepiece
and use the “Identify” menu to fi nd out information about
the object or the nearest object to it in the AutoStar
database.
1. Center the object you wish to have identifi ed in
the telescope’s eyepiece.
2. Navigate to the “Object: Identify” option and
press ENTER.
3. “Searching...” displays. When AutoStar fi nishes
calculating, the name of the closest object
displays.
4. Press a Scroll key to display information about
this object. AutoStar displays some or all the
following information about the object with each
press of a Scroll key:
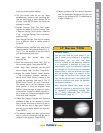
Displayed information: Example:
Catalog or common name... Messier 107, NGC 6171,
Orion Nebula, etc
Type of object...................... Globular Cluster, Nebula,
Black Hole, etc.
Right Ascension .................. 16:32:4
Declination .......................... 13°03’
Constellation ...................... Virgo, Orion, etc.
Magnitude ........................... 3
Size..................................... 2’
Scrolling message............... “This Globular Cluster is
10,000 light years
away...”
Advanced Alt/Az Alignment
If you would rather choose your own alignment
stars from the Autostar database during the Alt/Az
alignment procedure, Autostar offers two methods
described below.
Two-Star Alt/Az Alignment
Two-Star Alignment requires some knowledge of the
night sky. AutoStar provides a database of bright stars
and two stars from this database are chosen by the
observer for alignment.
1. Turn the telescope on: Turn the telescope
power switch to the ON position. The AutoStar
beeps and the display screen is activated.
AutoStar then takes a few moments to start up
the system.
2. Select Alignment Procedure: “Press 0 to Align
or Mode for Menu” displays. Press “Mode” to
access the AutoStar menu.
3. Testing Motors: The telescope then tests the
motor function of the telescope by moving in
the horizontal and vertical directions.
4. Set Your Location or Zip Code: The Location
screen displays. This screen asks you if you
wish to choose either the zip code of your
observing location or the location (i.e., entering
the city and state or country of your observing
location). Press “1” to select the zip code option
or “2” to enter the city and state.
Note: The location settings (country/state/province
and city, or zip code) are only asked for the fi rst
time you turn on the control panel. If you wish to
change this setting later on, use the Site menu.
See SITE, page 29 for more information.
a. If you chose the zip code option, the left most
“0” is highlighted. Use the Number keys to enter
the digits. As you enter a digit, the next digit to
the right will be highlighted. Enter the next digit.
Repeat this process until all 5 digits of your zip
code are entered. Press ENTER.
b. If you chose the location option, the next
screen asks for the country or state/province
(listed alphabetically) of the observing site.
c. Use the Scroll keys to scroll through the list of
countries, states, and provinces. Press ENTER
INDEX
ADVANCED FEATURES
38