Inspecting the Optics
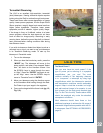
A Note About the “Flashlight Test”: If a ashlight or
other high-intensity light source is pointed down the
main telescope tube, the view (depending upon the
observer’s line of sight and the angle of the light) may
reveal what appears to be scratches, dark or bright
spots, or just generally uneven coatings, giving the
appearance of poor quality optics. These effects are
only seen when a high intensity light is transmitted
through lenses or reected off the mirrors, and can be
seen on any high quality optical system, including giant
research telescopes.
The optical quality of a telescope cannot be judged by
the “ashlight test;” the true test of optical quality can
only be conducted through careful star testing.
Gauging the Movement of
the Telescope
A common complaint of many rst-time telescope
owners is that they cannot see the telescope “move”
when the motor drive is engaged. If fact, when the
batteries are installed, the power is on, the telescope
is moving. However, the movement is at the same
speed as the hour hand of a 24-hour clock; as such,
the movement is difcult to discern visually.
To check the movement of your telescope, look at an
astronomical object through the telescope’s eyepiece
with the telescope polar aligned and with the motor
drive on. If the object remains stationary in the eld
of view, your telescope is operating properly. If not,
check to ensure that “Astronomical” is selected in the
“Targets” option of the setup menu.
Updating Your LS-6 Firmware
Meade is constantly rening and improving the operating
rmware that controls our computerized telescopes and
we even add new features and capabilities from time
to time. Your new LS-6 shipped with the most current
rmware at the time of manufacture, but there may
well be a new version available through the AutoStar
Updated program supplied on the AutoStar Suite DVD
MAINTENANCE
supplied with your telescope. The Updater goes online
to the Meade web site and checks to see if there is a
newer version available and can download it directly
to the telescope through a user supplied USB cable
or it can create a bootable Mini SD Card that, when
inserted into the telescope’s Mini SD Card slot (Pg. 12,
Fig. 3, 10), will transfer the les to the telescope on
startup. Please see the AutoStar Suite documentation
for details on how to perform the update.
Here are the steps to update your rmware:
1. Install AutoStar Suite software and the USB driver
from the DVD included with the telescope.
2. Attached telescope with user supplied USB
cable or insert a mini SD card or micro SD in mini
holder into a card reader to internet connected
computer.
3. Turn on the LS-6 and press “MODE” to abort
from the alignment.
4. Run AutoStar Suite
5. Select the “Telescope” menu from the menu bar
near the top of the screen.
6. Select “Product Updates” from the drop
down menu.
7. Click “OK” or “Yes” in the message box to
be sure you have the latest version of the
Updater software.
8. If you see “Error Box” about searching for COM
Ports and you have your telescope connected
with a USB cable, click “Yes”. If you are using an
SD Card, click “No”.
9. Click on “Upgrade AutoStar Software Now”.
10. Open the drop down menu called “Specify Type
of AutoStar...”.
11. Select LS-6.
12. If you want to make an Mini SD Card, check the
SD box.
13. Click “OK” and the rmware will download
and install.
35


