8 9
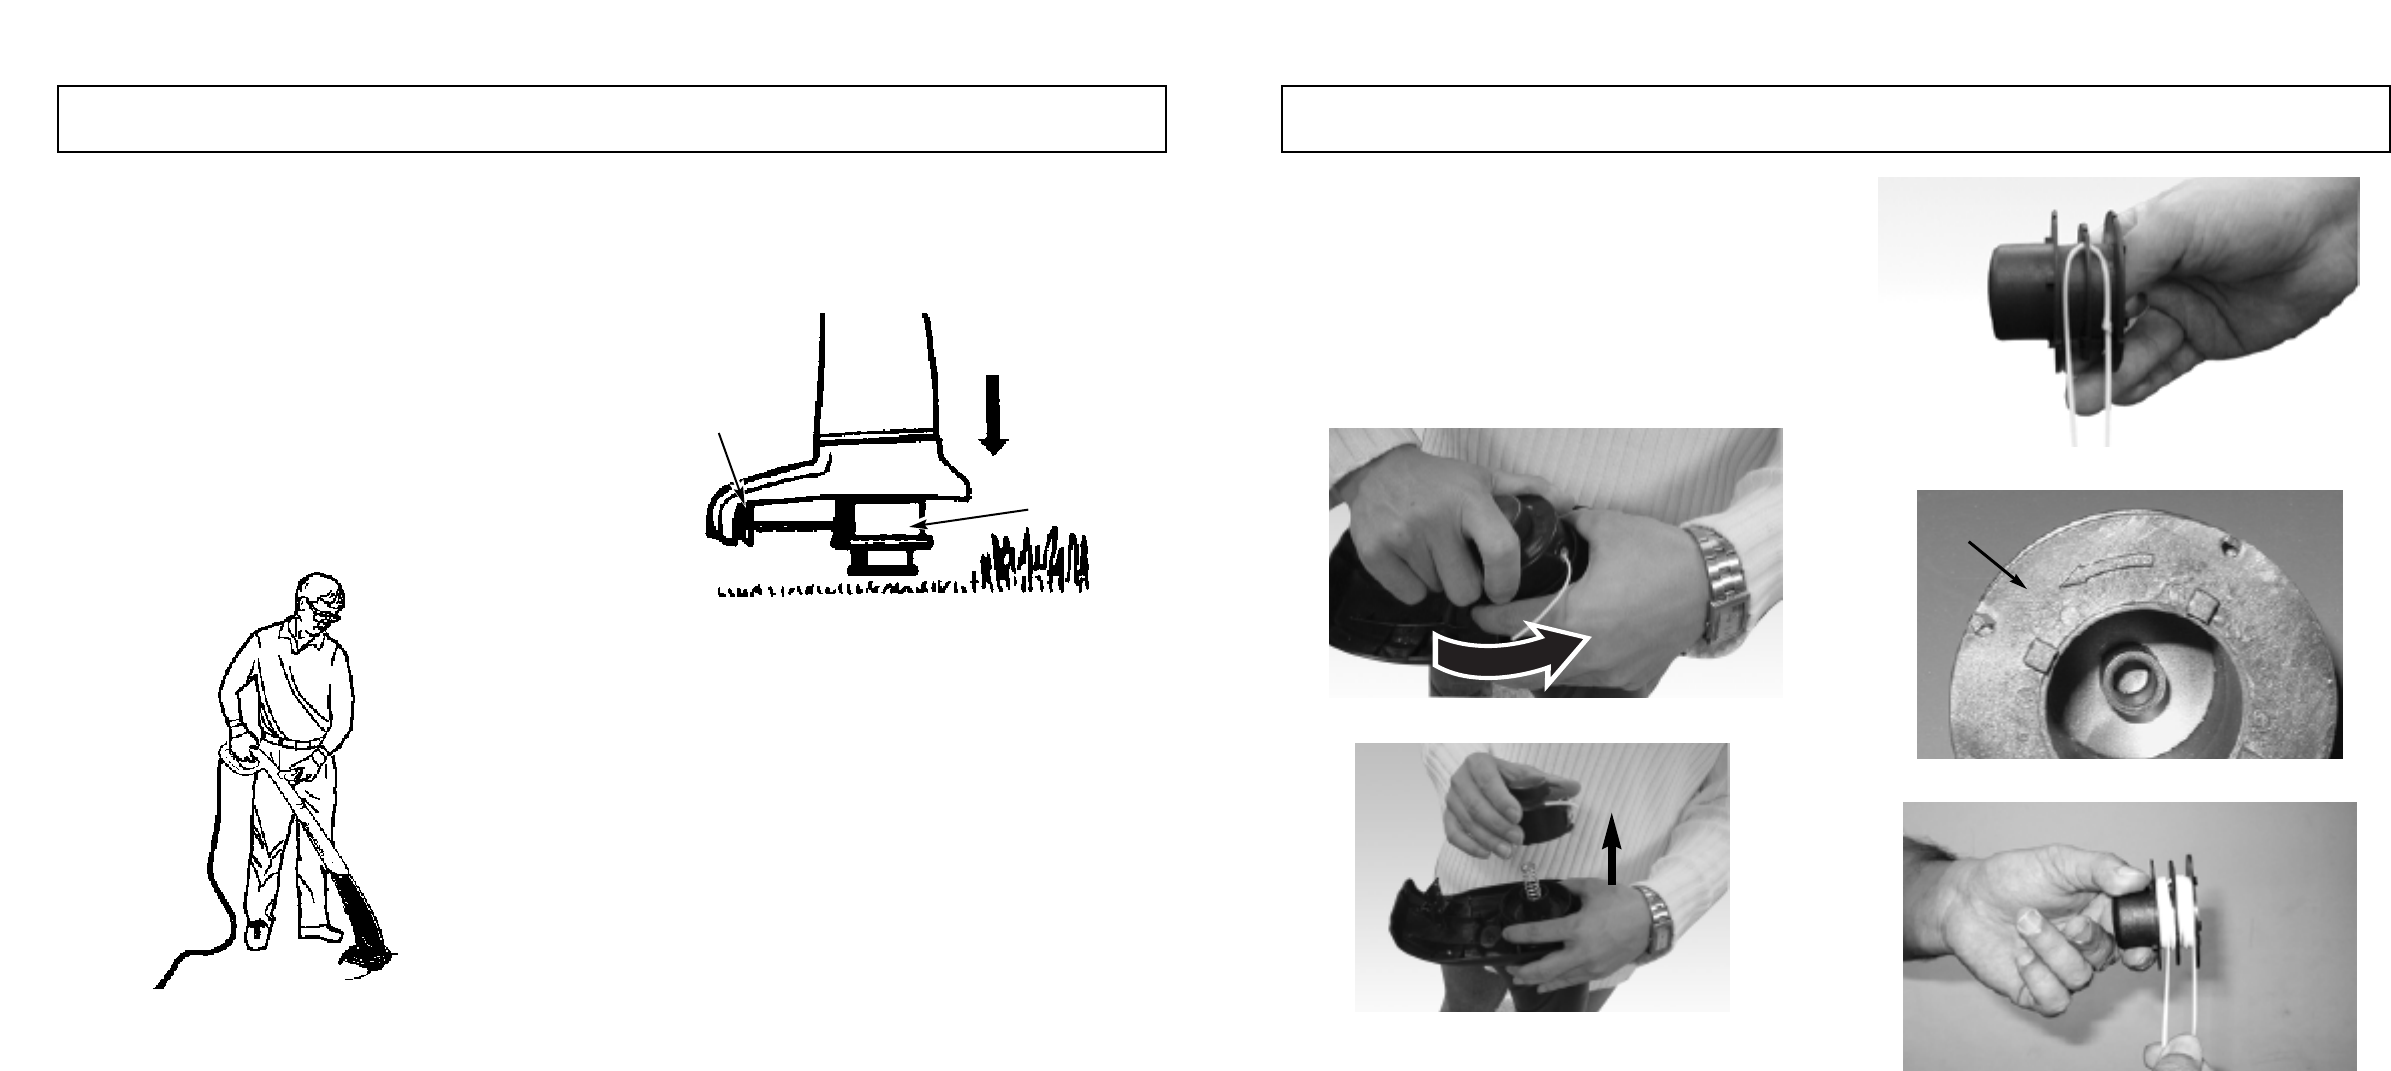
4-1. STAND AS SHOWN (FIG. 4-1) AND
CHECK THE FOLLOWING:
1. Operator wearing safety glasses and heavy clothing.
2.
Use both hands to hold trimmer during use.
3. Unit below waist level.
4. Use the left side for cutting so debris is thrown away
from the operator. Without operator bending over,keep
the line near and parallel to ground and not crowded
into material being cut.
CAUTION
Never use as an edger or lean over the trimmer head when
trimming. Spinning line causes objects to be thrown violent-
ly which can cause blindness or other serious injury.
4-2. EXTENDING THE LINE
To advance the line, tap the bottom of the cutting head on
the ground while the trimmer is running. The line cutting
blade will cut the line to the proper length. (Fig. 4-2)
4 - OPERATING INSYRUCTIONS
5-1. REPLACE THE SPOOL OF NYLON LINE
1.
Unplug the trimmer.
2. Remove the spool assembly from the trimmer. To do
so, hold the outer ribbed part of the assembly with one
hand, while pushing do
wn and turning the spool head
with the other to unlock it. (Fig. 5-1A & Fig. 5-1B) The
spool carrier and spool will now disassemble easily.
NOTE: There is a spring inside the spool head that
could easily be lost. Insure that it is put in a safe place.
3. Remove the clear plastic line retaining ring. Remove
an
y e
xisting line from the spool.
4. Using 0.065" replacement line measure off approxi-
mately 14' of line. Double over the cutter line into two
equal lengths and place loop in slot of the spool
divider (Fig. 5-1C).
5. Wind the line onto the spool by turning the spool. The
line should go on in the direction of the arrow (A) on
the spool (Fig.
5-1D).
Line should be wr
apped tightly
around the spool. The line is wound with each half
separ
ated by the divider. Tightly wind it until there is
about 6" of line left (Fig.
5-1E).
5 - MAINTENANCE INSTRUCTIONS
4-1
5-1B
5-1A
Line Cutting
Blade
TAP
Cutting
Head
5-1B
5-1C
5-1D
5-1E
A


