


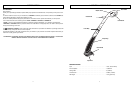

3-4. STARTING
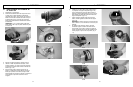
1. When starting the string trimmer for the first time,
check that the nylon lines touch or pass over the line-
cutting blade. If they are not long enough, press the
b
utton and, at the same time, pull the nylon lines (Fig.
3-4A).
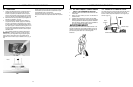
2. Connect the plug of the string-trimmer to the exten-
sion cord and attach this to the handle. (Fig. 3-3)
3. Take a secure hold of the grass trimmer. Without let-
ting the trimmer touch the grass, press the switch (A)
on the upper handgrip (Fig. 3-3). Let the string trimmer
run for a few seconds and “bump” the string head
against the lawn. Nylon line will automatically release.
The cut-off knife in the debris shield will trim off
excess line.
4. To turn off the string trimmer let go of the switch.
NOTE: A short or worn line is less efficient, to lengthen the
line tap the spool button lightly on the ground while the trim-
mer is running and spool turning. (Fig. 3-4B)
These operations should be repeated a few times before
star
ting work to make sure that everything is functioning
properly and to familiarize yourself with the string trimmer.
Start off slowly, when you have gained experience, you will
be able to use the grass trimmer to its full potential.
If you receive your unit assembled, check each step to
insure your unit is properly assembled. Follow all safety
information in the manual and on the unit.
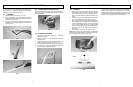
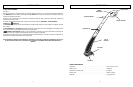
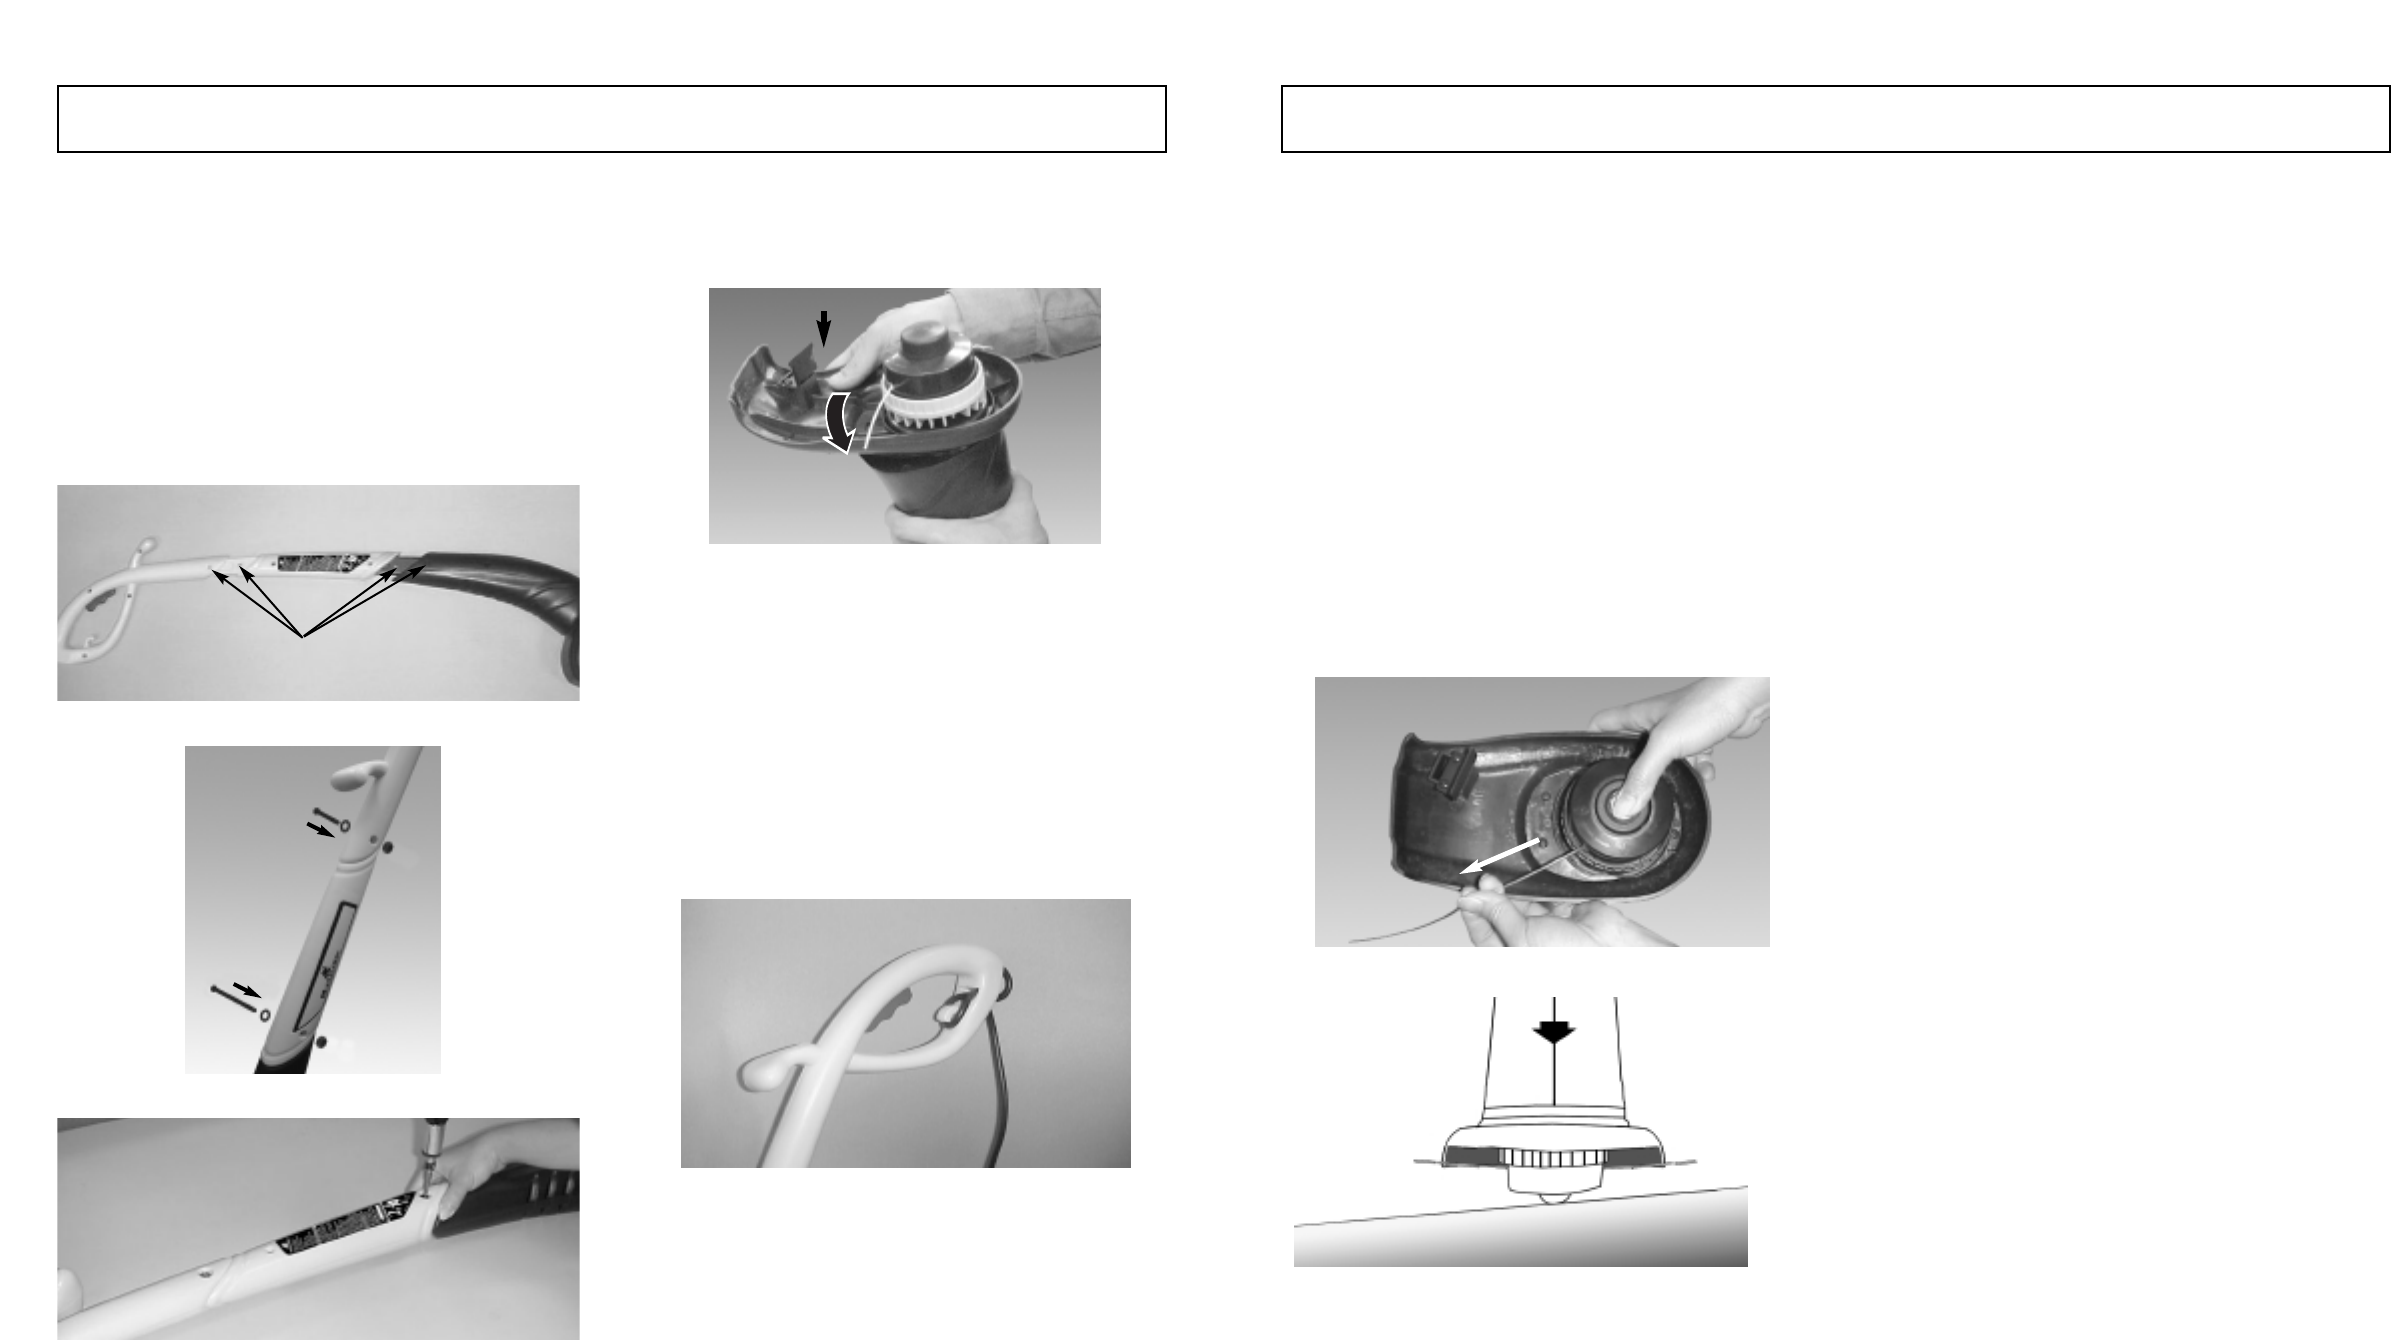
3-1. ASSEMBLY
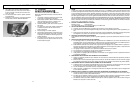
1. Assemble three parts into unit. (Fig. 3-1A)
2. Take out assembly screw bolts, washers, nuts from
parts pack and lock into the unit holes (the correspond
location are as Fig. 3-1B)
3. First of all, put the washer and nut in the hole, then
support the nut by finger and plug the screw bolt and
lock. (Fig. 3-1C)
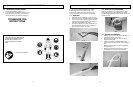
3-2. DEBRIS SHIELD INSTALLATION
Assemble shield as shown (Fig. 3-2). Keep hands and fin-
gers away from the sharp blade. Twist shield in direction of
arrow to assemble.
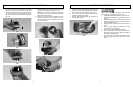
3-3. CONNECT THE CORD
1. Ensure the cord is NOT plugged into a receptacle
before this procedure.
2. Make a loop with 8” - 10” (20 - 25cm) of the end of the
extension cord.
3. Place the loop into the groove at the end of the rear
handle and lock into place as shown in Fig. 3-3.
4. Connect the extension cord to the plug on the trimmer.
5. Plug the extension cord into a receptacle ONLY when
you are ready to operate the trimmer.
6 7
3 - ASSEMBLY INSTRUCTIONS 3 - ASSEMBLY INSTRUCTIONS
3-4A
3-1A
A
3-1B
3-1C
3-2
3-4B
BUMP
3-3