


9
IMPORTANT POINTS TO REMEMBER
Whenpullingthestarterrope,donotusethefull
extentof the rope as this can cause the ropeto
break. Do not letstarter rope snap back. Hold
the handle and let the rope rewind slowly.
Forcold weather starting, startthe unitatfull
choke; allow the engine to warm up before
squeezing the throttle trigger.
NOTE: Do not cut material with the choke/
fast idle lever at the FULL CHOKE position.
STA R T I NG A COL D EN GIN E (or a
warm engine after running out of
fuel)
NOTE
: In the following steps, when the
choke/fast idle lever is pulled out to the full
extent, the correctthrottlesettingforstarting
is set automatically.
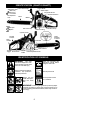
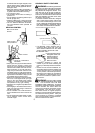
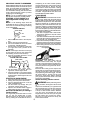
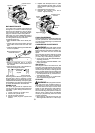
ON/STOP SWITCH
ON
STOP
(SIDE VIEW)
1. Move ON/STOP switch to the ON posi-
tion.
2. Slowly press primer bulb 6 times.
3. Pull out choke/fast idle to the full extent
(to the FULL CHOKE position).
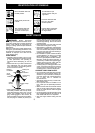
4. Pull the starter ropesharply 5 timeswith
your right hand. Then, proceed to the
next step.
NOTE: Ifthe engine sounds as ifit is trying
to start before the 5th pull, stop pulling and
immediately proceed to the next step.
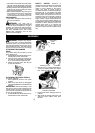
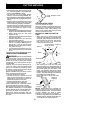
5. Push the choke/fast idle lever in to the
HALF CHOKE position.
OFF HALF
CHOKE/FAST IDLE LEVER
Choke/
fast idle lever
(SIDE VIEW)
FULL
6. Pull the starter rope sharply with your
right hand until the engine starts.
7. Allowtheenginetorunforapproximately
30seconds.Then,squeeze andrelease
throttletriggerto allowenginetoreturnto
idle speed.
STARTING A WARM ENGINE
1. Mo veON /S TOPswitcht otheONposit i on.
2. Slowly press the primer bulb 6 times.
3. Pull the choke/fast idle lever out to the
HALF CHOKE position.
4. Pull the starter rope sharply with your
right hand until the engine starts.
5. Squeeze and release throttle trigger to
allow engine to return to idle speed.
DIFFICULT STARTING (or starting a
flooded engine)
The engine may be flooded with too much
fuel if it has not started after 10 pulls.
Flooded engines can be cleared of excess
fuel by pushing the choke/fast idle lever in
completely (to the OFF CHOKE position)
and then following the warm engine starting
procedure listed above. Ensure the ON/
STOP switch is in the ON position. Starting
could require pulling the starter rope handle
manytimes dependingonhowbadly theunit
is flooded. Ifengine fails to start,refer tothe
TROUBLESHOOTING TABLE.
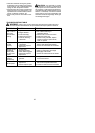
CHAIN BRAKE
WARNING: If the brake band is worn
too thin it may break when the chain brake is
triggered. With a broken brake band, thechain
brake will not stop the chain. The chain brake
should be replaced by an authorized service
dealer if any part is worn toless than0,02″(0,5
mm)thick. Repairs onachainbrake shouldbe
made by an authorized service dealer . Take
your unit to the place of purchase ifpurchased
from aservicing dealer ,ortothenearestautho-
rized master service dealer .
S This saw is equipped with a chain brake.
The b rake is designed to stop the chain if
kickback occurs.
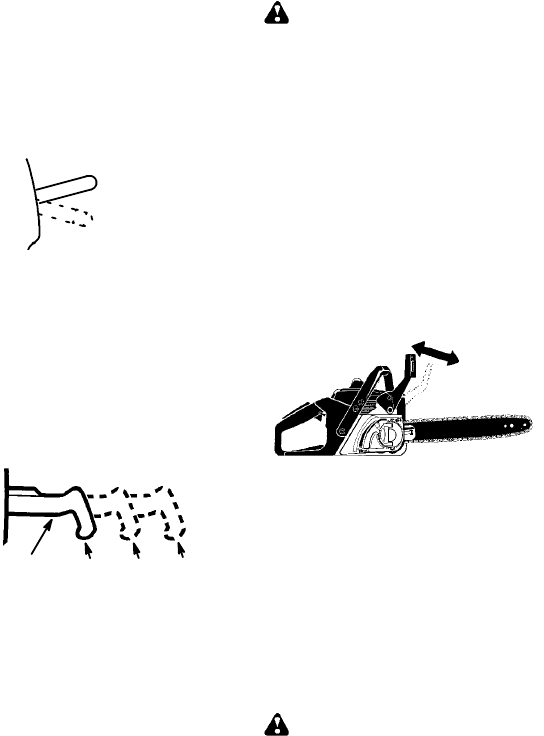
S Theinertiaactivated chainbrake i s activated
if the front hand guardis pushed forward, ei-
ther manually or by centrifugal force.
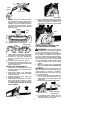
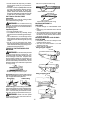
S Ifthebrakeisalready activated,itis disen-
gagedbypullingthefronthandgu ardback
toward thefronthandle as far aspossible.
S Whencuttingwiththesaw,thechainbrake
must be disengaged.
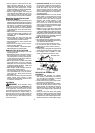
Disengaged
Engaged
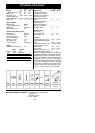
Braking function control
CAUTION:
The chain brake must be
checked several times daily. The engine
mustberunningwhenperformingthisproce-
dure. Thisistheonly instancewhen thesaw
should beplaced on the g roundwith theen-
gine running.
Place the saw on firm ground. Grip the rear
handlewithyourrighthandandthefronthan-
dle with your left hand. Apply full throttle by
fully de pressing the throttle trigger. Activate
the chain brake by turning your left wrist
against the hand guard without releasing
your grip around the fronthandle. Thechain
should stop immediately.
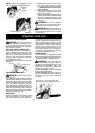
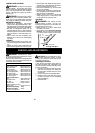
Inertia activating function control
WARNING: When performing the fol-
lowing procedure, the engine must be turned
off.
Grip therear handlewithyourright handand
the fronthandle withyour lefthand. Holdthe
chain saw approximately 14” (35 cm)above
a stump or other wooden surface. Release
your grip on the front handle and use the
weight of the saw to let the top of the guide
bar fall forward and contact the stump.
When the tip of the bar hits the stump, the
brake should activate.