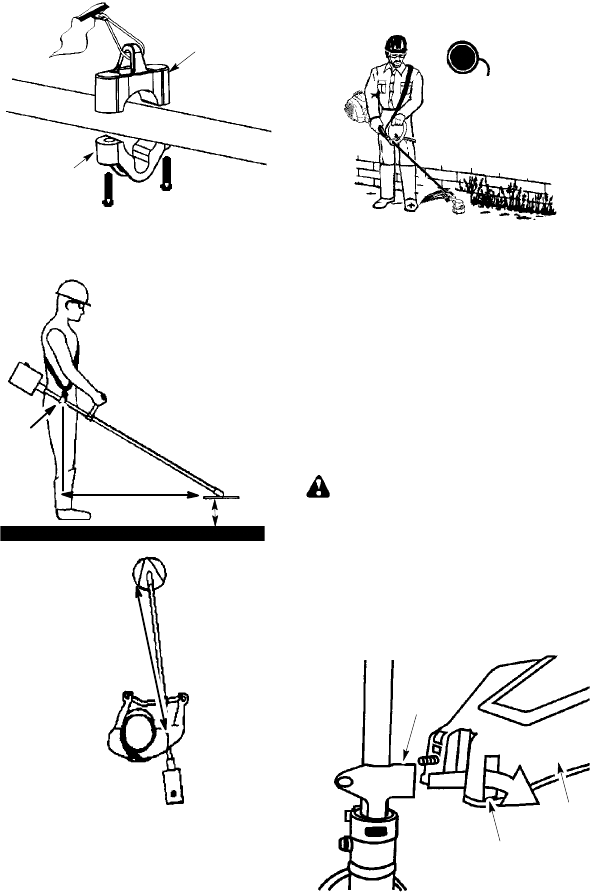
7
Upper shoulder
strap clamp
Screws
Lower shoulder
strap clamp
4. Insert two screws into the screw holes.
5. Secure shoulder strap clamp by tighten-
ing screws with a hex wrench.
76 cm
HARNESS
ADJUSTMENT
FOR BALANCE
10 -- 30 cm
above
ground
15 cm
below
waist
76 cm
CONFIGURING YOUR UNIT
You canconfigure your uni tusing acuttinghead
for grass and light weeds, or a weed blade for
cutting grass, weeds, and brush up to 1 cm in
diameter. To a ssemble your unit, go to the sec-
tion for the desired configuration and follow the
instructions.
ASSEMBLY INFORMATION --
TRIMMER HEAD
TRIMMER
HEAD
NOTE:Remove theblade an dmetal shieldbe-
fore attaching t he plastic shield and trimmer
head. To remove blade, align hole in the dust
cup withthe holeinthesideofthe gearboxby
rotating t heblade. Insert asmall screwdriver
intoalignedholes. T hiswillkeepth eshaftfr om
turning while loosening the blade nut. Remove
blade nut by turning clockwise. Remove the
screwdriver. Remove both washers andblade.
To r emove metal shield, loosen and removethe
four mounti ng screws. See A TTACHING THE
METAL SHIELD and INSTALLA TION OF THE
METALBLADEforillustrations. Besure t ostore
all parts and instructions for future use.
ATTACHING THE PLASTIC SHIELD
AND TRIMMER HEAD
WARNING: Theshield m ustbe prop-
erly installed. The shield provides partial
protection tothe operatorandothers fromthe
risk of thrown objects, and isequipped with a
linelimiterbladewhichcuts excess linetothe
proper length. The line limiter blade (on un-
derside of shield) is sharp and can cut you.
1. Remove nut from shield.
2. Insert bracket into slot on shield.
3. Pivot shielduntil boltpasses throughhole
in bracket.
Bracket
Slot
Shield
4. Reinstall nut and tighten securely with
wrench (provided).


