


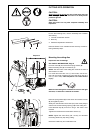
16
3
4
5
6
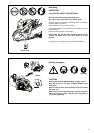
2
1
2a
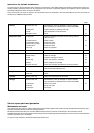
Cold start (Choke)
Warm start (ON)
Engine off
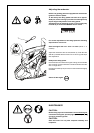
Combination switch in safety position
(ignition current cut off, necessary for all
maintenance, repair, and installation work)
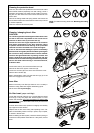
Cold starting:
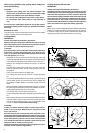
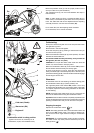
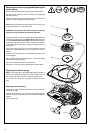
Grasp front handle Þ rmly with one hand and press the Power
Cut against the ground.
Place left toe in the rear handguard.
Prime the fuel pump (4) by pressing it several times until you
can see fuel in the pump.
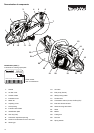
Move the combination switch (3) up (choke position). This also
actuates the half-throttle lock.
Pull starter handle smoothly and evenly, until you hear the
Þ rst ignition (but max. 3-5 pulls).
CAUTION: Do not pull the starter cable more than about 50
cm/20” out, and let it back in slowly by hand.
Move the combination switch (3) to the central “ON” position.
Pull the starter handle smoothly and evenly again.
As soon as the engine is running, grasp the rear handle (the
safety lock button (5) is actuated by the palm of the hand) and
press the throttle trigger (6). The half-throttle lock will disengage
and the engine will now idle.
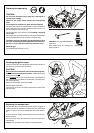
Warmstart:
As described above for cold starting, but before starting push
the combination switch (3) up (Choke position) and
then right away back to the middle “ON” position. This is only
to engage the half-throttle lock. If the engine doesn’t start after
2 or 3 pulls, repeat the entire starting procedure as described
for cold starting.
NOTE: If the engine was switched off only for a short time, the
saw can be started without using the combination switch.
Important: If the fuel tank has been completely emptied and the
engine has stopped due to lack of fuel prime the fuel pump (4) by
pressing it several times until you can see fuel in the pump.
Stopping the engine
Depress the combination switch (3).
NOTE: After being pressed down, the combination switch will
revert to the ”ON” position again. The engine is switched off,
but can be turned on again without moving the combination
switch.
IMPORTANT: To cut off the ignition current, push the combina-
tion switch all the way down past the resistance point to the
safety position (
).
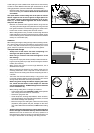
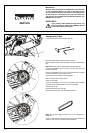
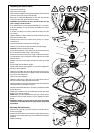
Move the protective hood (1) into the proper position for the
work you intend to do (see illustration).
The protective hood (1) can be moved between the stops in
both directions.
Note: A water supply line (from a pressurized water tank or
other source) is connected by the water set on the protective
hood. The water ß ow rate can be adjusted with the adjusting
screw (2). Press the 1/2" hose into the holder (2a).
For a slower ß ow, turn the adjusting screw clockwise.
For a faster ß ow, turn it counter-clockwise.