


26
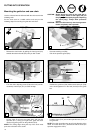
Cleaning the brake band and sprocket interior
A
1
2
3
4
5
6
7
STOP
CAUTION: Before doing any work on the guide bar or
chain, always switch off the engine and pull
the plug cap off the spark plug (see "Replacing
the spark plug"). Always wear protective gloves!
CAUTION: Start the chain saw only after having assem-
bled it completely and inspected!
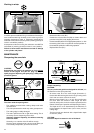
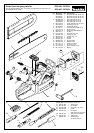
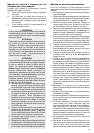
- Remove the sprocket guard (A/1) (See "PUTTING INTO
OPERATION" figs. A and B).
- Turn the chain tightener screw (A/2) to the left (counter-
clockwise) until you feel resistance.
- Remove the chain (A/3) and guide bar (A/4).
- Clean the interior with a brush, in particular the brakeband
area (A/5).
NOTE:
Make sure that no residue or contaminants remain in the oil
guide groove (A/6) and the chain tightener (A/7).
- For replacing the guide bar, chain, and sprocket see
"PUTTING INTO OPERATION".
NOTE:
The chain brake is a very important safety device and like
any other component subject to normal wear and tear.
Regular inspection and maintenance are important for your
own safety and must be done by a MAKITA service center.
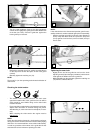
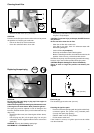
Replacing the suction head
B
The felt filter (B/1) of the suction head can become clogged. It
is recommended to replace the suction head once every three
months in order to ensure unimpeded fuel flow to the car-
buretor. To remove the suction head for replacement, pull it
out through the tank filler neck using a piece of wire bent at
one end to form a hook.
1
Replacing the saw chain
CAUTION:
Use only chains and guide bars designed for this saw (see
the Extract from the spare-parts list)!
1
2
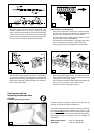
C
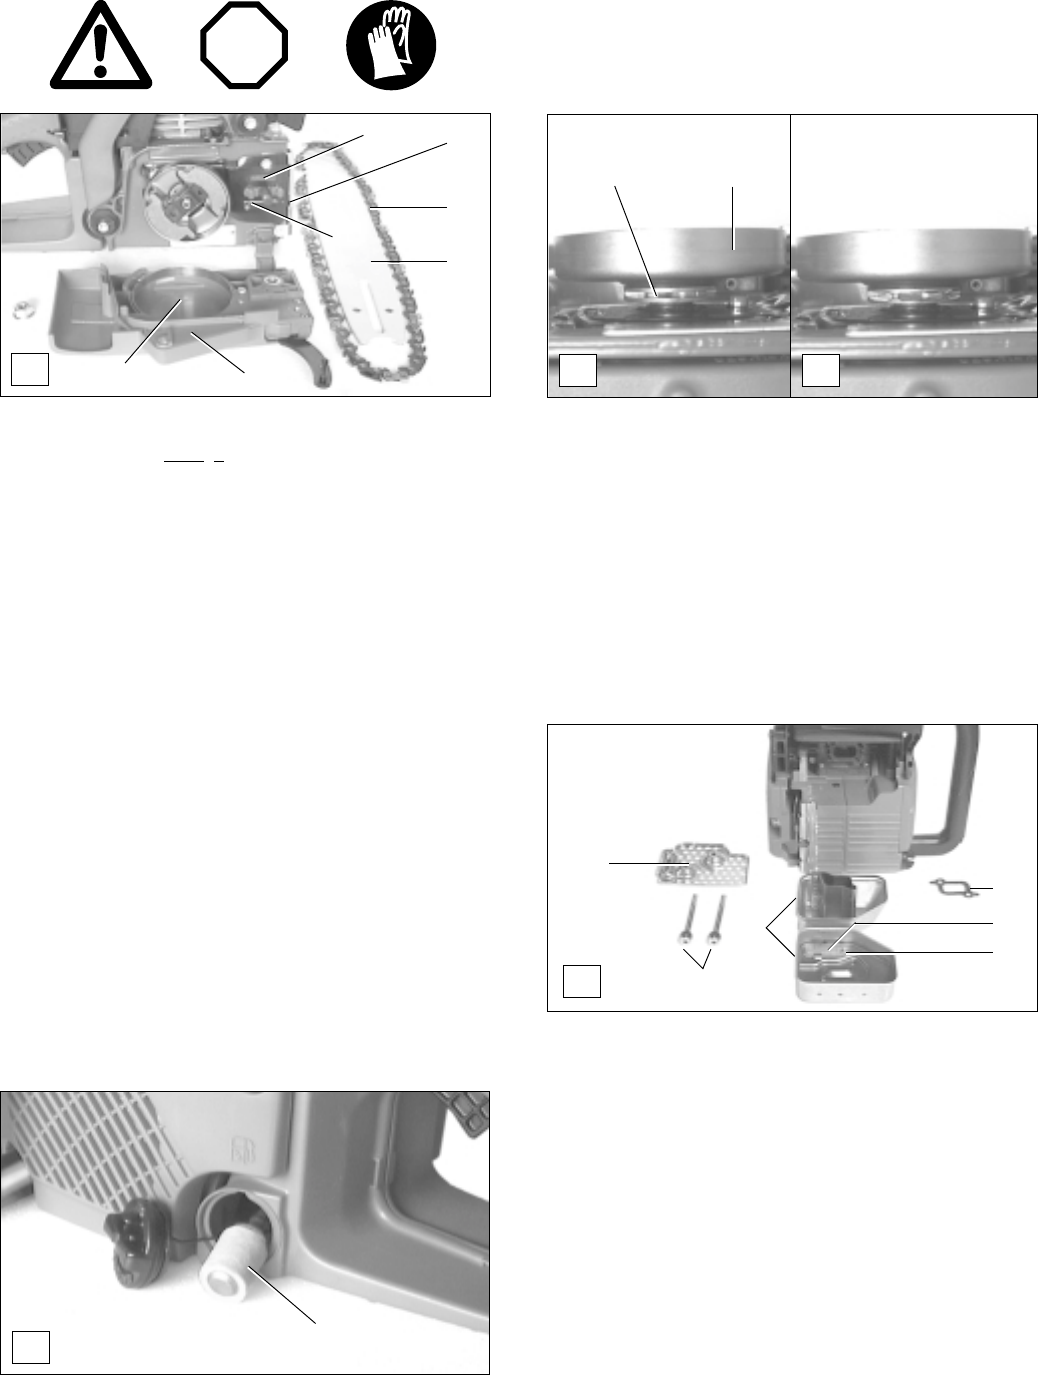
Check the sprocket (C/1) before mounting a new chain.
The sprocket is located underneath the clutch drum (C/2).
CAUTION:
Worn out sprockets (D) may damage the new chain and must
therefore be replaced.
Do not attempt to replace the sprocket yourself. Sprocket
replacement requires special training and tools and must be
done at a MAKITA service center.
D
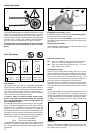
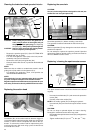
Replacing / cleaning the spark arrester screen
E
The spark arrester screen should be checked and cleaned
regularly.
- Unscrew the muffler bolts (E/1) and remove the protective
screen (E/2).
- Carefully remove the muffler (E/3).
NOTE: If the muffler gasket (E/4) is damaged, replace it.
- Unscrew bolt (E/6) and remove the spark arrester screen
(E/5).
CAUTION:
Do not use sharp or pointed objects for screen cleaning.
Damaged or misformed screen wires may result.
- Reassemble the spark arrester screen (E/5) and tighten the
screw (E/6).
- Tighten muffler bolts (E/1) to 5.6
+0.07
ft. lbs. (8.0
+0.1
Nm).
1
2
3
4
5
6