12
G
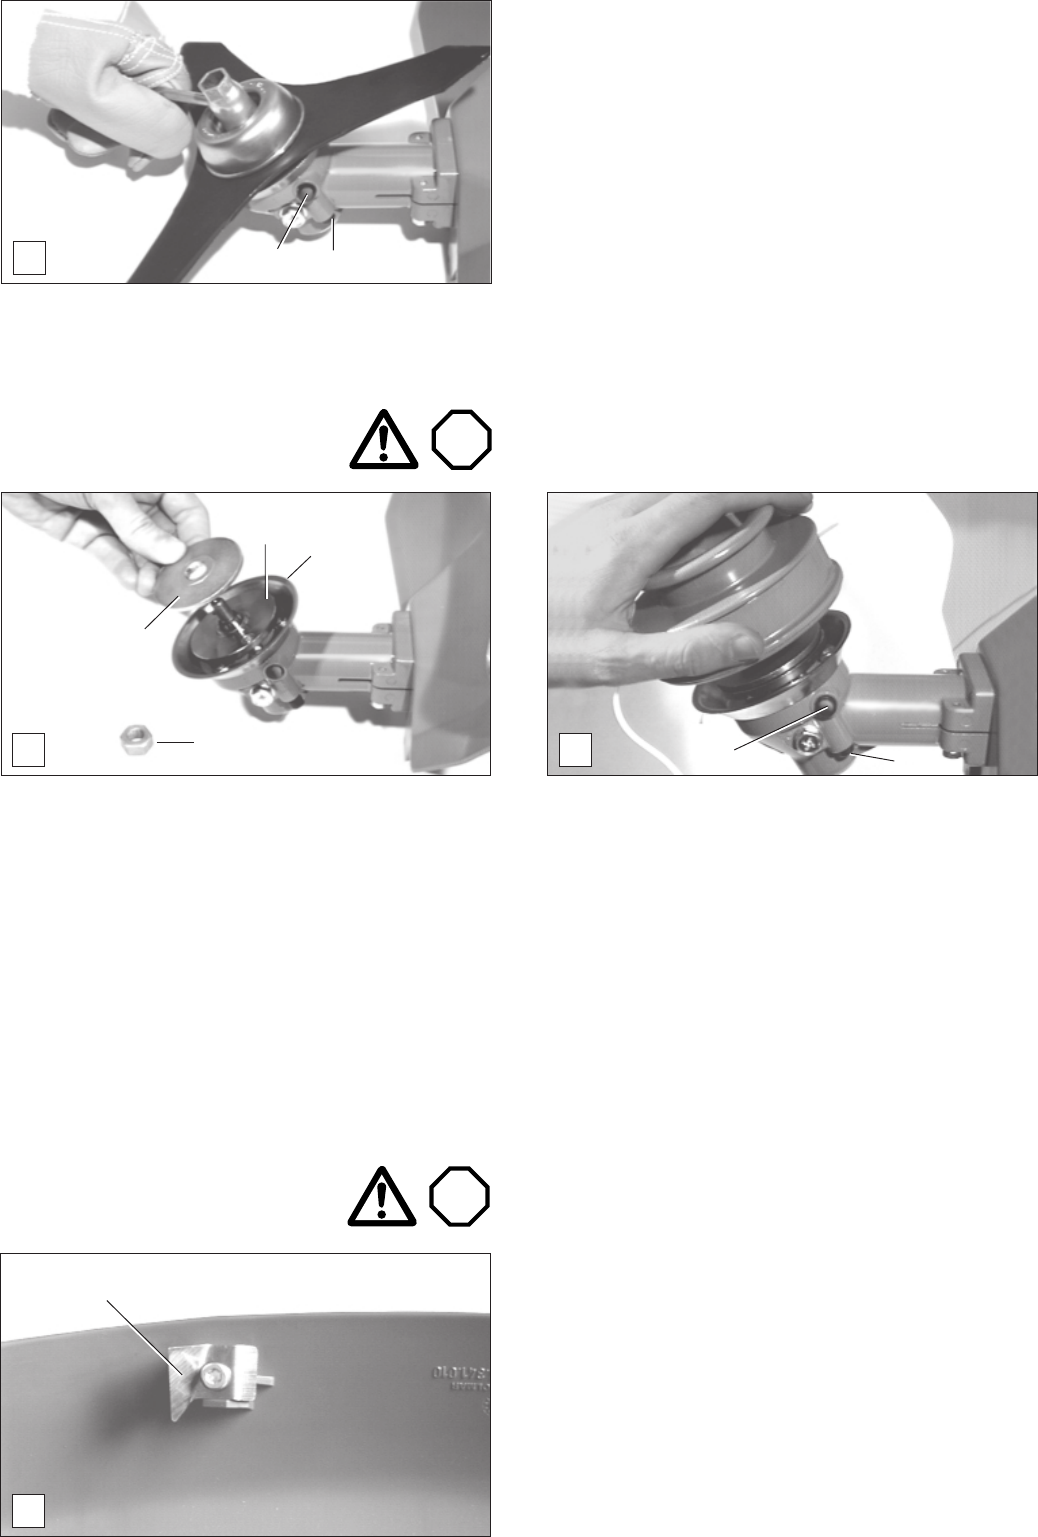
- Press the locking button (G/9) and hold it down, while using
the combination wrench to turn the shaft counter-clockwise
until the locking button engages and locks the shaft.
- Now tighten the locknut counter-clockwise using the
combination wrench (25-30 Nm).
- To unlock the locked shaft press the release button
(G/10). The locking button (G/9) will trip (if necessary turn
the cutting tool slightly).
- Check to make sure the cutting tool can turn freely.
Use the shaft lock in the same way when dismounting the cut-
ting tool.
10
9
Installing the trimmer head
Always switch off the engine and
disconnect the spark plug cap
before mounting the trimmer head!
H
When using the trimmer head install the cutter guard with the
mounting plate in position A (see “Installing the cutter guard”).
Always install the line cutter (see below, “Installing the line
cutter”)!
- Unscrew the locknut (H/1) from the shaft by turning it
clockwise.
Note: The locknut has a left-hand thread!
- Place the pressure disk (H/4) on the shaft as shown.
1
4
5
6
- If necessary, install the winding guard (H/6) (three screws).
To do so, first remove the locking disk (H/5) (note its position
as installed).
- Screw the trimmer head onto the shaft by turning it
counter-clockwise.
- Press the locking button (I/9) and hold it down while turning
the trimmer head counter-clockwise until the locking button
engages, locking the shaft.
- Now tighten the trimmer head by hand.
- Press the release button (I/10) to unlock the shaft. The
locking button (I/9) will jump out (it may be necessary to
turn the trimmer head slightly).
- Check to make sure the trimmer head can turn freely.
I
2-line trimmer
head shown
9
10
J
The line cutter and its mounting screw are included in the
accessory pack.
- The picture shows the line cutter (J/11) mounted on the
cutter guard with the mounting screw.
Note:
If you adjust the length of the trimmer line (see page 19),
the line cutter will automatically cut the lines to identical
length during operation.
Caution:
Always turn off the engine before adjusting the line
length!
11
Installing the line cutter
STOP
STOP


