8
Installing or removing the wheel
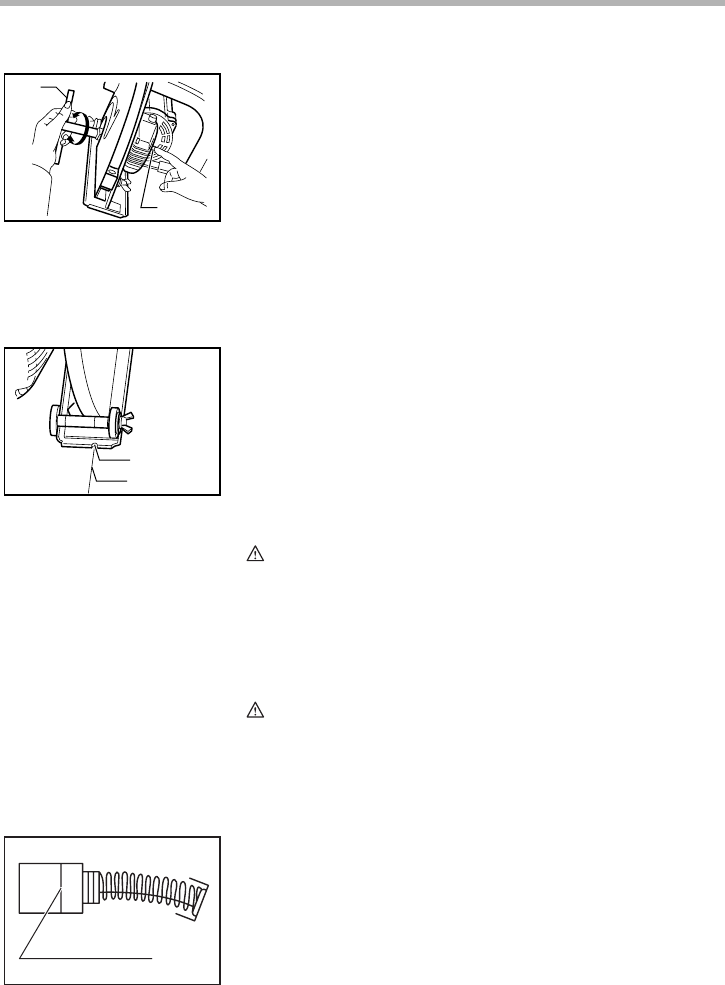
To replace the wheel, depress the shaft lock to hold the shaft
stationary, then loosen the hex bolt clockwise with the socket
wrench.
Be sure to fully tighten the hex bolt counterclockwise after
mounting the new wheel, or operation will be dangerous.
NOTE:
• Hex bolt has a left-hand thread.
OPERATION
The cut is made by pulling the tool toward you (not by push-
ing away from you). Align the notch on the base with your
cutting line when performing a cut.
Hold the tool firmly. Set the base plate on the workpiece to
be cut without the wheel making any contact. Then turn the
tool on and wait until the wheel attains full speed. Move the
tool toward you over the workpiece surface, keeping it flat
and advancing smoothly until the cutting is completed. Keep
your cutting line straight and your speed of advance uniform.
CAUTION:
• Use this tool for straight line cutting only. Cutting curves
can cause stress cracks or fragmentation of the diamond
wheel and abrasive cut-off wheel resulting in possible
injury to persons in the vicinity.
MAINTENANCE
CAUTION:
• Always be sure that the tool is switched off and
unplugged before attempting to perform inspection or
maintenance.
Replacing carbon brushes
Remove and check the carbon brushes regularly. Replace
when they wear down to the limit mark. Keep the carbon
brushes clean and free to slip in the holders. Both carbon
brushes should be replaced at the same time. Use only iden-
tical carbon brushes.
1. Socket wrench
2. Shaft lock
1
2
003530
1. Notch (Groove)
2. Cutting line
1
2
003546
1. Limit mark
1
001145


