


6
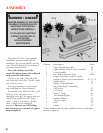
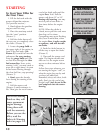
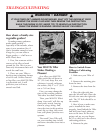
Your MANTIS Tiller comes partially
assembled. You must install only the
handlebars, the carrying handle, and the
tines. This will take just a few minutes if
you follow the directions.
First, take all items out of the
carton. But do not remove the cardboard
from around the Tiller’s base.
The list at the right, shows the parts
that come with your tiller. Check to make
sure you have them.
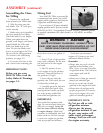
The bag of hardware is in the plastic
bag containing the Owner’s Manual.
To assemble your MANTIS Tiller, you’ll
need two 7/16” wrenches or two
adjustable wrenches. We suggest that you
install all nuts and bolts only “finger
tight”
— that is, one-half to one full
turn — until you’ve completed
assembly. The nuts are self locking,
but you must use a wrench to tighten
them completely.
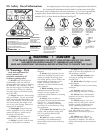
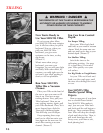
ASSEMBLY
WARNING • DANGER
IMPROPER ASSEMBLY OF THIS TILLER
CAN RESULT IN SERIOUS INJURY.
MAKE SURE TO FOLLOW ALL
INSTRUCTIONS CAREFULLY.
IF YOU HAVE ANY QUESTIONS
CONTACT OUR FACTORY AT
1-800-366-6268
OR AN AUTHORIZED
MANTIS DEALER
! !
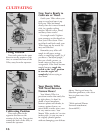
Quantity Description *Key #
1 Upper Handle Assembly 4A
1Upper Handle Throttle Side Assembly 5A
2 Lower Handles 6
1 Pair Tiller/Cultivator Tines 39/40
1 Engine Assembly (includes Fender
Guard & Worm Gear Transmission) 20, 21, 55
1Handle Brace 8
1Plastic Carrying Handle 42
1 Bag of Hardware Containing:
2 Cap Screws 47*
4 Lock Nuts 48*
2Bolts (3” long) 49*
2Tine Retaining Pins 41*
2Handle Clamps 51*
1 Throttle Clips 13*
2 Bolts 52*
2Knobs 53*
*These numbers are the same numbers shown on the Parts
Layout on page 27.