


3
06/26/07
Manual No. 701-157M
Assembly Instructions
Land Pride
■
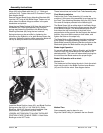
Hinge (#2) to the Blade with the 1/2" x 1 " Bolts and
Locknuts (#15). Tighten Nuts to 60 Ft Pounds of Torque.
See diagram below.
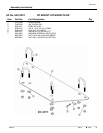
Remove the two Blade Spring Attaching Brackets (#8)
from the LEFT side of the Blade Hinge. Fasten one on
either side of the Blade Hinge as shown in the parts
breakdown and picture.
Hang the two Blade Springs (#16) from the top holes in
the Blades ribs. Place the Eyebolts (#14) onto the
springs and fasten the Eyebolts to the Blade Spring
Attaching Brackets (#8) using the two locknuts.
Spring tension may be set stiffer by tightening the
locknuts on the Eyebolts, or for less tension loosen the
Locknuts. Setting the tension stiffer means the blade will
not trip as easily as when set with less tension.
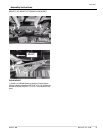
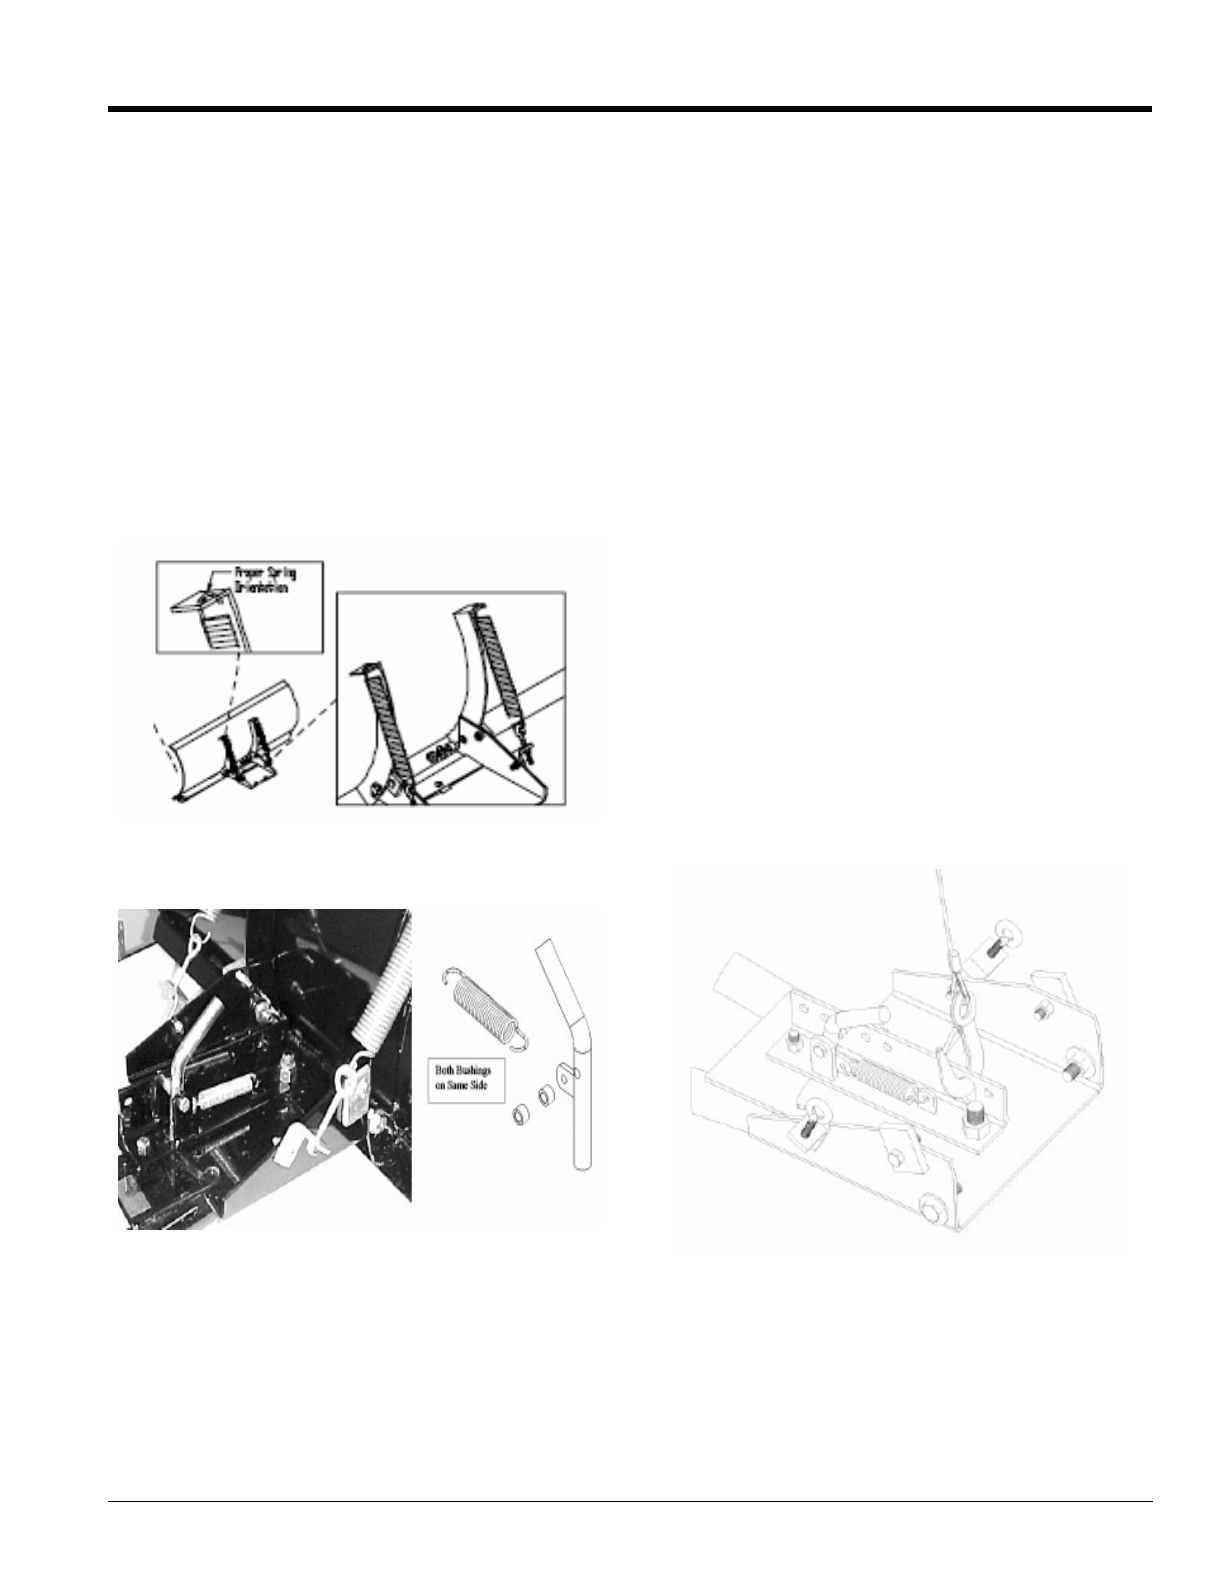
Install the Blade Position Lever (#5), and Blade Position
Spring using the 5/16" x 2 1/4" Bolt (#12), Roller
Bushings, and 5/16" Nylock Locknut provided. See
picture above. Tighten bolt fully and THEN
LOOSEN JUST ENOUGH TO ALLOW THE BLADE
POSITION LEVER TO MOVE FREELY. Both Roller
Bushings on the LEFT side.
These Instructions are for the Push Tube Assembly only.
Final Blade Installation
Position the Push Tube Assembly (#1) under the
machine. Lift the rear of the assembly up and secure it to
the Push Tube Attaching Brackets using the 3/8" Clevis
Pins and #3 Hairpins provided in the Attaching Kit.
The Blade Stops (#4) on either side of the Blade Hinge
are shipped loose. By turning the Stops around, the pitch
of the Blade changes. The recommended pitch is one
that allows the top and bottom of the blade to be
perpendicular to the ground. Set the Stops to the desired
position, they must be the same on both sides, and
tighten the bolts on the stops fully.
The Blade Skids on 60" blades are installed up side down
at the factory for shipping/boxing purposes. Turn the
Blade Skids around by loosening the two end bolts on the
Blade and tighten the Bolts before using the Blade.
Blade Angle Operation
To move the Blade Left, Right or Straight, pull the Blade
Position Lever (#5) forward and turn the blade to the
desired position. The Lever will automatically spring into
the slot when the Blade reaches the proper angle.
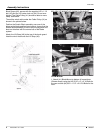
Blade Lift Operation with a winch
Method One:
The blade can be lifted using the winch. Hook the winch
hook onto the slot in the Blade Position Lever Bracke
(#3) and lift with the winch. See diagram below.
Method Two:
Some assembly may be done for you.
Align the Cable Pulley (#1) between the two Snatch