


7/01/05
25
Section 6 Maintenance
4400EX Heavy Duty Off Road Utility Vehicle 720-132M
Table of Contents
Engine Torques
For engine torque values, see engine owner’s manual.
All Other Torques
For all other torques refer to “Torque Values Chart”
page 48.
Tire Maintenance
Use only tires recommended by Land Pride.
It is important for your safety and the safety of others that
the tires have correct air pressure. Check air pressure in
all four tires before each use. Visually inspect tires for loss
of air throughout each day of operation. See Tire Inflation
Chart below for correct tire pressure.
*Maximum tire pressure is noted on tire side wall.
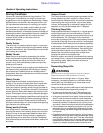
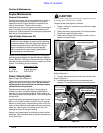
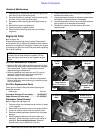
Jacking the Vehicle
!
DANGER
For your safety and safety of others, a jacked vehicle must be
supported properly with jack stands before working under and
around it. Also the wheels on the ground must be chocked on
both sides to prevent the vehicle from rolling forward or
backward.
1. Prepare vehicle for maintenance as outlined in steps
1-6 on page 24.
2. Loosen the lug nuts on a wheel being removed
approximately 1/2 turn counterclockwise while it is still
on the ground.
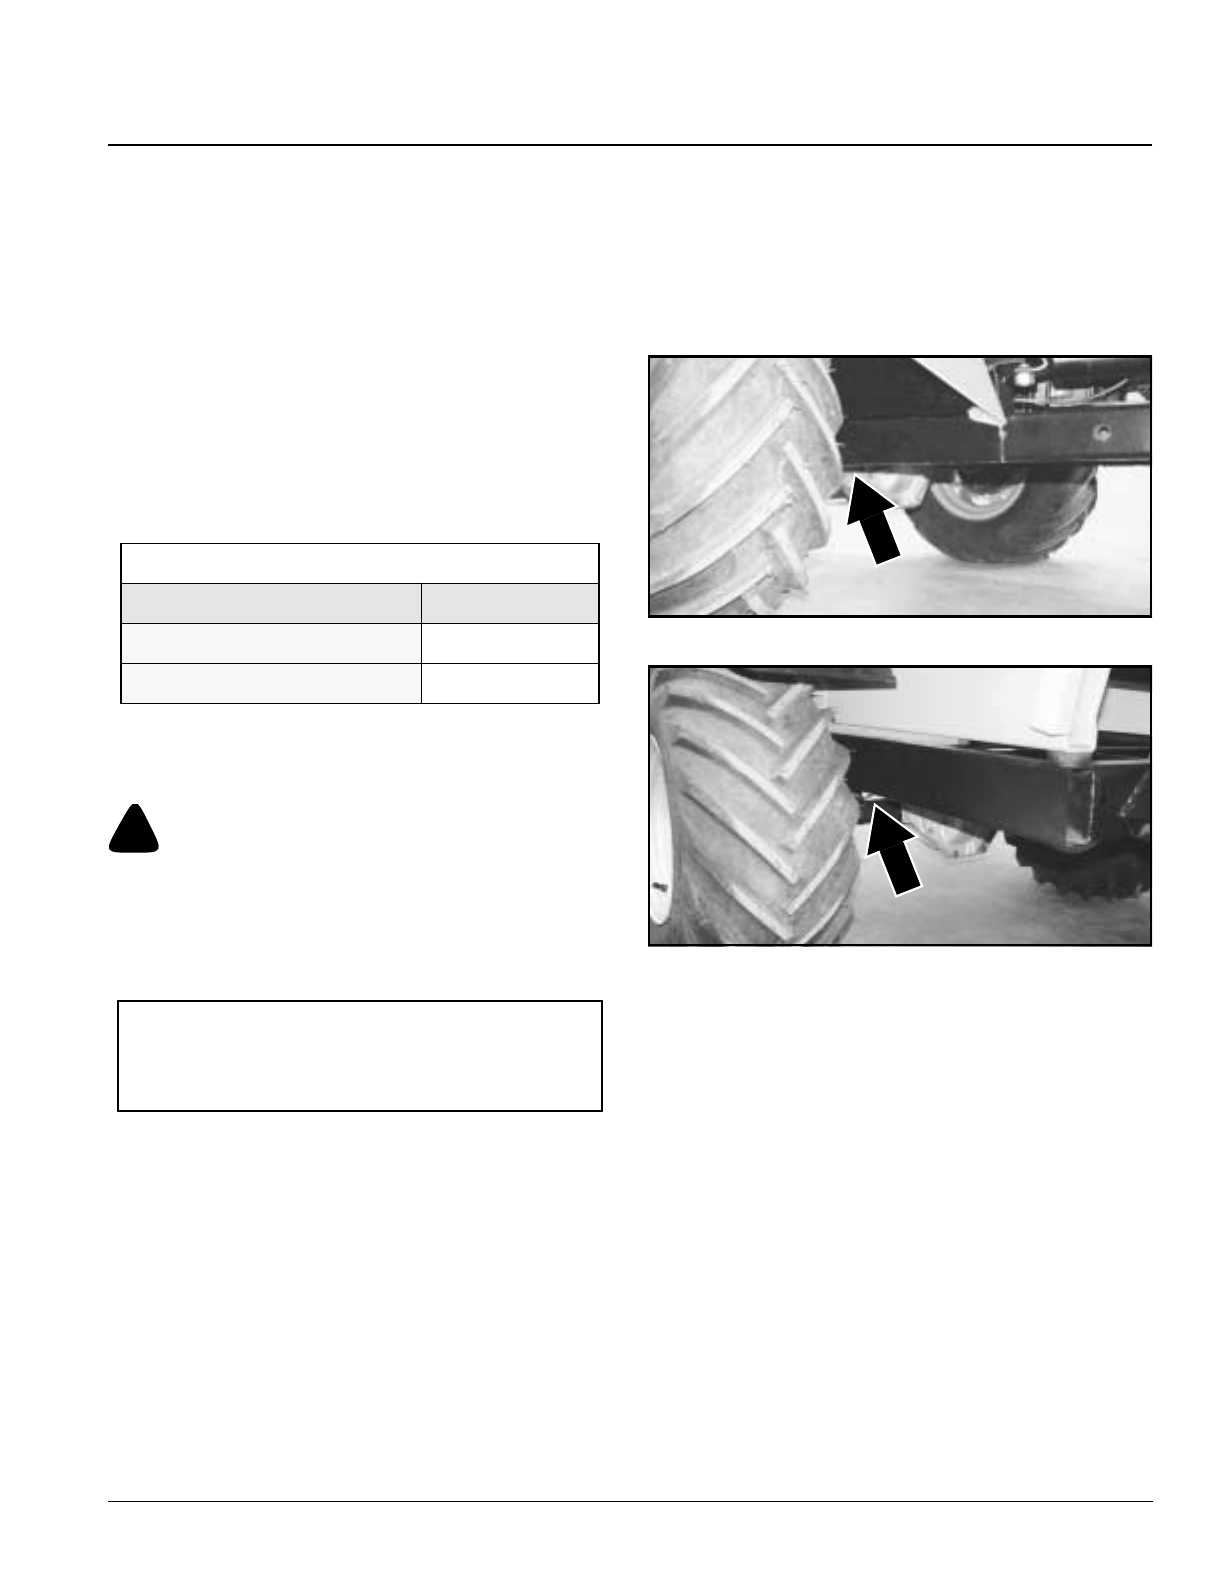
3. See important note above. Place proper jack under
vehicle as follows:
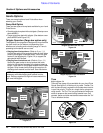
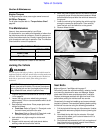
a. Front tires: Refer to Figure 6-1. Place jack under
the main frame just behind the axle.
b. Rear tires: Refer to Figure 6-2. Place jack under
the main frame just in front of the axle.
4. Jack vehicle only high enough to do the work
intended.
5. Support vehicle securely with jack stands before
working under and around the vehicle.
Tire Inflation Chart
Tire Inflation PSI
Front Tires
15*
Rear Tires
20*
IMPORTANT: Use a hydraulic jack, floor jack, or
scissor type jack to lift vehicle. Do not use a handyman
jack or bumper jack and don’t jack against the bumper,
body, differential case, axles or hydraulic lines.
6. Work may now be performed on the vehicle. Be sure
to properly torque all bolts that were loosened. Wheel
bolts should be torqued after the vehicle is lowered to
the ground.
7. Lower the vehicle by first jacking the vehicle up high
enough to remove the jack stands. Then carefully
lower the jack until the vehicle is on the ground.
8. Remove wheel chocks.
.
Figure 6-1
Figure 6-2
Seat Belts
Refer to Figure 4-7 and Figure 4-8 on page 17
Periodically check the seat belt webbing, retractor, buckle
and mounting hardware for wear and damage. Always
check seat belts for wear and damage after a collision.
Replace a damaged seat belt with genuine Land Pride
parts before putting the vehicle back into service.
Occasionally the seat belt webbing can become twisted,
tangled or jammed. Free seat belt webbing before putting
the vehicle into service using the following procedures:
1. Pull the lap belt all the way out of the retractor. Untwist
the belt and remove any objects that are jamming the
belt.
2. Hand feed the lap belt into the retractor. If the belt
does not fully retract, pull it out and retract until it is
completed retracted.
3. Once the belt has retracted, pull it fully out again and
feed it back into the retractor several more times to
make sure it is working properly.
21350
21351