


6
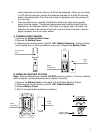
* When the signal is successfully received by the Weather Station, the icon will be
switched on. (If not successful, the icon will not be shown in LCD) So the user can
easily see whether the last reception was successful (icon on) or not (icon off). On the
other hand, the short blinking of the icon shows that a reception is being done now.
C. SELECTING 12 OR 24 HOUR TIME DISPLAY
1. Press and hold the SET/CH button for about 5 seconds.
2. “12h” will begin to flash in the TIME section of the LCD
3. Press the MIN/MAX/+ button to toggle between “12h” and “24h” time.
Note:
• Selecting 12 hour time will automatically select °F as your temperature unit.
• Selecting 24 hour time will automatically select °C as your temperature unit.
4. Press and release the SET/CH button again to enter Time Setting.
D. TIME SETTING
1. After exiting the 12/24 Hour Setting, the hour will begin flashing in the time
display.
2. Press and release the MIN/MAX/+ button to select the desired hour.
Note: PM will appear to the left of the time display for PM hours. For AM hours, that
area will remain blank.
3. Press and release the SET/CH button again, and the minutes will begin to flash.
4. Press and release the MIN/MAX/+ button to select the desired minutes.
5. Press and release the SET/CH button to exit the SET UP mode.
Note: If no buttons are pressed for 10 seconds, the Wireless Weather Station will
automatically return to the normal display.
II. FEATURES
A. MINIMUM AND MAXIMUM TEMPERATURES AND HUMIDITY
1. Press and release the MIN/MAX button, “MIN” appears at the bottom of the LCD
and the recorded minimum temperatures and humidity are displayed.
2. Press and release the MIN/MAX button again to view maximum recorded
temperatures and humidity. “MAX” appears at the bottom of the LCD and the
maximum temperatures and humidity are displayed.
3. Press and release the MIN/MAX button once more to return to the current
temperatures and humidity.
B. RESETTING THE MINIMUM AND MAXIMUM TEMPERATURES AND HUMIDITY
To reset both the minimum and maximum temperatures and humidity—press and
hold the MIN/MAX button for 5 seconds.
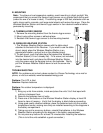
C. ADDING ADDITIONAL REMOTE SENSORS (OPTIONAL)
The WS-9023U is able to receive signals from 2 additional thermo-hygro sensors . The
following are instructions for the set-up of thermo-hygro sensor units with the WS-
9023U. These extra sensors can be purchased through the same dealer as this unit.