


La Crosse Technology, Ltd. Page 6
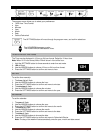
Fahrenheit/Celsius
1. °F or °C will flash.
2. Use the ARROW buttons to select Fahrenheit or Celsius.
3. Press and release the SETTINGS button to confirm and exit the program menu.
Note: When no buttons are pressed for ten seconds, the Forecast Station will save the last change
and default back to a normal time display.
Alarm Time
The TIME ALARM button moves through alarm set mode and confirms settings.
The UP ARROW increases a value.
The DOWN ARROW decreases a value.
Set Time Alarm
In normal time mode, press and release the TIME ALARM button once to show alarm time. Hold the TIME
ALARM button for three seconds to enter alarm set mode.
1. The hour will flash.
2. Use the ARROW buttons to set the hour.
3. Press the TIME ALARM button to confirm and switch to minutes.
4. The minutes will flash.
5. Use the ARROW buttons to set the minutes.
6. Press TIME ALARM button to confirm.
7. Press the SETTINGS button to return to normal mode
Note: When no buttons are pressed for ten seconds, the Forecast Station will save the last change and
default back to normal mode.
Activate/Deactivate Time Alarm
In normal mode, press and release the TIME ALARM button once to show alarm time.
Press and release the TIME ALARM button repeatedly to turn ON/OFF alarm.
The alarm icon appears when alarm is activated.
Note: The alarm will ring for 2 minutes then turn off if no buttons are pressed.
Snooze
When the alarm sounds, press the HI/LOW/OFF button to snooze the alarm for 10
minutes.
The snooze option can be repeated three times.
The alarm icon will flash while the snooze feature is active.
Note: While the alarm sounds, press any button except the TIME ALARM button to turn the alarm off.
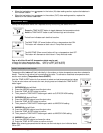
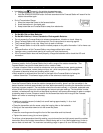
USB Charge Port
The integrated USB charging port (on back) will charge your smartphone, camera or other devices when
the atomic alarm clock is plugged into a power outlet with the included 5V A/C adapter.
Note: This is a power-output charging port. The charging port does not supply power to the atomic alarm
clock.
Begin charging your external device by connecting the device’s USB charging cable (not included) to the