La Crosse Technology, Ltd. Page 11
Outdoor Temperature/Humidity Flashing
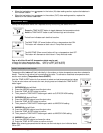
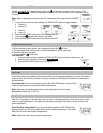
• Low battery icon present in the outdoor temperature area:
1. Change batteries in the transmitter and press the TX button.
2. Hold the SENSOR SEARCH button for three seconds and the Forecast Station will search for the
outdoor transmitter again.
• End of Transmission Range:
1. Move the transmitter closer to the forecast station.
2. Avoid obstructions in the signal path.
3. Keep transmitter and Forecast Station away from electronics.
Care and Maintenance
• Do Not Mix Old and New Batteries
• Do Not Mix Alkaline, Lithium, Standard or Rechargeable Batteries
• Do not expose the Forecast Station to extreme temperatures, vibration or shock. Keep dry.
• Clean Forecast Station with a soft damp cloth. Do not use solvents or scouring agents.
• The Forecast Station is not a toy. Keep it out of reach of children.
• The Forecast Station is not to be used for medical purpose or for public information. It is for home use
only.
• The specifications of this Forecast Station may change without prior notice.
• Improper use or unauthorized opening of housing will void the warranty.
• If the Forecast Station does not work properly, change the batteries and/or check the A/C cord
connection.
Position the Forecast Station
Choose a location for the Forecast Station that is within range of the outdoor transmitter. The
Forecast Station has a built in base stand to sit on a table or desk.
• Choose a location 6 feet or more from electronics such as cordless phones, gaming systems,
televisions, microwaves, routers, baby monitors, etc., which can prevent signal reception.
• Be aware of electrical wires and plumbing within a wall.
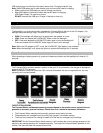
• Best reception is achieved when the front or the back of the Forecast Station is facing the
outdoor transmitter. This allows a larger portion of the antenna to receive a signal.
Position the Outdoor Transmitter
Once the Forecast Station shows the outdoor temperature/humidity, place it and the transmitter in the
desired locations and wait approximately one-hour before permanently mounting the transmitter to ensure
that there is proper reception. The transmitter should be mounted vertically, in a shaded, protected area,
at least 6 feet from the ground to avoid damage and ensure accurate readings. The transmitter is water
resistant, not waterproof and should not be placed anywhere it will become submerged in water or subject
to standing water or snow. Choose a location for the transmitter that is within range of the Forecast
Station and under an overhang for accuracy.
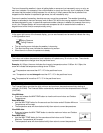
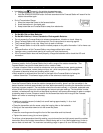
Option 1:
• Install one mounting screw (included) into a wall leaving approximately ½ of an inch
(12.7mm) extended.
• Place the transmitter onto the screw, using the hanging hole on the backside.
• Gently pull the transmitter down to lock the screw into place.
Option 2:
• Insert the mounting screw through the front of the transmitter and into the wall.
• Tighten the screw to snug (do not over tighten).
To achieve a true temperature/humidity reading, mount where direct sunlight cannot reach the outdoor
transmitter. Mount the outdoor transmitter on a North-facing wall or in any well shaded area. Under an
eave or deck rail work well. The maximum transmitting range in open air is over 200 feet (60 meters).


