OPERATION
13
MTF-031071L
The operation of any snowthrower can result in foreign objects being thrown into the eyes,which can
result in severe eye damage. Always wear safety glasses or eye shields before beginning snowthrower
Operation. We recommend standard safety glasses or Wide Vision Safety Mask for over spectacles.
SNOWTHROWER OPERATION
The most effective use of the snowthrower will be established
by experience, taking into consideration the terrain, wind
conditions and building location which will determine the
direction of the discharge chute.
NOTE: Do not blow snow toward a building as hidden
objects could be blown with sufficient force to cause
damage.
TO STOP YOUR SNOWTHROWER
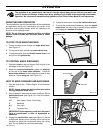
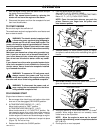
1. To stop throwing snow, release the auger drive lever.
(see Figure 11).
2. To stop the wheels, release the traction drive lever.
3. To stop the engine, push the throttle control lever to off
and pull out the ignition key.
TO CONTROL SNOW DISCHARGE
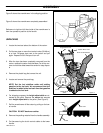
1. Rotate the crank to set the direction (left to right) of the
discharge chute (see Figure 10).
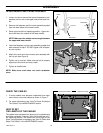
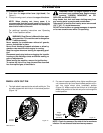
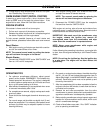
2. Adjust the snow chute deflector. Loosen the wing nut
on the side of the snow chute deflector. Raise the
snow chute deflector for more distance or lower for less
distance. Tighten wing nut. (see Figure 12).
HOW TO MOVE FORWARD AND BACKWARD
1. Start the engine. See “To Start Engine” in the Operation
section.
NOTE: Always release the traction drive lever before
moving the speed select lever.
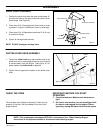
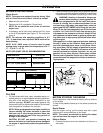
2. Ground speed is determined by snow conditions. Set the
speed select lever (see Figure 13) in one of the follow-
ing positions.
1-2 Wet, Heavy, Slushy, Extra Deep
3 Moderate
4-5 Very Light
6 Transport Only
IMPORTANT: Before operating, make sure the area in
front of snowthrower is clear of bystanders or
obstacles.
3. Engage the traction drive lever (see Figure 11). As the
snowthrower starts to move, maintain a firm hold on the
handles and guide the snowthrower along the cutting
path. Do not attempt to push the snowthrower.
4. To stop forward motion, release the traction drive lever.
5. To move the snowthrower backwards, move the speed
select lever into either first or second reverse position
and engage the traction drive lever.
Auger Drive Lever
Traction Drive Lever
Figure 11
Figure 12
Wing Nuts
Chute Deflector
Figure 13
Speed Select Lever


