


20 English
MAINTENANCE
A
Chain Maintenance
Use only Dual Raker low-kickback chain on this saw. This fast-
cutting chain will provide kickback reduction when properly
maintained.
For smooth and fast cutting, Raker chain needs to be main-
tained properly. The chain requires sharpening when the wood
chips are small and powdery, the chain must be forced through
the wood during cutting, or the chain cuts to one side. During
maintenance of your chain, consider the following:
1. Improper filing angle of the side plate can increase the risk of
a severe kickback.
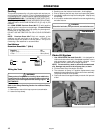
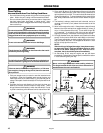
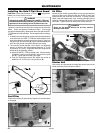
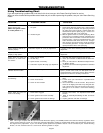
2. Raker (depth gauge) clearance (A): Too low increases the
potential for kickback; not low enough decreases cutting
ability.
3. If cutter teeth have hit hard objects such as nails and stones,
or have been abraded by mud or sand on the wood, have
servicing dealer sharpen chain.
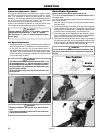
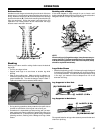
NOTE: Inspect the rim sprocket for wear or damage when
replacing the chain. If signs of wear or damage are present in the
areas indicated in illustration (B), have the rim sprocket re-
placed by a John Deere Servicing Dealer.
WARNING
Improper chain sharpening increases the potential of
kickback.
Failure to replace or repair damaged chain can cause
serious injury.
The saw chain is very sharp, always wear protective
gloves when performing maintenance to the chain.
WARNING
Dull or improperly sharpened chain can cause exces-
sive engine speed during cutting which may result in
severe engine damage.
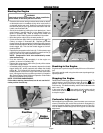
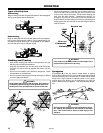
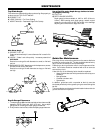
How to Sharpen the Cutters
Be careful to file all cutters to the specified angles and to the
same length, as fast cutting can be obtained only when all
cutters are uniform.
E
F
F
E
D
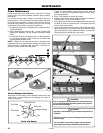
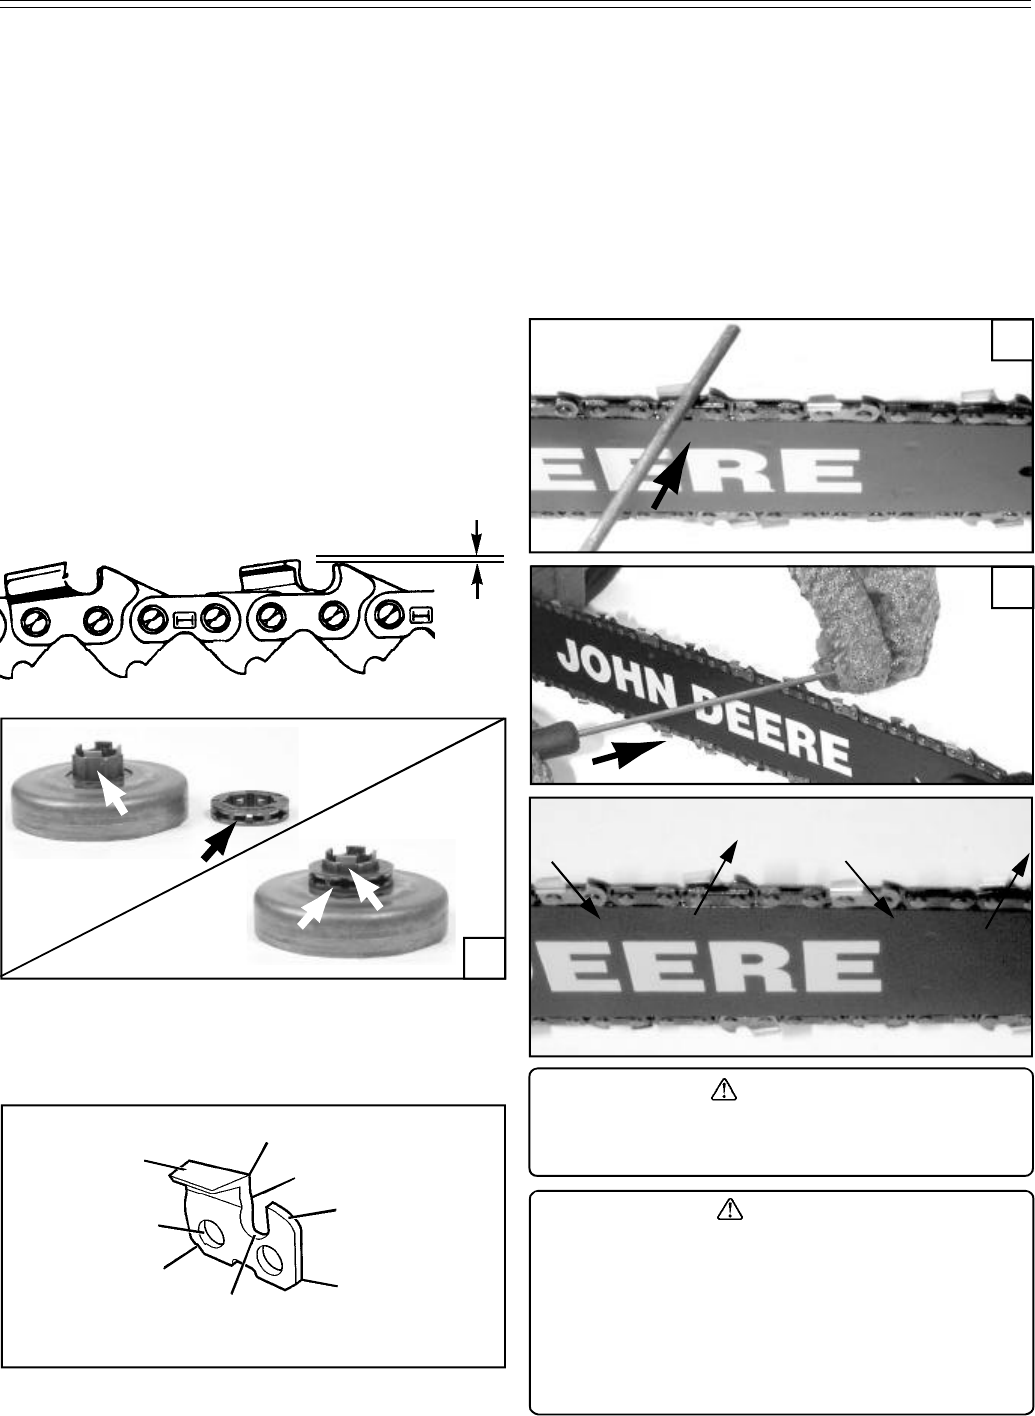
C
Cutting Corner
Side Plate
Depth Gauge
Toe
Gullet
Heel
Rivet Hole
Top Plate
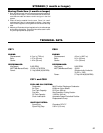
1. Tighten the chain tension enough that the chain does not
wobble. Do all of your filing at the mid-point of the bar. Wear
gloves for protection.
2. Use a 7/32" diameter round file and holder.
3. Keep the file level with the top plate of the tooth as shown in
Illustration (C). Do not let the file dip or rock.
4. Using light but firm pressure, stroke towards the front corner of
the tooth as shown in Illustration (D). Lift file away from the
steel on each return stroke.
5 Put a few firm strokes on every tooth. File all left hand cutters
(E) in one direction. Then move to the other side and file the
right hand cutters (F) in the opposite direction. Occasionally
remove filings from the file with a wire brush.
Parts of a Cutter
B