


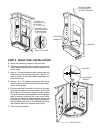

STEP 4. BACK OR BODY SPRAY
INSTALLATION
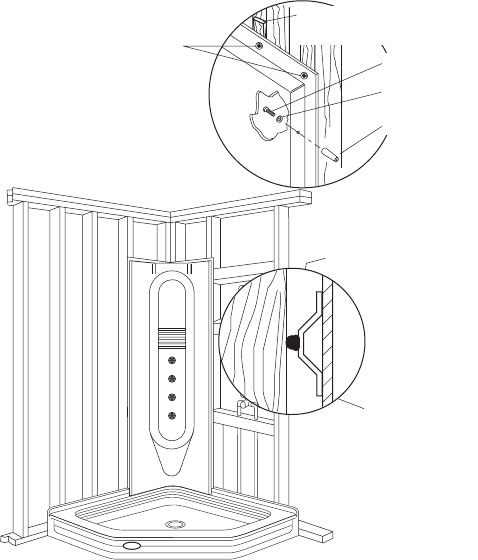
A. Attach the pins to the wall, (5) per side.
B. Temporarily place wall in position on the base and
against the corner stud wall.
C. Temporarily place the shelf wall and seat wall in
position by engaging the pins and holes.
D. Line up system walls and base at the front. Shim the
back or body spray wall top flange if necessary.
E. Remove all walls. Hook up plumbing from transfer
valve to body spray plumbing.
F. Place a 1/4" bead of caulking at the bottom of the
shower base flange where the wall will sit.
G. Place a 1/4" to 1/2" bead of construction adhesive on
each stud where the back surface of the panel stiffen-
ers will make contact.
H. Place the wall in position on the shower base. Secure
the top flange to the stud wall using #6 drywall screws.
The wall must remain seated and flush on the shower
base to ensure a matching joint to the sidewall.
I. Secure the two side flanges to the side stud walls
using #6 drywall screws. Shim between the flange
and studs as required to maintain plumb walls.
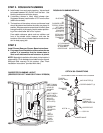
BACK WALL INSTALLATION AND DETAILS
CONSTRUCTION
ADHESIVE NEEDS
TO BOND STUDS
TO STIFFENERS
STUD
SECURE FLANGE
TO STUDS WITH
DRYWALL SCREWS
SHIM BACK WALL IF
NECESSARY
PIN
WASHER
SCREW
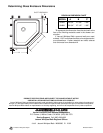
STEP 5. SEAT WALL INSTALLATION
A. Temporarily place the seat wall in position resting the
seat wall on the base. Make certain the wall and base
are in line at the front notch. Remove the seat wall.
C. Mark valve locations on the back side of the panel if
there is access. Remove the shelf wall and drill faucet/
plumbing access holes as required. If there is no
access for marking from behind, measure locations of
the valves and transfer dimensions to wall before
drilling. Protect the wall surface with masking tape to
prevent scratching the wall panel before drilling.
D. After faucet/plumbing access hole(s) are complete,
repeat dry-fit to ensure a correct cut.
C. Apply a 1/4" bead of sealant to each vertical edge and
around each pin of the back wall. Apply a 1/4" bead of
sealant to the shower base edge where the seat wall
will rest.
D. Place a 1/4" to 1/2" bead of construction adhesive at
each stud where the back surface of the panel stiffen-
ers will make contact.
E. Place a 1/2" bead of construction adhesive at 1"
centers as shown.
F. Place the seat wall in position on the pins of the body
spray wall and against the side stud wall. Secure the
top flange to the stud wall using #6 drywall screws.
The seat wall must remain seated flush on the shower
base to ensure a matching joint to the back wall. Shim
top as required to keep the panel square and perpen-
dicular. Secure the front flanges to the side stud wall
using #6 drywall screws. Shim between the flange
and studs as required.
G. Clean off excess sealant.
H. Drill a 3/16" hole into the stud wall through the hole
above the seat. Push the seat firmly against the stud
wall to ensure the structural adhesive has contacted
the back surfaces of the seat. Secure the seat wall to
the stud wall with the 5/16" lag screw and washer.
Tighten only until the washer is snug and does not
move. Completely caulk and seal the lag screw and
washer. After the caulking has cured, adhere the
nameplate over the hole as shown.