


iOptronCorp.|6EGillStreet|Woburn,MA01801USA|(781)569‐0200|TollFree(866)399‐4587|www.iOptron.com
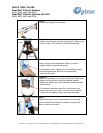
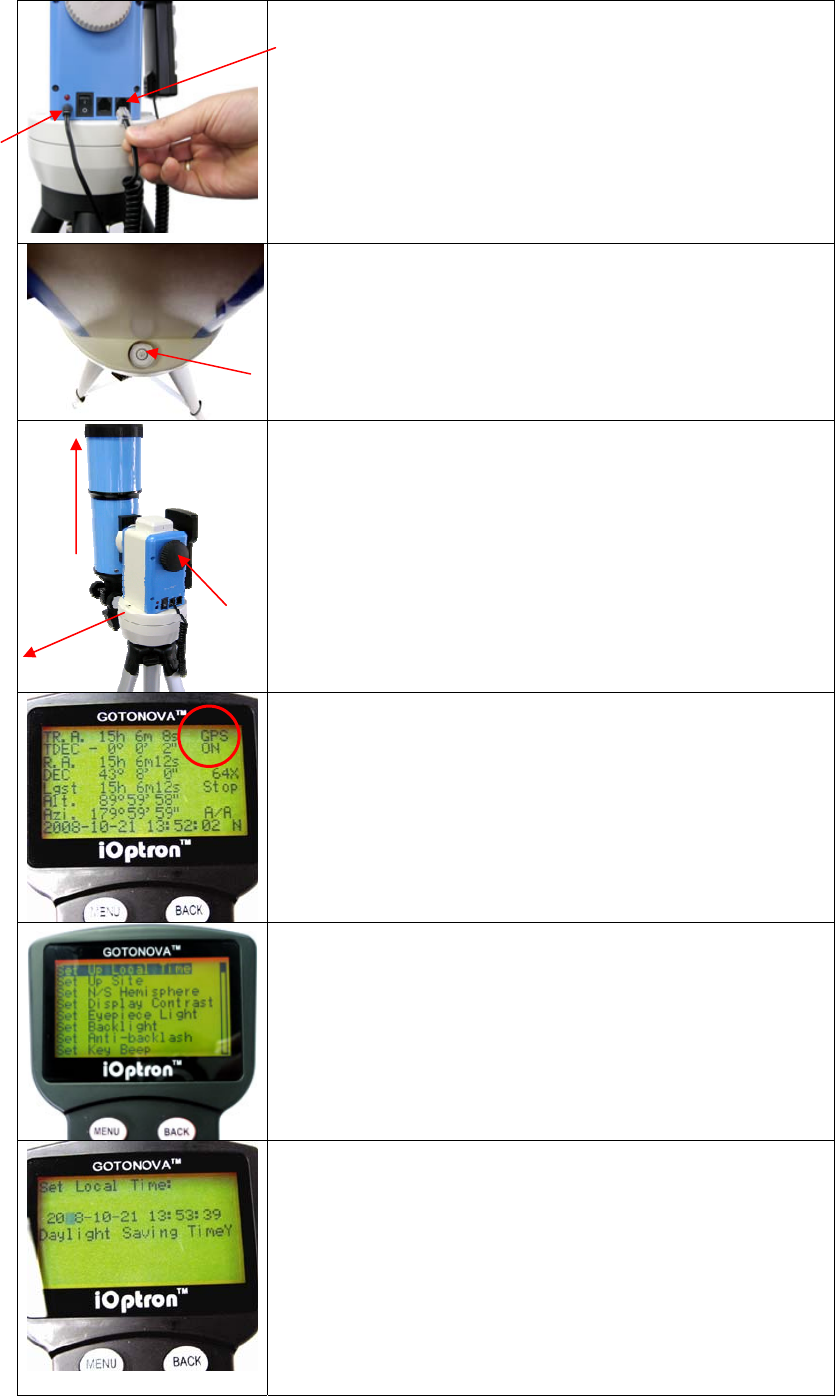
Step 5. Plug in hand controller and AC adaptor.
Plug hand controller into either one of the two HBX ports on
the mount. Next plug in AC adaptor.
(Or use batteries—see
step 3).
Turn on power (the red light should go on).
At this point you can begin observing manually. Use the 4 Arrow
keys (▲▼◄►) to rotate the scope Up, Down, Left, and Right. Use
the SPEED key to change the slew rate from the slowest (1X) to the
fastest (MAX). (Note: The slowest speed on the SmartStar
®
-E is
2X).The next steps show you how to set up the telescope and
controller for automatic slewing and tracking.
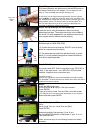
Step 6. Set up telescope for auto-observing.
Level the mount using the bubble on side of mount by
adjusting tripod legs. The bubble should be in the middle of
the circle. It is also suggested to use additional levels (such
as a torpedo level) to assure precise leveling.
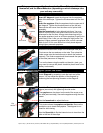
Step 7.
Set telescope to PARK POSITION.
(1) Position the mount so that the “SOUTH” mark is facing
south (A compass may be helpful).
(2) The telescope tube should be pointed directly up at the
zenith. If it is not perfectly straight then loosen the altitude
lock (#4) to adjust telescope.
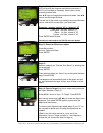
Step 8. Main Screen
For models with GPS: Wait for controller to say “GPS-OK” or
“Stop” in top right corner —not “GPS-ON”. GPS provides
Latitude, Longitude, and current time only.
Continue to step 9.
(Please note: this picture shows the SmartStar
®
-G hand controller.
The SmartStar
®
-E hand controller has similar menu items, but with a
smaller 4-line screen instead.)
Step 9.
Press the MENU key once.
Scroll (with the ▲/▼ keys) to “Set Up Controller”
Press ENTER.
Then go to Set Up Local Time and Site in the next screen.
(This may be one or two menu items depending on your version)
Select and then press ENTER.
Step 10. Set Up Local Time
Go to:
Set up Local Time (or “Local Time and Site”).
Press ENTER.
Enter date and day-light savings (Y-yes. N-no).
For SmartStar
®
-E controller a checkmark is “yes”, X is “no”.
Then press ENTER
(Note: use arrow keys to scroll through screen and select
numbers)
1)South
2)Up
#4
Alt
lock
PluginAC
adaptor
here