


iOptron Corp. | 6F Gill Street | Woburn, MA 01801 USA | (781) 569-0200 | Toll Free (866) 399-4587 | www.iOptron.com
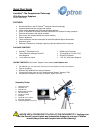
Quick Start Guide for AstroBoy
®
Computerized Telescopes
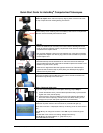
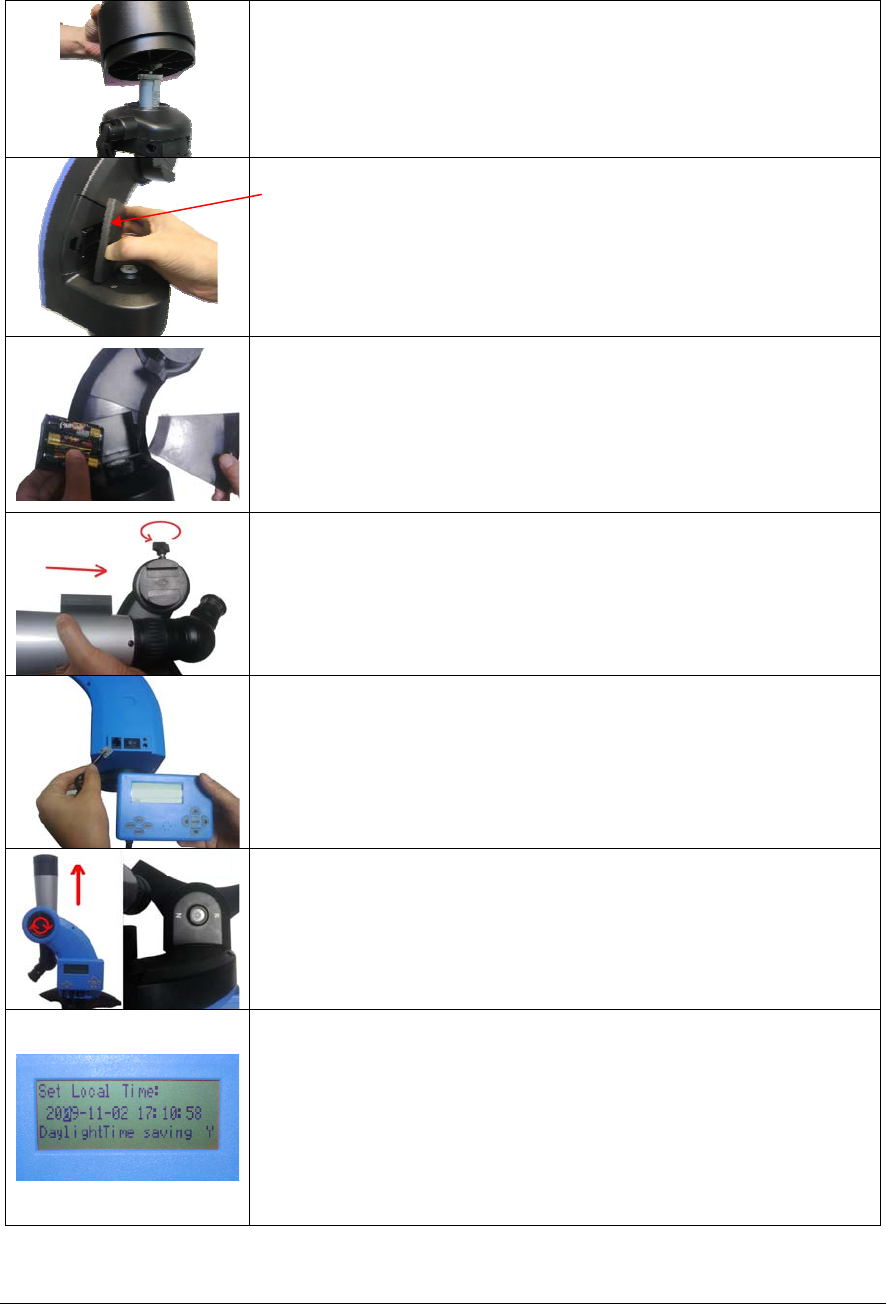
Step 1.
Attach to tripod. Attach mount to tripod by aligning base of mount onto screw
on top of tripod and then hand tightening until secure.
Step 2.
Lift the battery cover. Carefully pull out the battery holder from the compartment.
Be sure not to accidentally disconnect the wires.
Step 2a.
Insert 6 AA batteries (not included) in the holder. Refer to the diagram on the
holder to orient the batteries properly. Replace the holder back into the battery
compartment and replace the lid.
Use only fresh batteries. Using old or low batteries may cause error messages.
An optional AC adapter and 12V car plug cable are also available for purchase
at www.iOptron.com.
Step 3.
Slide the telescope into the dovetail slot on mount and secure the telescope
using dovetail lock knob (#2). Note that the dovetail is tapered and slides in one
direction only (see arrow in photo).
Insert the 45° diagonal and then the eyepiece into the end of the telescope.
Tighten the side screws to keep in place (Note: your telescope may appear
different from the photo here).
Step 4.
Plug hand controller into the HBX port on the mount. The hand controller can
also attach magnetically to the mount arm.
Step 5. Telescope initial setup
If you are using the telescope for land object observing, skip to Step 11.
(1) Loosen the altitude clutch; point the telescope tube directly up at the zenith.
Tighten the clutch (see left photo).
(2) Level the mount using the bubble on the mount by adjusting the height of
the mount base or tripod legs. Position mount so it faces South (you can
simply pick up mount with tripod to position “S” to face South).
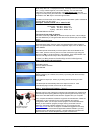
Step 6. Hand controller initial setup
Press the I/O power switch to turn the mount on (controller will light up).
Now “Set Local Time:” is displayed at the top. A blinking cursor is on the second
line.
.
Use ▲/▼ keys to change the numbers. Use ◄/► keys to scroll through the
fields.
The last field of this screen is for setting “DaylightTime saving”.
Use ▲/▼ keys to switch between “Y” (yes) and “N” (no).
Press ENTER when finished.
#2knob