


4
iOptron Corp. | 6E Gill Street | Woburn, MA 01801 USA | (781) 569-0200 | Toll Free (866) 399-4587 | www.iOptron.com
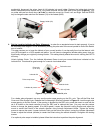
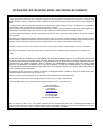
5. Install Counterweight (CW): The SmartEQ comes with one 2 lbs (0.9 kg) counterweight. However, because of
its unique design, no CW is needed if the payload is less than 4 lbs. The mount and installed batteries will
provide balancing weight needed. If a payload is greater than 8.8 lbs (4 kg), additional CW is needed. The
Counterweight Shaft is stored inside the mount head. If a CW is needed, release the CW Shaft Locking Screw
to pull out the shaft. Mount a CW onto the shaft and tighten the CW Locking Screw to hold the CW in place.
Tighten the CW Safety Screw.
Figure 10. Release CW shaft
Figure 11. Install CW
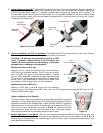
6. Attach and Balance an OTA on the Mount
: After attaching an OTA and accessories to the mount, balance
the mount in both R.A. and DEC to ensure minimum stress on the mount.
CAUTION: The telescope may swing when the R.A. or DEC
clutch is released. Always hold on to the OTA before you
release the clutch to prevent it from swinging. It can cause
personal injury or damage to the equipment.
Balance the mount in R.A. axis
Release the R.A. Clutch and rotate the R.A. axis to place the
DEC axis in the horizontal position. The OTA can be on either
side. If the DEC axis stays in the horizontal position, it means
the R.A. axis is balanced. Otherwise, you may adjust the length
of CW shaft, or install and adjust CW position to balance the
mount in R.A. axis. Remember to install the CW Safety Lock
and tighten the CW Locking Screw, if a CW is installed.
Balance the mount in DEC. axis
Balance in DEC axis is not that critical since the maximum
payload is only 11 lbs. Release the DEC Clutch and if the OTA does not rotate along the DEC axis, it is OK.
Tighten the DEC Clutch again.
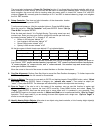
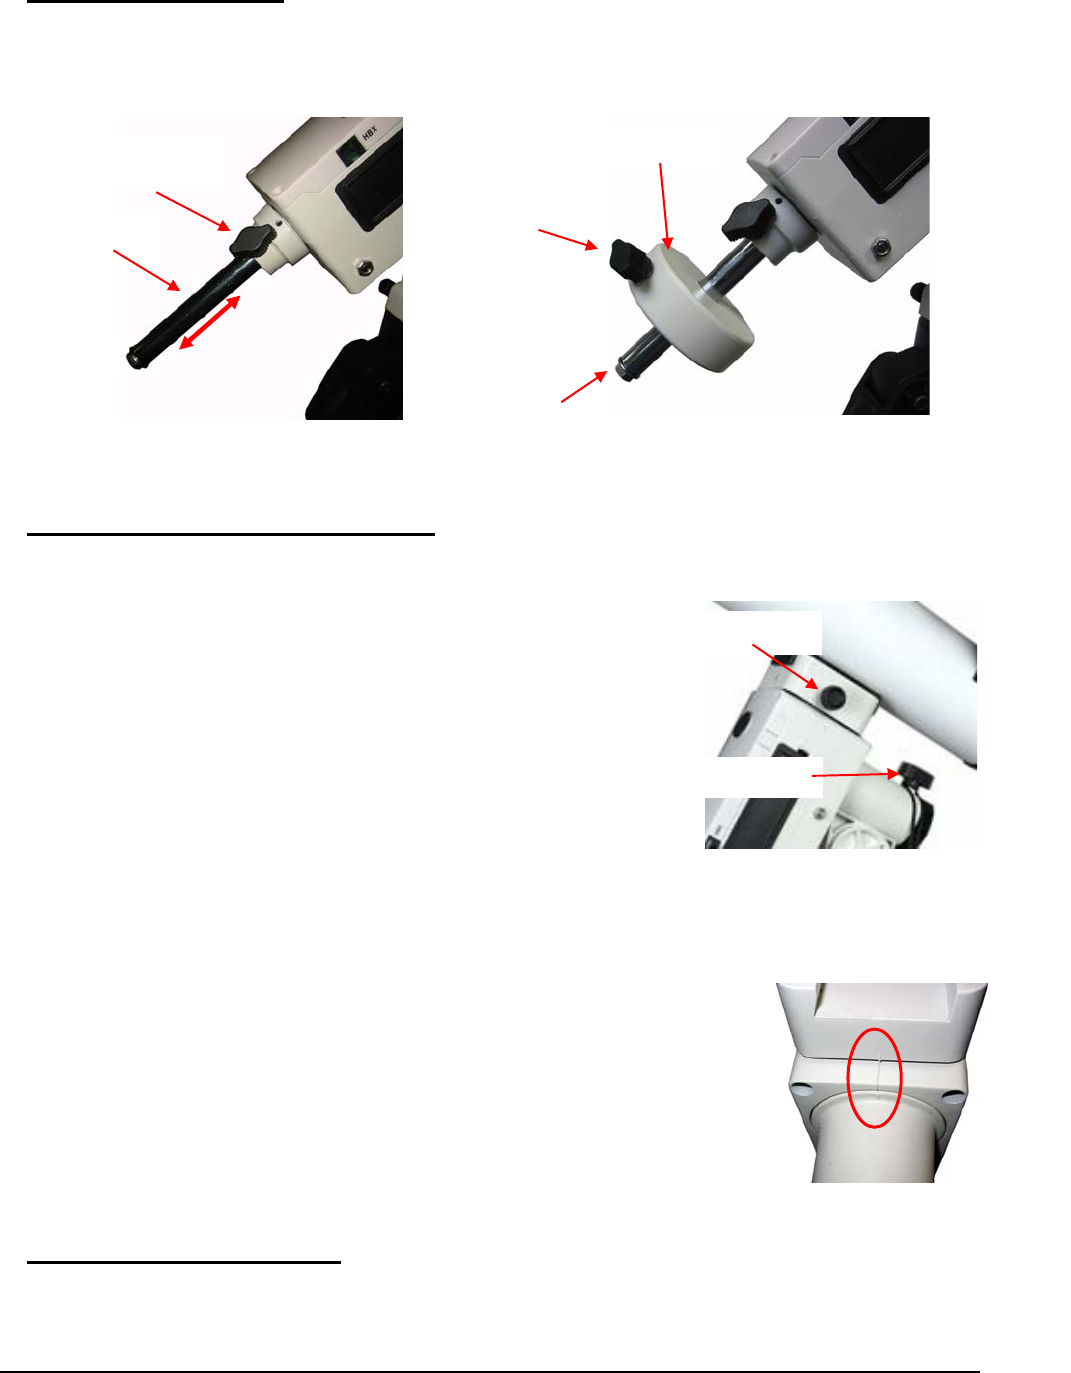
Adjust the Mount to Zero Position:
The Zero Position is the position where the counterweight shaft points to ground,
telescope is at the highest position with its axis parallel to the polar axis and the
telescope is pointing to the Celestial Pole. Loosen the DEC and R.A. Clutches to
adjust the mount to the Zero Position by align three marks located on DEC unit,
R.A. unit and mount, respectively, as shown in Figure 13. Tighten the screws
after adjustment. Make sure the hand controller is also at the zero position,
which can be ensured by turn the mount power off and on again.
7. Manual Operation of the Mount
: Now you can observe astronomical objects using the arrow keys of a
Go2Nova
TM
hand controller. Flip the I/O switch on the telescope mount to turn on the mount. Use ►,◄,▼ or ▲
buttons to point the telescope to the desired object. Use the number keys to change the slewing speed. Then
press 0 button to start tracking.
Figure 12
DEC clutch screw
R.A. clutch screw
CW shaft
lockin
g
scre
w
CW safety
scre
w
Retractable
CW shaft
CW locking
scre
w
Counterweight
Figure 13