


26 – English
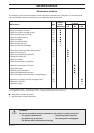
MAINTENANCE
WARNING!
Wear protective glasses when
dismantling the cutting unit. The
spring which tensions up the belt
can go off and cause personal
injury.
!
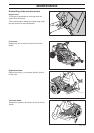
Adjusting the parallelism of the cutting
unit
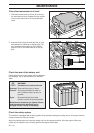
1. Remove the front hood and right-hand fender,
as described on page 19.
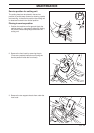
2. Undo the nuts on the lift strut.
3. Unscrew the strut (anticlockwise) to lower the
rear edge of the hood.
Screw the strut in (clockwise) to raise the rear
edge of the hood.
4. Tighten the nuts after adjustment.
5. On completion of the adjustment the unit’s
parallelism should be re-checked.
6. Fit the right-hand fender and the front hood.
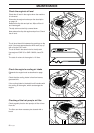
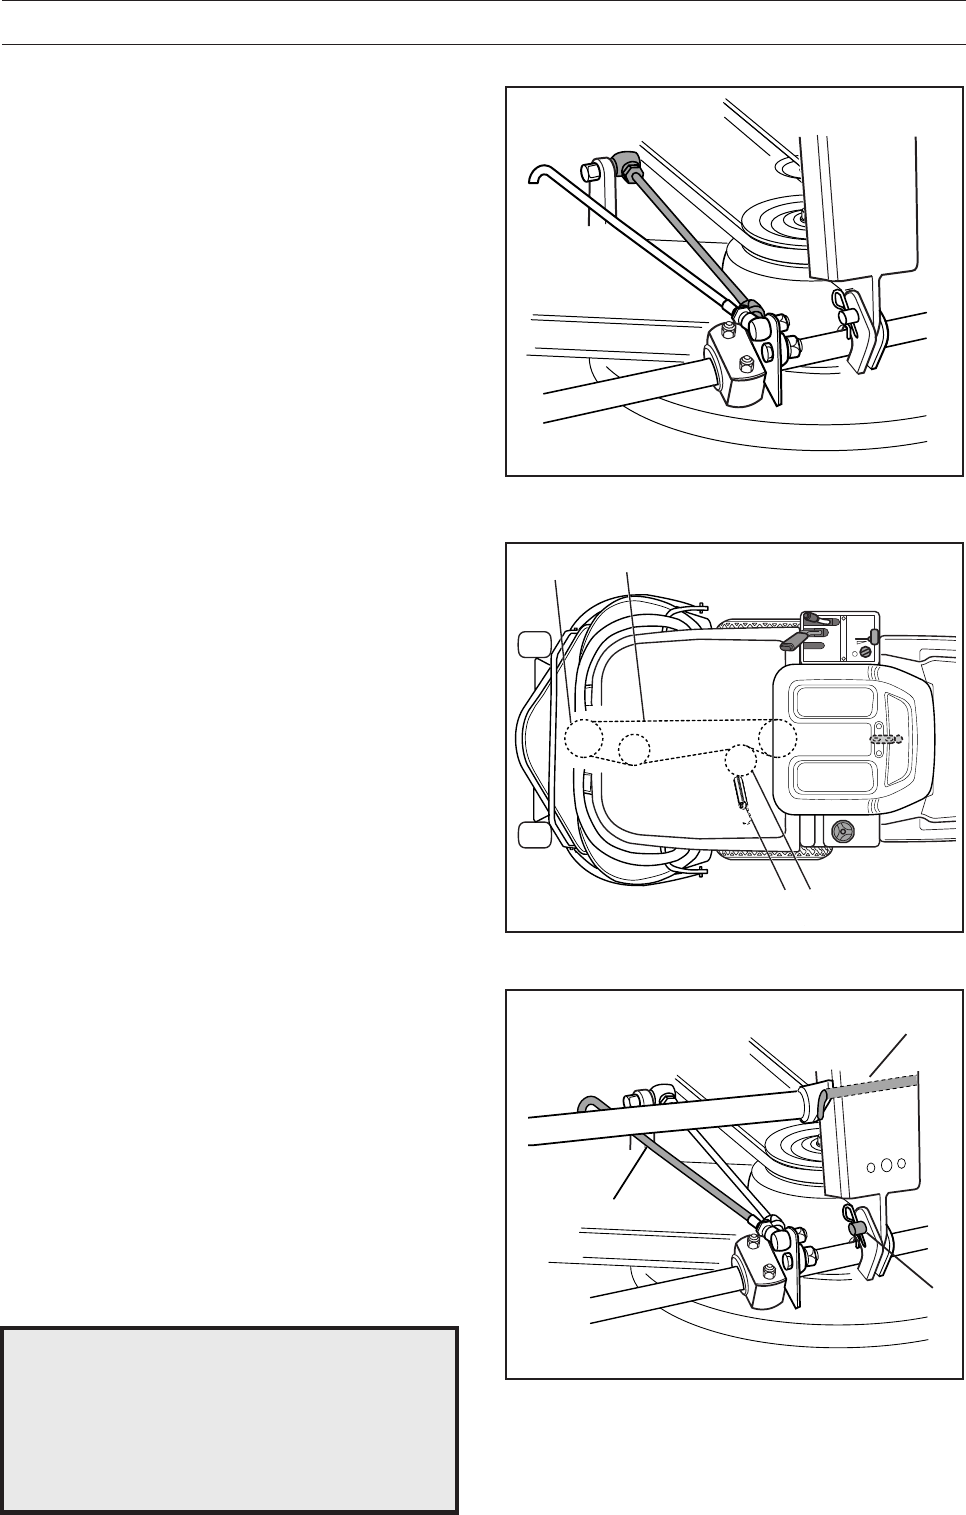
Removing the cutting unit
1. Apply the parking brake, see page 10.
2. Adjust the cutting height to its lowest setting.
3. Remove the front hood, as described on page
19.
4. Fit the support wheel.
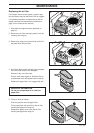
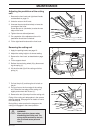
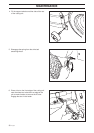
5. Relieve the tensioning wheel (2) by disconnect-
ing the spring (1).
6. Lift the drive belt (3) off the cutting unit drive
pulley (4).
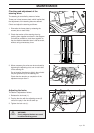
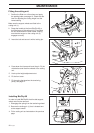
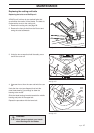
7. Pull out the pin (2) and hang the drive belt on
the pin.
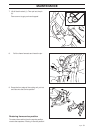
8. Put your foot on the front edge of the cutting
unit. Raise the front edge of the cutting unit
slightly and unhook the lift strut (1).
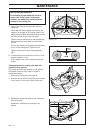
9. Remove the bolt (3) and pull out the cutting unit.
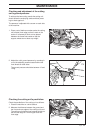
Fitting of the cutting unit takes place in the reverse
order to removal. See page 24 for details of how to
fit the BioClip 90.
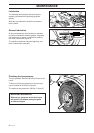
During fitting: make sure that the tongue on the
cutting unit engages in the correct position.
4
3
2
1
2
3
1