16
6
3
2
1
SERVICE AND ADJUSTMENTS
FIG. 20
ATTACHMENT
LIFT LEVER
ATTACHMENT
HEIGHT
ADJUSTMENT
KNOB
“B”
“C”
LEFT
SIDE
LEFT REAR
LIFT LINK
RIGHT
SIDE
LOWER FLANGE
OF MOWER DECK
UPPER TRUNNION
NUT
LOWER TRUNNION
NUT
REAR LIFT LINK
TRUNNION
“E”
LOWER FLANGE
OF MOWER DECK
MOWER HOUSING
“D”
VIEWED FROM FRONT OF TRACTOR
GROUND LINE
GROUND LINE
REAR LIFT
LINK
FIG. 21
FIG. 22
FIG. 23
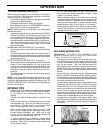
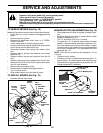
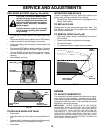
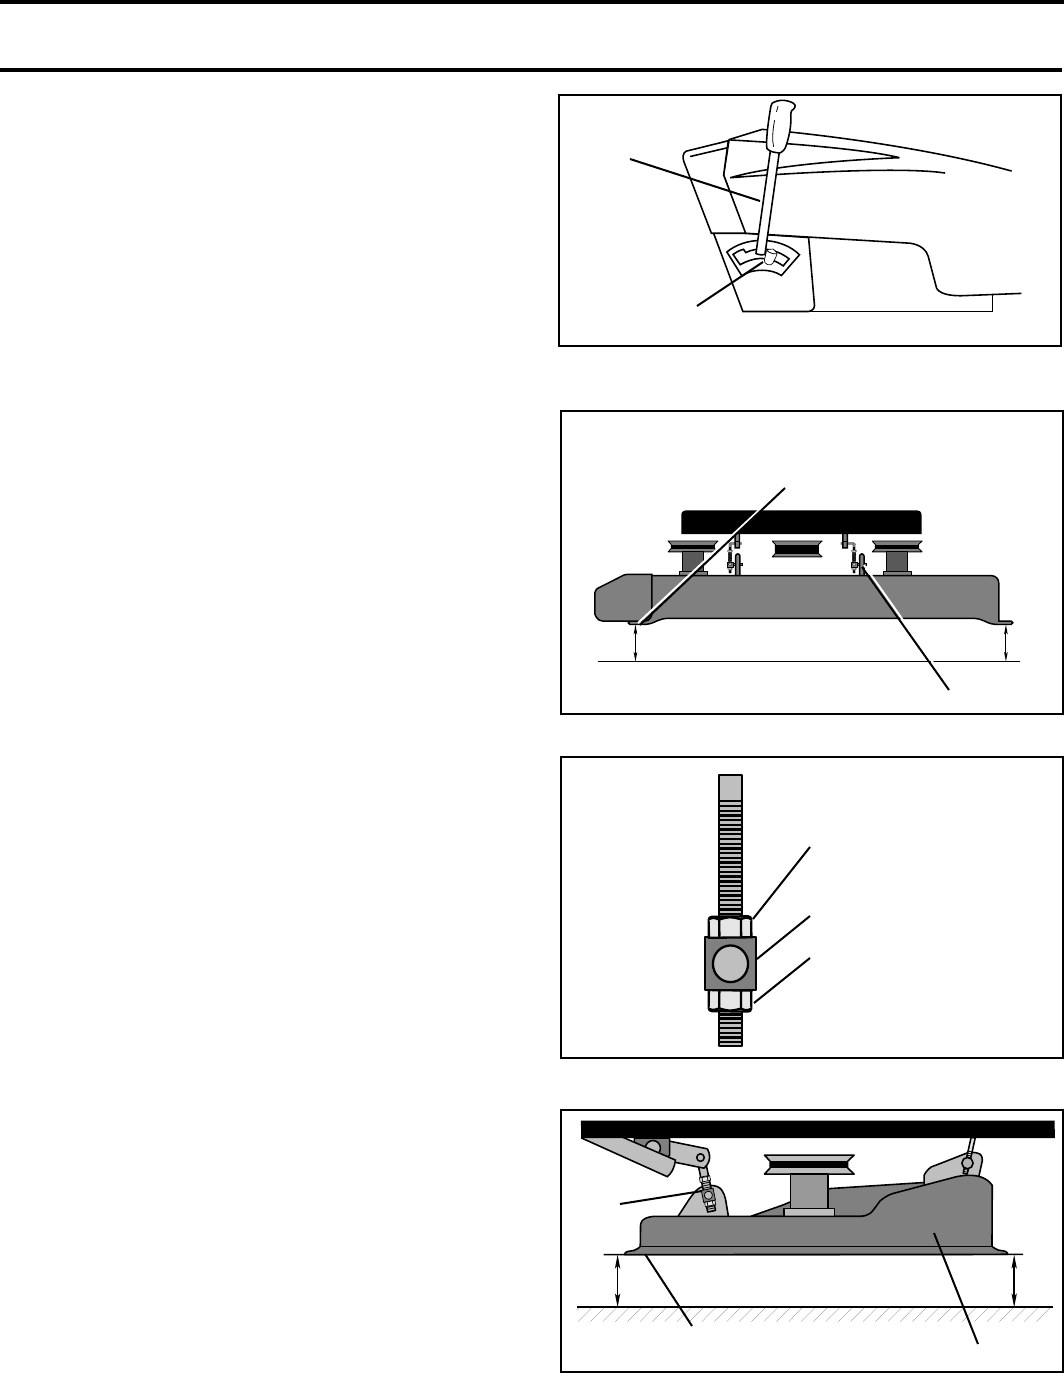
TO LEVEL MOWER HOUSING
(See Figs. 20-23)
Adjust the mower while tractor is parked on level ground or
driveway. Make sure tires are properly inflated. If tires are
over or under inflated, you will not properly adjust your
mower.
NOTE: One rotation of trunnion nut is equivalent to ap-
proximately 1/8 inch of height change. Be sure upper and
lower nuts are tightened against trunnion after adjustment
has been completed.
• Place attachment height adjustment knob in position
“3” (See Fig. 21).
• Lower attachment lift lever to height adjustment knob.
SIDE-TO-SIDE ADJUSTMENT (See Figs. 21 and 22)
• Measure distance from ground to lower flange of mower
deck on both sides of mower (dim. “B” & “C” ). Dim. “B”
& “C” should be the same.
Level mower side-to side by adjusting the left rear lift link.
• To raise left side of mower, loosen upper trunnion nut
and tighten lower trunnion nut.
• To lower left side of mower, loosen lower trunnion nut
and tighten upper trunnion nut.
FRONT-TO-BACK ADJUSTMENT (See Figs. 22 and 23)
To obtain the best cutting results, the mower housing
should be adjusted so the rear is approximately 1/4" to 3/
4" higher than the front when the mower is in height
adjustment position “3”.
• Measure distance from ground line to lower flange of
deck at right front and right rear (dim. “D” & “E”) in line
with front and rear tires.
Raise or lower rear of mower housing by adjusting the right
rear lift link.
• To raise rear of mower housing, loosen upper trunnion
nut and tighten lower trunnion nut.
• To lower rear of mower housing, loosen the lower
trunnion nut and tighten upper trunnion nut.
• Recheck side-to-side adjustment.


