English-45
MAINTENANCE
Checking the Parking Brake
Visually check that no damage is found on
the lever, links, or switch belonging to the
parking brake. Perform a test drive and check
that there is sufficent braking action.
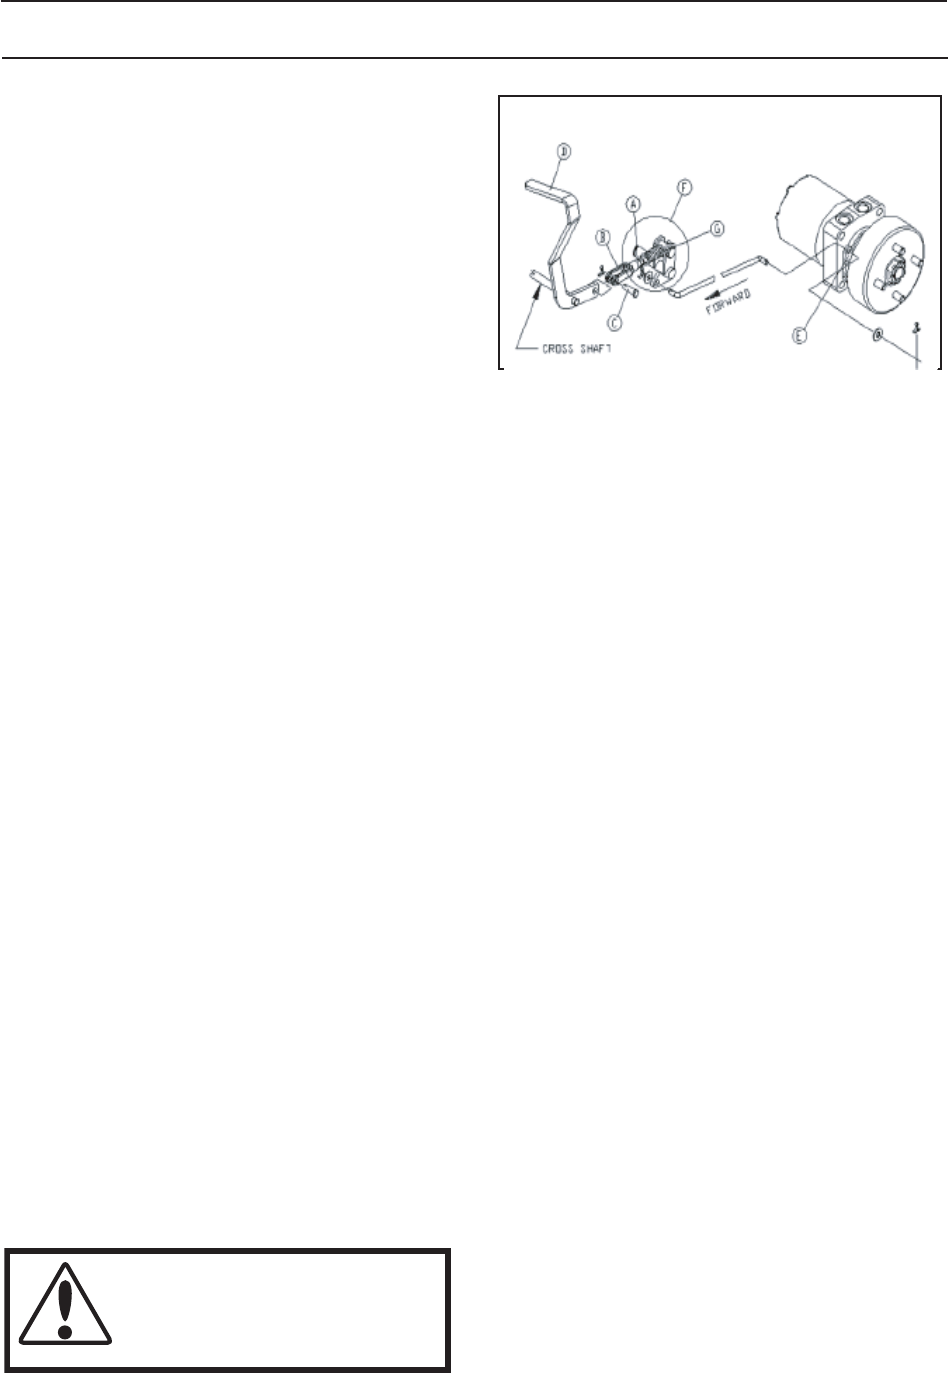
To adjust the parking brake:
1. Set brake lever (D) fully forward against
stop.
NOTE: Brake cross shaft MUST be properly
lubricated and both cross shaft and over-
center assemblies (F) MUST rotate freely.
2. Loosen jam nut (A) at rear of clevis (B)
and remove clevis pin (C) both sides of
mower.
3. Rotate over-center assembly (F) in
correct direction (clockwise on left
counter-clockwise on right) to pull brake
actuating arm (E) forward until firm
contact between brake shoes and drum
can be felt. Hold in this position.
4. Rotate clevis until clevis pin can just be
inserted thru clevis and brake lever with
pin resting against rear of the hole in
brake lever.
5. Remove clevis pin and rotate clevis two
(2) full turns toward rear to allow correct
clearance between brake shoes and
drum.
6. Temporarily reinstall clevis pin (do not
install cotter pin) to keep clevis from
turning and tighten jam nut.
7. Remove pin and repeat above procedure
on opposite side.
8. Reinstall clevis pins and secure with new
cotter pins.
9. Set brake lever rearward to fully engaged
position.
10. Adjust spring (G) to correct tension by
turning rear jam nut until spring
measures 1 1/8".
Park brake linage
Parkin
g
brake linka
g
e
WARNING!
Faulty adjustment can cause
an accident.


