English – 27
E
MAINTENANCE
1
2
!
WARNING!
When the lock pins are removed the
unit will drop to the ground. Make sure
to keep your hands or fingers away
from under the unit during dismantling.
2
3
5
4
6
1
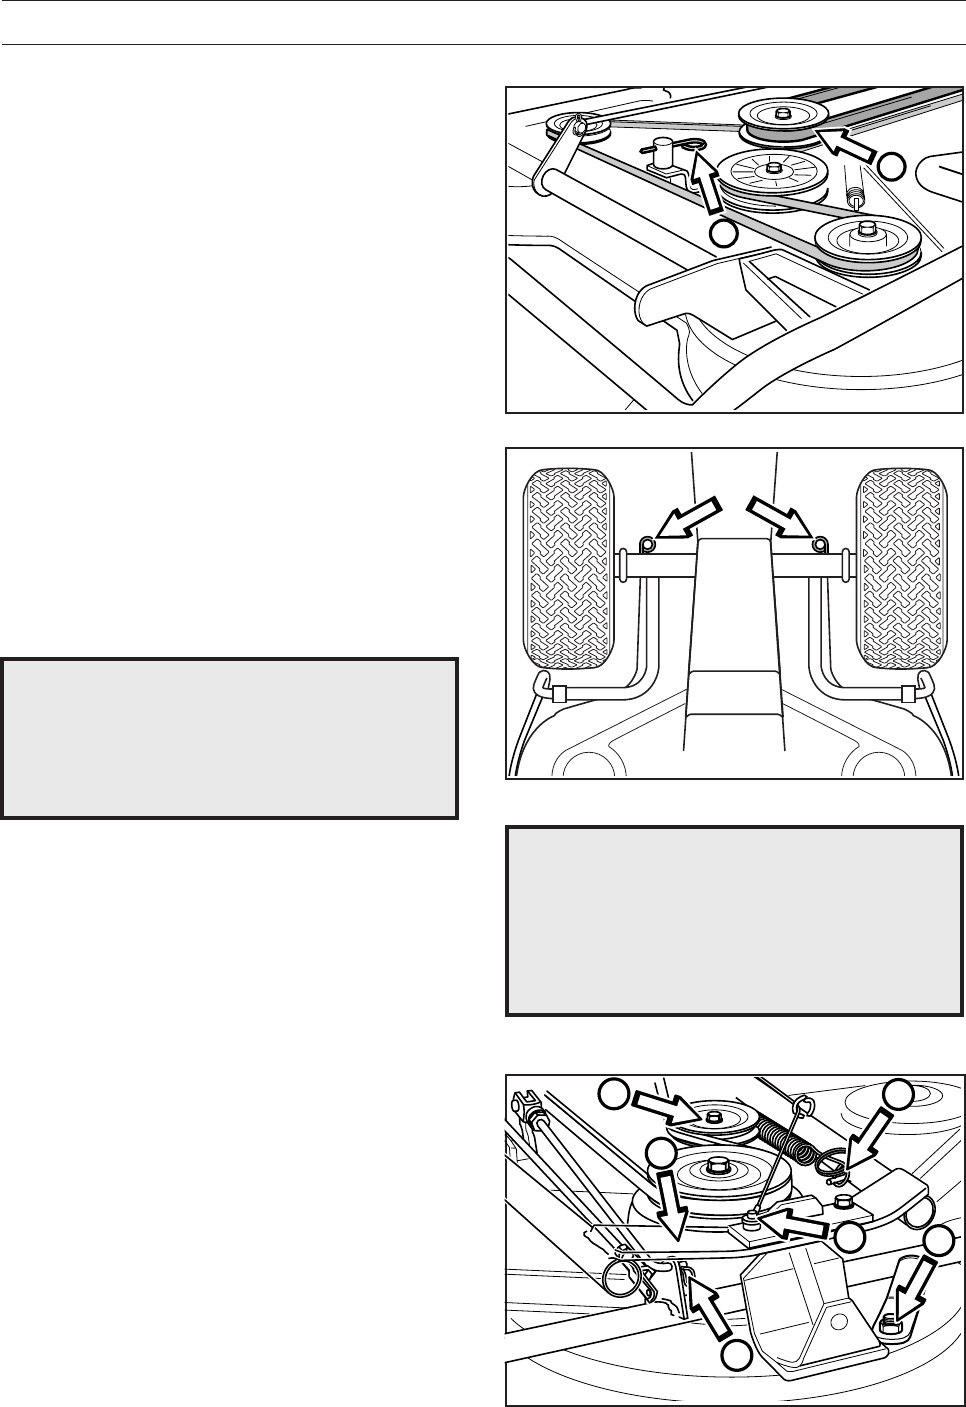
Dismantling the cutting unit
The cutting unit can be released from the machine
for cleaning or checking of the blades and screws.
Dismantle the cutting unit on Rider 850 as follows:
1. Dismantle the front hood and right-hand and left-
hand fenders as described on page 20.
2. Raise the cutting unit by pulling the lift lever
backwards to the transport position.
3. Dismantle the drive belt (1).
4. Lower the cutting unit by pressing in the lift
lever’s lock button and moving the lever to
cutting position, and then setting the lowest
cutting height with the cutting height lever.
5. Remove the hair-needle spring (2) from the
chain retainer.
6. Remove the lock pins (one on each side) on the
rear edge of the unit.
Fitting of the cutting unit takes place in the reverse
order to dismantling.
Dismantle the cutting unit on Rider 970 Bioclip as
follows:
1. Dismantle the front hood as described on page
20.
2. Set the cutting height to the highest position.
Push the stop (1) in against the crossbar and
then set the cutting height to the lowest position.
The cutting unit is now locked vertically.
3. Relieve the tensioning roller (2) by disconnecting
the spring (3).
4. Push the lock-plate (4) forwards and press down
the unit’s front edge so that it is released from
the unit’s frame (5).
5. Push the unit backwards and dismantle the drive
belt. Remove the hair-needle spring and release
the crossbar (6) from the height adjustment.
The unit can now be pulled forward until it
releases from the rear suspension.
Fitting of the cutting unit takes place in the reverse
order to dismantling.
WARNING!
Wear protective glasses when
dismantling the cutting unit. The
spring which tensions up the belt
can go off and cause personal
injury.
!
850,970 Eng 97-10-14, 14.3027


