


Hunter Fan Company 42704-01 • 01/29/07
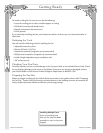
To install a ceiling fan, be sure you can do the following:
• Locate the ceiling joist or other suitable support in ceiling.
• Drill holes for and install wood screws.
• Identify and connect electrical wires.
• Lift 40 pounds.
If you need help installing the fan, your Hunter fan dealer can direct you to a licensed installer or
electrician.
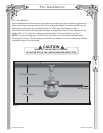
Gathering the Tools
You will need the following tools for installing the fan:
• Adjustable wrench or pliers
• Electric drill with 11/64” bit
• Standard screwdriver (magnetic tip recommended)
• Phillips-head screwdriver (magnetic tip recommended)
• Ladder (height dependent upon installation site)
• 3/8” socket wrench
Checking Your Fan Parts
Carefully unpack your fan to avoid damage to the fan parts. Refer to the included Parts Guide. Check
for any shipping damage to the motor or fan blades. If any parts are missing or damaged, contact
your Hunter dealer or call Hunter Technical Support Department at 888-830-1326.
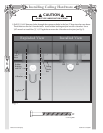
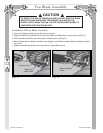
Preparing the Fan Site
Before you begin installing the fan, follow all the instructions in the pullout sheet called “Preparing
the Fan Site.” Proper ceiling fan location and attachment to the building structure are essential for
safety, reliable operation, maximum effi ciency, and energy savings.
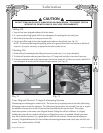
Installing Multiple Fans?
If you are installing more
than one fan, keep the blade
assemblies in sets, as they were
shipped.
4
Getting Ready