


Page 14 — English
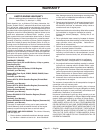
CHANGING ENGINE LUBRICANT
See Figure 24.
Shut off the engine.
Clean the area around the lubricant fill cap/dipstick, then
remove the lubricant fill cap/dipstick.
Tilt the pressure washer on its side as shown. Drain lu-
bricant into approved container.
NOTE: Drain the lubricant while the engine is still warm
but not hot. Warm lubricant will drain quickly and more
completely.
After the crankcase is completely drained, return the
pressure washer to an upright position.
Fill with lubricant following the instructions in Adding
Lubricant To The Engine earlier in this manual.
NOTE: Consult hazardous waste management guidelines in
your area for the proper way to dispose of used lubricant.
PUMP LUBRICATION
The pump on this product was lubricated with a sufficient
amount of high grade lubricant for the life of the unit under
normal operating conditions. Therefore, no further lubrica-
tion is required.
STORING THE PRESSURE WASHER
See Figure 25.
Store the pressure washer with the gas tank empty by either
draining the tank or running the pr essure washer until the
gas runs out. Allow 30 minutes of “cool down” time before
storing the machine. Never place the unit in any position
other than upright on its wheels.
Store in a dry, covered area where the weather can’t damage it.
It is important to store this product in a frost-free area. Always
empty water from all hoses, the pump, and the deter gent
bucket before storing.
NOTE: Use of a fuel stabilizer and pump saver will give you
better performance and increase the life of the machine.
Discharge Fuel:
Drain the fuel tank completely . Stored gas can go stale in
30 days.
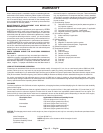
NOZZLE MAINTENANCE
See Figure 21.
Excessive pump pr essure (a pulsing sensation felt while
squeezing the trigger) may be the r esult of a clogged or
dirty nozzle.
Turnoffthepressure washerandshutoffthewater
supply. Pull trigger to release water pressure.
Removethenozzlefromthespraywand.
NOTE: Never point the spray wand at your face.
Usingastraightenedpaperclipornozzlecleaningtool
(not provided), free any foreign materials clogging or
restricting the nozzle.
Usingagardenhose,flushdebrisoutofnozzlebyback
flushing (running the water through the nozzle backwards
or from the outside to the inside).
Reconnectthenozzletothespraywand.
Turnonthewatersupplyandstarttheengine.
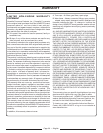
CLEANING THE AIR FILTER
See Figure 22.
A dirty air filter will cause starting dif ficulty, loss o f
performance, and shorten the life span of the engine. Check
the air filter monthly. For best performance, replace the air
filter at least once a year.
Unscrew air filter knob, then remove the air filter cover.
Lift the edge of the air filter carefully and pull it out.
Wash the air filter with warm, soapy water.
Rinse and squeeze to dry.
Reinstall the air filter.
NOTE: Make sure the filter is seated properly inside the
cover. Installing the filter incorrectly will allow dirt to enter
the engine, causing rapid engine wear.
Reinstall the air filter cover.
CHECKING SPARK PLUG
See Figure 23.
Clean the area around the base of the spark plug before
removing to keep dirt and debris out of the engine. Re-
move spark plug.
Clean off carbon deposits on the spark plug electrode
using a plug cleaner or wire brush. Replace the plug if
worn. (Recommended spark pl ug: BPR6HS (NGK) or
equivalent.)
Check electrode gap. The gap should be .03 in. (0.7- 0.8 mm).
Adjust the gap, if necessary, by carefully bending the
ground electrode.
Reinstall spark plug. Tighten securely.
MAINTENANCE