


Page 14
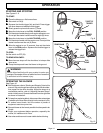
AIR
FILTER
AIR
FILTER
PROBLEM POSSIBLE CAUSE SOLUTION
IF THESE SOLUTIONS DO NOT SOLVE THE PROBLEM CONTACT YOUR AUTHORIZED SERVICING DEALER.
Engine will not start:
Engine starts but will not
accelerate:
Engine starts but will only run
at high speed at half choke:
Engine does not reach full
speed and emits excessive
smoke:
1.Switch not ON.
2.No spark.
3.No fuel.
4.Flooded engine.
5.Starter rope pulls harder now
than when new.
Carburetor requires adjustment.
Carburetor requires adjustment.
1. Oil / fuel mixture is incorrect.
2. Air filter is dirty.
3. Carburetor requires adjustment.
4. Spark arrestor screen is dirty.
1.Move switch to ON.
2.Check spark. Remove spark plug. Reattach the
spark plug cap and lay spark plug on metal
cylinder. Pull the starter rope and watch for spark
at spark plug tip. If there is no spark, repeat test
with a new spark plug.
3.Push primer bulb until bulb until fuel is visible in the
bulb. If fuel is not apparent, the primary fuel
delivery system is blocked. Contact a servicing
dealer. If primer bulb fills, engine may be flooded
(see next item).
4.Remove spark plug. NOTE: Do not let gas spill on
the ground. Move choke lever to “RUN” and pull
starter cord 10 to 15 times. This will clear excess
fuel from engine. Clean and reinstall spark plug.
Pull starter three times with choke lever at “RUN”.
If engine does not start, move choke lever to
“CHOKE” and repeat normal starting procedure. If
engine still fails to start, repeat procedure with a
new spark plug.
5.Contact a servicing dealer.
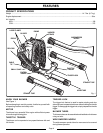
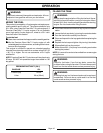
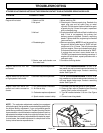
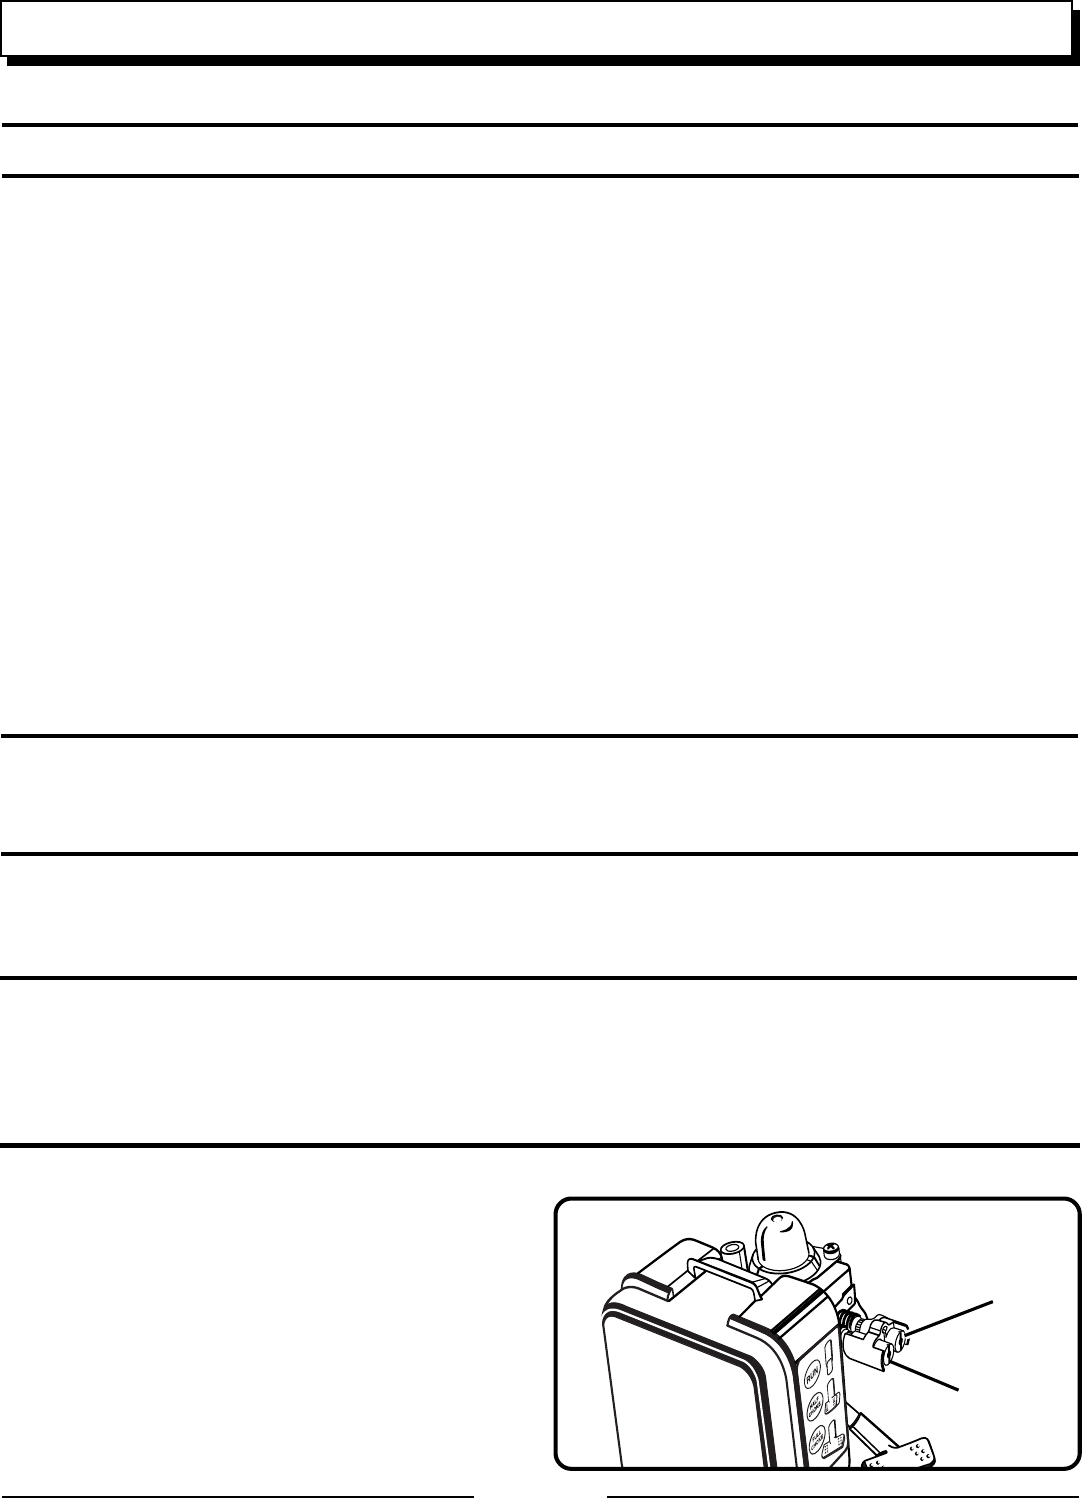
Turn “L” needle counterclockwise 1/16 turn. If “L”
low needle can not be turned counterclockwise, do
not force plastic limiter caps. Contact a servicing
dealer.
See Figure 12.
Tur n “H” needle counterclockwise 1/16 turn. If “H”
high needle can not be turned counterclockwise, do
not force plastic limiter caps. Contact a servicing
dealer.
See Figure 12.
1. Use fresh fuel and the correct 2-cycle oil mix.
2. Clean air filter, refer to “Replacing and Cleaning
the Air Filter” earlier in this manual.
3. Turn “H” needle clockwise 1/16 turn.
See Figure
12.
4. Contact a servicing dealer.
NOTE: The carburetor adjustment needle(s) are equipped
with plastic cap(s) that prevents counterclockwise rotation from
the original factory adjustment. If your unit exhibits specific
performance problem(s) where the Trouble Shooting Section
recommends a counterclockwise needle adjustment and no
adjustments have been made since original purchase, the unit
should be taken to a factory authorized service dealer for repair.
In most cases, the needed adjustment is a simple task for the
factory trained service representative.
TROUBLESHOOTING
“L” NEEDLE
Fig. 12
“H” NEEDLE