


English
19
• Spray washer
The water is discharged in a wide fan for cleaning walls,
motorbikes and automobiles, etc.
The entire nozzle can be rotated by approximately 90
degrees to change the shape of the spray between
horizontal and vertical.
NOTE
Set the spray adjustment to “Jet” fi rst of all, and then
gradually move it to the “Spray” position while pulling the
trigger.
Note that there is a chance of the water being sprayed
horizontally over a wide area if this is rotated fully to the
“Spray” position.
Note that the nozzle may be damaged if it is forced to
move past the stop position when alternating between
“Jet” and “Spray”.
Turbo nozzle
The turbo nozzle rotates as it sprays high-pressure jets of
water for e cient washing.
NOTE
The turbo nozzle only discharges powerful jets of water
when set at the “Jet” mode.
Avoid using this on items that are easily broken or for
which coatings are easily peeled.
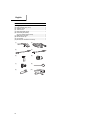
Detergent bottle nozzle (Fig. 11 and 12)
Sprays water mixed with detergent.
Uses neutral detergents available on the open market.
(1) Insert the water feed pipe into the detergent nozzle.
(2) Pour an undiluted neutral detergent into the bottle and
then screw the bottle onto the detergent nozzle.
(3) Attaching and removing the detergent bottle nozzle is the
same as explained for other nozzles.
When inserting the detergent bottle, make sure that
the trigger gun is pointing in the direction shown in the
illustration on the right.
(4) Aim the detergent nozzle at the article to be washed and
pull the trigger on the trigger gun to spray a mixture of
water and detergent at low pressure.
WARNING
Do not use acidic or alkali detergents. Use only neutral
detergents available on the open market.
Using detergents other than neutral detergents or
chemical agents may result in accidents or malfunctions.
NOTE
Moisten the O-ring with water if it is di cult to insert the
nozzle.
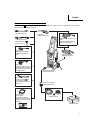
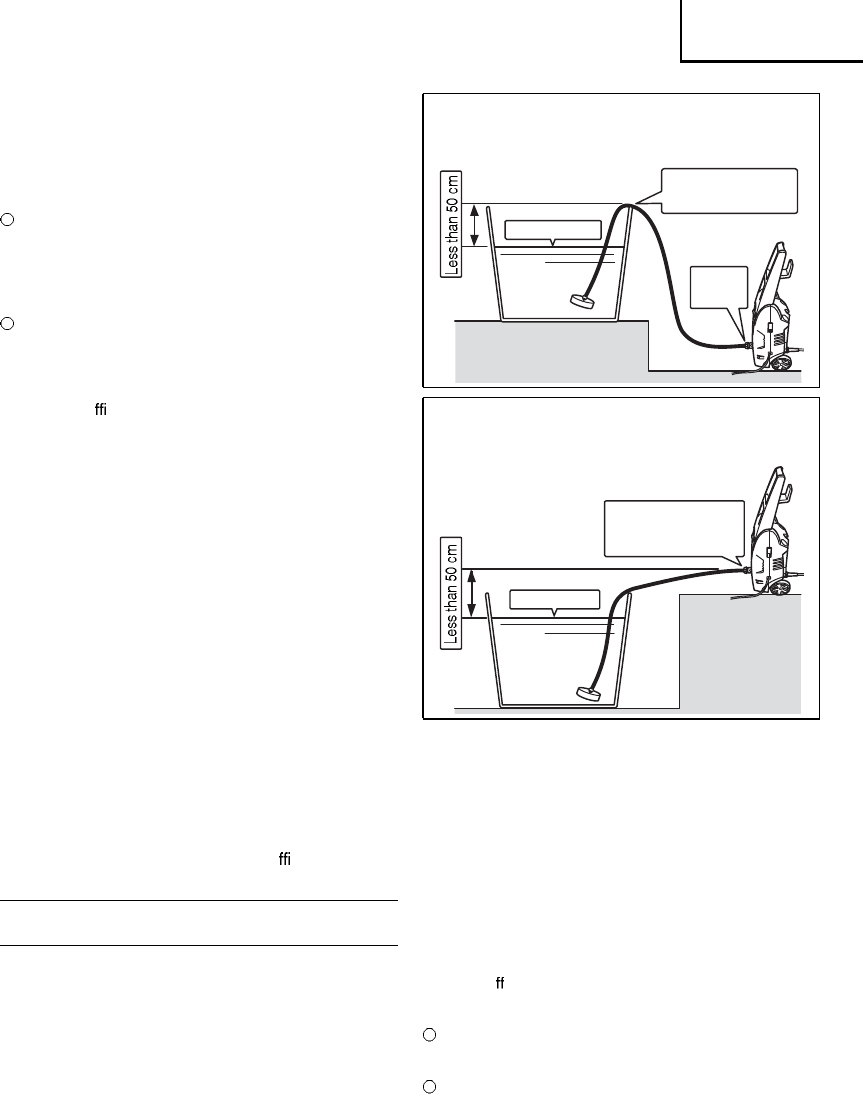
USING THE STRAINER HOSE SET (sold
separately)
The separately-sold strainer hose set is equipped with a
function that will automatically suck water from a water tank,
etc., when attached to the AW130.
The maximum height of suction (lifting range) is
approximately 0.5 m.
Attach this correctly in accordance with conditions.
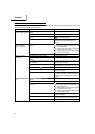
Í«½¬·±² ¸»·¹¸¬ ©¸»² ¬¸» ¸»·¹¸¬ ±º ¬¸» ©¿¬»® º»»¼ ±«¬´»¬
·- ´±©»® ¬¸¿² ¬¸» ³¿¨·³ «³ ¸»·¹¸¬ ±º ¬¸» -«½¬·±² ¸±-»æ
Ú®±³ ¬¸» ³¿¨·³«³ ¸»·¹¸¬ ±º ¬¸» -«½¬·±² ¸±-» ¬± ¬¸»
-«®º¿½» ±º ¬¸» ©¿¬»®ò
Water surface
Water
feed inlet
Maximum height of the
suction hose
Í«½¬·±² ¸»·¹¸¬ ©¸»² ¬¸» ¸»·¹¸¬ ±º ¬¸» ©¿¬»® º»»¼
±«¬´»¬ ·- ¬¸» -¿³» ¿- ¬¸» ³¿¨·³«³ ¸»·¹¸¬ ±º ¬¸»
-«½¬·±² ¸±-»æ Ú®±³ ¬¸» ©¿¬»® º»»¼ ±«¬´»¬ ¬± ¬¸» -«®º¿½»
±º ¬¸» ©¿¬»®ò
Water surface
Water feed inlet
(maximum height of
the suction hose)
1. Attaching the strainer to the suction hose (Fig. 13)
(1) Pass the suction hose through the hose band supplied
and then gently moisten the inside of the suction hose
with water.
(2) Insert the strainer as far as it will go, and then fi rmly
tighten the hose band with a fl at-headed screwdriver.
2. Attaching the one-touch joint (black) to the suction
hose (Fig. 14)
Attach the one-touch joint (black) supplied as a standard
accessory to the suction hose.
3. Starting the suction hose water suction process
(Fig. 15)
Sink the strainer hose set into a container fi lled with
water.
Start o the suction process (introduce water to the
suction hose.)
NOTE
Do not use anything other than clean water (river or pond
water, muddy water containing sand granules.)
Failure to observe this may result in malfunctions.
Set the switch at “ON” without the nozzle attached.
Failure to observe this may result in dry operations,
leading to malfunctions.
4. Insert the one-touch joint into the water feed
connector (Fig. 16)
Withdraw the one-touch joint from the accumulated water
and insert it into the water feed connector on the washer
while making sure that the water inside the hose does not
escape.