


SKU 91924 Page 10
For technical questions, please call 1-800-444-3353.
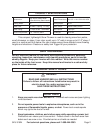
UNPACKING
When unpacking, check to make sure that this product is in good condition, and all the
following are included. If any parts are missing or broken, please call Harbor Freight Tools
at the number shown on the cover of this manual as soon as possible.
Snow Thrower Main Component
Snow Thrower Handle
(2) Locking Knobs
ASSEMBLY AND OPERATING INSTRUCTIONS
NOTE: For additional information regarding the parts listed in the following pages, refer
to the Assembly Diagram on page 13.
1. CAUTION: Always make sure the Power Cord is unplugged from its electrical outlet
prior
to assembling or making any adjustments to the tool.
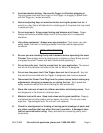
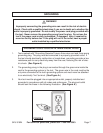
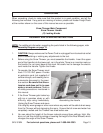
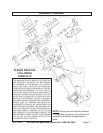
2. Before using the Snow Thrower, you must assemble the Handle. Insert the upper
part of the Handle into the lower part, as in the photo. There is an insertion mark on
the handle. Do not insert beyond the mark. Be careful not to damage the electric
cord inside the Handle. Tighten the Knobs.
3. To operate, the Snow Thrower must
have 110-120 VAC power. Provide
an extension cord (not supplied) of
sufficient length, and meeting the re-
quirements discussed in the previ-
ous section. Be careful that the ex-
tension cord does not lie in open
water or on wet surfaces. Observe
all safety precautions mentioned in
this manual.
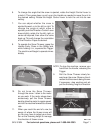
4. If the Snow Thrower gets locked up
with ice or operates slowly or with
difficulty, stop using immediately.
Unplug the Snow Thrower and move
it to a slightly warm garage or other room where any water will be able to drain away
from the Thrower without damaging the room. Ensure that all snow and water has
completely melted and the Thrower has dried before use.
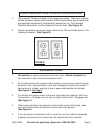
5. You can adjust the height of the thrown material among three settings, High, Me-
dium, or Low. You do this by raising or lowering the height of the Rear Wheels, which
changes the angle of the Snow Thrower.
Knobs
Upper
Handle
Assembling the Handle