


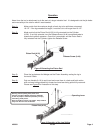
Step 5) Repeat Step 4 to advance the Piston Rod (A-32) forward. This will push the log
against the Wedge and split the log.
Step 6) Once the Log is split, remove the pieces from the Log Splitter. Turn the Release
Screw counterclockwise so that the Piston retracts back into the Cylinder as in
Step 2 (see Figure 2). Tighten the Release Screw once the Piston Rod is fully
retracted.
Step 7) Continue the preceding steps until all logs have been split. Once completed,
your Log Splitter should be stored with the Release Screw (A-49) opened so
that any hydraulic pressure is relieved during non-use.
if t h er e is a n y q u es t i o n a b o u t a c o n d i t i o n b e i n g s a f e o r u n s a f e , d o n o t o p e r at e t h e t o o l .
Maintenance
After every use, wipe down the Log Splitter to remove any tree sap or dirt occurring during use. This will
extend the use of the Log Splitter.
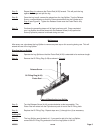
Bleeding the Log Splitter
Step 1) Operate the Log Splitter so that the Piston Rod (A-32) is extended to its maximum length.
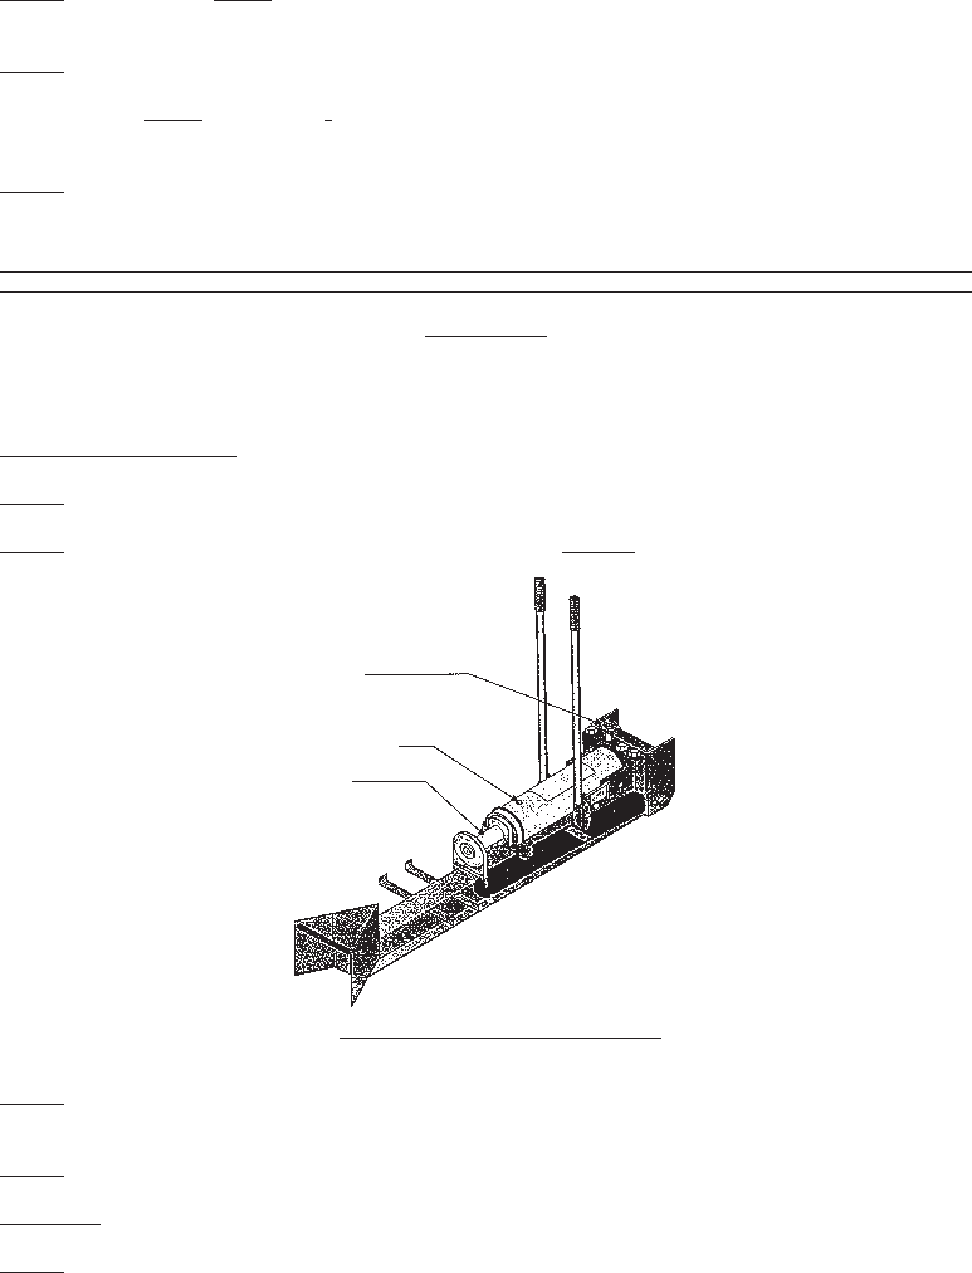
Step 2) Remove the Oil Filling Plug (A-56) as shown in Figure 4.
Step 3) Turn the Release Screw (A-44) counterclockwise as fast as possible. The
Piston Rod will retract into the Cylinder and push air out of the Oil Filling Hole.
Step 4) Replace the Oil Filling Plug. Repeat steps one (1) through four (4) as necessary.
Adding Oil
Step 1) The Log Splitter uses Hydraulic oil. If you need to add oil to the Log Splitter,
remove the Oil Filling Plug and add oil until the Log Splitter is 3/4 full.
Figure 4-Bleeding the Log Splitter
Release Screw
Oil Filling Plug (A-56)
Piston Rod
#39981 Page 5
Rev 08l