Assembly - 65
ASSEMBLY
Assembly
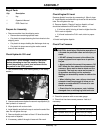
Bag of Parts
Prepare for Assembly
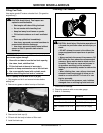
• Remove machine from the shipping crate:
• Remove box containing operator seat.
• Cut plastic tie straps fastening the front wheels to the
shipping crate.
• Cut plastic tie straps holding the discharge chute up.
• Cut plastic tie straps securing the motion control
levers to the machine.
Check Hydraulic Oil Level
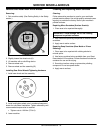
1. Park machine safely. (See Parking Safely in the Safety
section.)
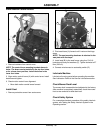
MX15294
2. Unscrew and remove hydraulic reservoir cap/dipstick (A)
from hydraulic oil reservoir.
3. Wipe dipstick with a clean cloth.
4. Install dipstick and allow the cap to rest on the end of the
tube. Do not tighten the cap.
5. Remove dipstick and check oil level. Oil level should be
at top mark on dipstick.
6. If necessary, add oil through oil reservoir filler neck.
7. Install cap on filler neck.
Check Engine Oil Level
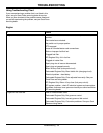
Remove dipstick from tube by unscrewing it. Wipe it clean.
8. Install dipstick and allow the cap to rest on the end of the
tube. Do not tighten the cap.
9. Remove dipstick. Check oil level on dipstick; oil level
should be between the ADD and FULL marks.
• If oil is low, add oil to bring oil level no higher than the
FULL mark on dipstick.
• If oil level is above the FULL mark, drain to proper
level.
10.Install and tighten dipstick.
Check Tire Pressure
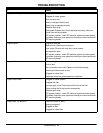
1. Check tires for damage.
2. Check tire pressure with an accurate gauge.
3. Check that tires have correct pressure. Add air, if
necessary:
Qty. Description
1Key
1 Operator’s Manual
1 PDR Check List
IMPORTANT: Avoid damage! Check all fluid levels
before attempting to start the machine. Machine
should be parked on a hard, level surface with the
key switch in the STOP position.
A
c CAUTION: Avoid injury! Explosive separation of
a tire and rim parts can cause serious injury or
death:
• DO NOT attempt to mount a tire without the
proper equipment and experience to perform
the job.
• Always maintain the correct tire pressure. DO
NOT inflate the tires above the recommended
pressure. Never weld or heat a wheel and tire
assembly. The heat can cause an increase in
air pressure resulting in a tire explosion.
Welding can structurally weaken or deform the
wheel.
• When inflating tires, use a clip-on chuck and
extension hose long enough to allow you to
stand to one side and NOT in front of or over
the tire assembly.
• Check tires for low pressure, cuts, bubbles,
damaged rims or missing lug bolts and nuts.
Tire Size Pressure
Front: 13 x 5.0-6 110
-138 kPa (16-20 psi)
Rear - Chariot: 23 x 9.5-12 69
-97 kPa (10-14 psi)
Rear - Chariot LX: 24 x 12-
12
69
-97 kPa (10-14 psi)


