


Repair
3A0540L 13
Lower Reassembly
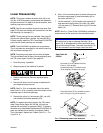
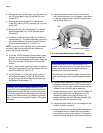
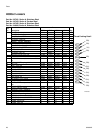
1. Lubricate the new piston seal (25*) and install it on
the piston.
2. Install the piston plate (24) with the beveled edge
facing away from the piston seal. See F
IG
. 7.
3. Install o-ring retainer (20). Lubricate o-ring (22*) and
slide it on over the threads of piston shaft. Apply
high strength (red) Loctite
®
263 or 2760 to entire
length of the piston rod (19) threads. Sealant must
be allowed to cure for a minimum of 12 hours before
use. Screw the piston nut (21) snugly against the
o-ring retainer (20). Apply lubricant to the bottom
face of the piston nut (21). Assemble o-ring (23*)
and install in the groove on the piston nut. Screw
rod (19) into piston (26) until snug. Tighten piston
nut (21) to 270-285 N•m. (200-210 ft-lb).
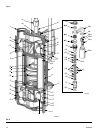
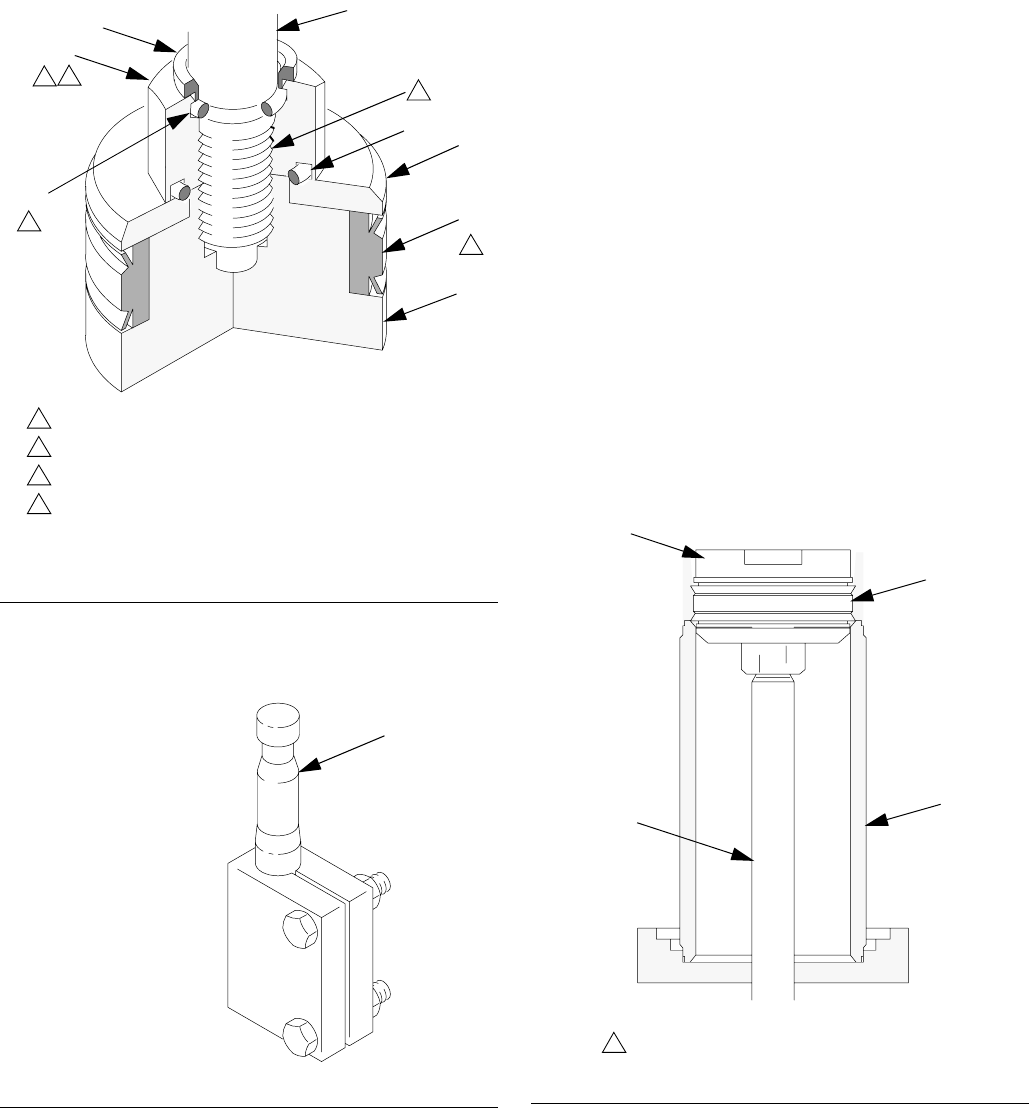
4. Remove the piston assembly from the vise, but do
not lay it down on its side; doing so may dam-
age the seal.
5. Carefully and evenly guide the seal and the piston
into the cylinder. The piston seal and piston may
need to be tipped at an angle and the exposed,
leading lip of the seal tapped into the cylinder with a
plastic mallet. After the seal lip has entered the cyl-
inder use an arbor press or tap the bottom of the
piston assembly lightly with a plastic mallet to slide
the piston assembly into the cylinder. Before press-
ing, ensure the piston seal lips are started into the
cylinder. See F
IG
. 9.
6. Clean the remaining pump parts in a compatible sol-
vent.
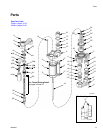
F
IG
. 7. Piston Assembly
F
IG
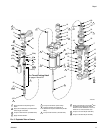
. 8. Tool Kit 220385
TI0219
21
20
19
*22
23*
25*
26
24
Apply lubricant.
Torque to 200-210 ft-lb (270-285 N•m).
Apply lubricant to face of piston nut.
Apply high strength (red) Loctite
®
263 or 2760 to entire
length of threads. Sealant must be allowed to cure for a
minimum of 12 hours before use.
1
3
4
8
8
1
3
4
1
01413
19
Tighten the tool on the
widest part of the shaft
(19). Grip the tool with
a wrench and unscrew
the shaft.
F
IG
. 9. Install Piston in Cylinder
25
4
19
26
1
Do not damage edges of seal.
TI0221