12
7. Do not cut damp or wet grass. Do not overload the
mower.
8. After finishing the cutting operation, release pressure
on both motor on/off grips (4) and allow the motor to
come to a complete standstill. Before switching off, tilt
the mower to one side to prevent the still-turning blades
from cutting the grass too short as the mower sinks to
the ground.
9. Remove the cable plug from the mains supply.
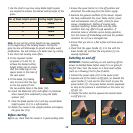
Emptying the grass box
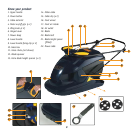
As the grass collection box (13) fills with grass, it is clearly
visible through the translucent material of the box.
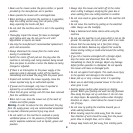
1.Ensure the power button (2) is in the off position and
disconnect the power cable
plug from the power point.
2.Ensure that you are on a
flat surface and have secure
footing.
3.Lift the hinged cover (9).
4.Lift out the grass box (13),
empty it, replace it and
close the hinged cover (9).
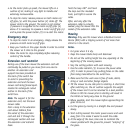
Changing the mower blade
Warning. Never carry out any assembly operations or
adjustments with the power connected to the mower.
Always ensure that the power button is in the off position
and that the power plug is disconnected from the supply.
1. Periodically check the blade (22) for nicks and dull
cutting edges and have it sharpened if needed.
Notes. The blade should be sharpened and balanced by an
authorised repair centre.
2.If there are rounded or broken ends, thinned metal or
other damage, replace the blade.
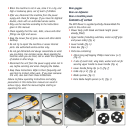
3.With the power button (2) in the off position and the
power plug removed from the supply, take out the grass
box (13) and turn the mower on its side.
4.Put on a pair of sturdy gloves to protect your hands.
5.Block the rotation of the blade (22) and use the blade
spanner (15) to unscrew the blade bolt (23) in an anti-
clockwise direction (viewed from underneath).
6.Remove the blade bolt (23) and blade (22) taking care
not to disturb any blade height spacers (16 and 24)
that might be fitted.
7.Check that the blade height spacers (16 and 24) are
properly located, replace the blade (22) and screw
in the blade bolt (23), tightening it with the blade
spanner (15).
8.Return the blade spanner (15) to its storage position in
the cable tidy (8).
9.Press down on the blade spanner (15) to lock it in
position under the retaining latch.
10. Return the mower to the upright position and replace
the grass box (13).
Reconnect the power cable to the supply and run the
mower for a few minutes to check that the blade is
properly fitted and that there is no undue noise or
vibration. Use only the blade as recommended by the
manufacturer.
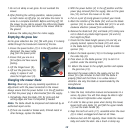
Maintenance
1.Store the tool, instruction manual and accessories in a
secure, dry place. You will then always be able to refer
to the relevant information when required.
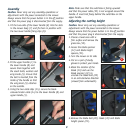
2.In order to take up less space when storing the mower,
loosen both wing knobs (5) and fold the upper handle
(1) over the lower handle (8).
3.Keep the tool’s air vents (17), accessible when the cover
(6) is raised, unclogged and clean at all times.
4.Remove dust and dirt regularly. Clean inside the mower
body and under the deck. Use a brush or damp rag.
4


