8
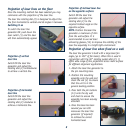
Projection of laser lines on the floor
Once the mounting method has been selected you may
commence with the projection of the laser line.
The laser line rotating dial (2) is designed to adjust the
line from horizontal to vertical and all angles in between.
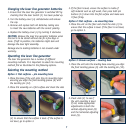
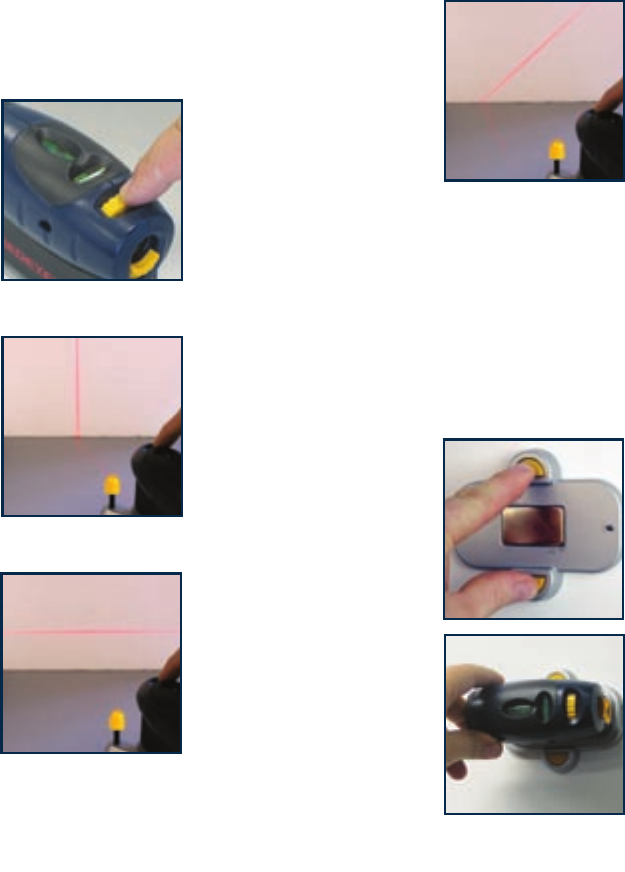
Switching it on
To switch the laser line
generator ON, push down the
laser switch (1) and the laser
will then automatically appear.
Projection of vertical
laser line
Switch ON the laser line
generator and adjust the
rotating dial (2) anticlockwise
to achieve a vertical line.
Projection of horizontal
laser line
Switch ON the laser line
generator and adjust the
rotating dial (2) clockwise to
achieve a horizontal line.
Projection of inclined laser line
on the opposite surfaces
Switch ON the laser line
generator and adjust the
rotating dial (2) to the
required inclined angle on the
opposite surface.
NOTE. Position the laser line
generator a maximum of 10m
from the wall surface. It is
recommended to use red laser
enhancing glasses (15) to improve the visibility of the
laser line especially in a bright light environment.
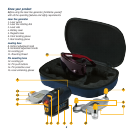
Projection of laser line when fixed on a wall
The laser line generator is built with a large laser fan
angle (up to 100° of fan beam). When this is used in
conjunction with the 90° rotating system dial (2), it
offers wide range of line projections across main surfaces
for different alignment applications.
1. Attach the laser line generator to
the pin mounting base.
2. Position this mounting
assembly onto the wall and
check the vial (3) to ensure
that the unit is in the
general leveling position.
3. Press both the pin buttons
(13) onto the dry wall
and check to ensure the
assembly has been securely
attached.
4. Once the base has been
secured you can still
manouvre the laser line
generator (if required)
to achieve the correct
horizontal level.