12
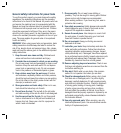
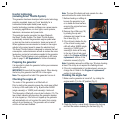
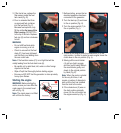
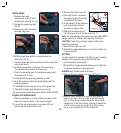
3. If the fuel is low, replace the
filter screen inside the fuel
tank neck (Fig. E).
4. Pour in unleaded fuel from
an approved fuel container
into the fuel tank (Fig. F).
Because fuel expands, only
fill the unit to the base of the
filter housing. DO NOT FILL
to the tip of the tank. Replace
fuel cap (2) and turn clockwise
to lock.
WARNING.
• Do not refill fuel tank while
engine is running or is hot.
• Check to ensure that the fuel
drain (21) has been tightened
and that fuel is not leaking from
the rear outlet tube.
Note. If the fuel drain screw (21) is not tight fuel will be
visibly leaking from the fuel drain hose (6).
• Be careful not to admit dust, dirt, water or other foreign
objects into the fuel.
• Wipe off spilt fuel thoroughly before starting engine.
• Ensure you DO NOT fuel the generator in close proximity
to any open flames.
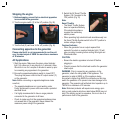
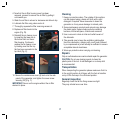
Starting the engine
WARNING. Before starting the
motor, ensure you have filled the
crank case to the correct level
with oil (Fig. G).
Note. The crank case is not filled
with oil from the factory.
1. Before starting, ensure that no
electrical apparatus has been
connected to the generator.
2. Turn the fuel cap (2) vent lever
to the on position (Fig. H).
3. Turn the engine switch (7) to
the on position (Fig. I).
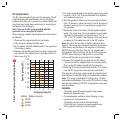
4. To start a cold engine move the choke lever (3) to the
start position. In order to restart a warm engine, leave the
choke lever in the run position (Fig. J).
5. Slowly pull the recoil starter
(4) until you feel it engage
and then pull it briskly. Return
the recoil starter gently and
slowly to the original position
by hand (Fig. K).
Note. When the motor is started
for the very first time, it will
require a number of attempts to
start until the fuel has travelled
from the tank to the motor.
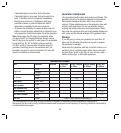
6. If the choke lever (3) was on
the start position gradually
move it to the run position as
the engine warms up (Fig. L).
F
J
K
H
I
Oil Filler Cap
Low Oil Level
Full Oil Level
G
E
L


