GeneracPortableProducts7500EXLExtendedLifeGenerator
Yourgeneratorrequiressomeassemblyandis ready
foruseafterit hasbeenproperlyservicedwiththe
recommendedoilandfuel.
If you have any problems with the assembly of
your generator, please call the generator helpline
at 1-800-270-1408.
IMPORTANT: Any attempt to run the unit before it has
been serviced with the recommended oil will result in
an engine failure.
REMOVE GENERATOR
FROM CARTON
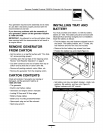
• Set the carton on a rigid flat surface with "This Side
Up" arrows pointing upward.
• Carefully open the top flaps of the shipping carton.
Review "Cold Weather Operation" on page 9.
• Cut down corners at one end of carton from top to
bottom and lay that side of carton down flat.
• Remove all packing material, carton fillers, etc.
• Remove the generator from the shipping carton.
CARTON CONTENTS
Check alt contents If any parts are missing or
damaged, call the generator helpline at
1-800-270-1408.
• The generator
Electric start battery cables
Generator and engine owner's manuals
Locking 20 Amp and 30 Amp plugs
Battery charge cables
Battery tray mounting bracket/hardware
Spare spark plug and air filter element
Spark plug wrench
INSTALLING TRAY AND
BATTERY
You must purchase and install a 12 Volt DC battery
(Series U1-109). The battery should be serviced with
electrolyte fluid and fully charged prior to installation.
Install the battery as follows:
• Find the battery tray and fasteners shipped loose in
the carton. The battery bracket, two 7" J-bolts, two
lock washers and two hex nuts are included.
• Remove the four battery tray screws from base.
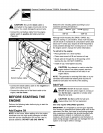
• Position the battery tray and install (Figure 2).
I
J
J
• Set battery onto tray and attach bracket, J-bolts, lock
washers, flat washers, and hex nuts (Figure 3).
Tighten hardware with 3/8" wrench.
/
5


