


12 Generac
®
Power Systems, Inc.
Section 3 – Maintenance
PRIMEPACT 50 Recreational Vehicle Generator
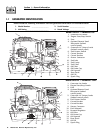
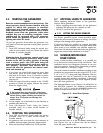
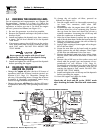
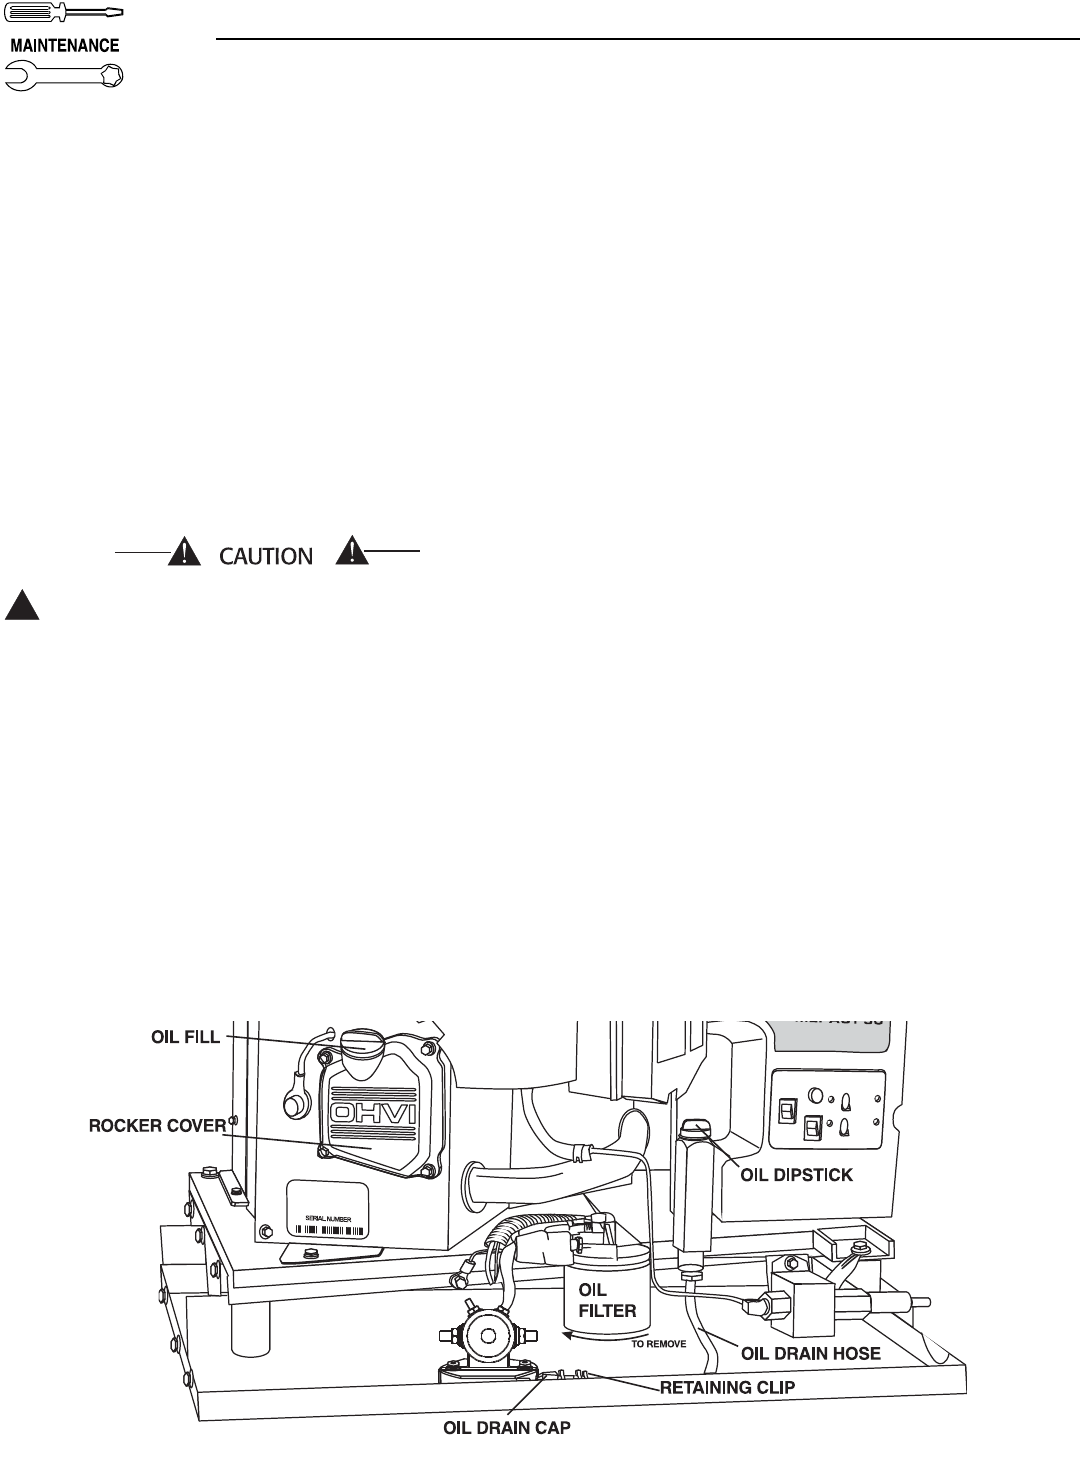
Figure 3.1 – Oil Maintenance Features
3.1 CHECKING THE ENGINE OIL LEVEL
For oil capacities and requirements, see “Engine Oil
Requirements,” Section 1.5.4 (Page 6). Check the
engine crankcase oil level at least every eight hours of
operation, or before you use it. To check the engine
oil level, proceed as follows (see Figure 3.1):
1. Be sure the generator is as level as possible.
2. Remove the dipstick and wipe it dry with a clean,
lint-free cloth.
3. Install and tighten the dipstick cap; then, remove
it again. The oil level should be at the dipstick
“Full” mark.
4. If necessary, remove the oil fill cap on the rocker
cover and slowly add oil until it reaches the dip-
stick “Full” mark. DO NOT FILL ABOVE THE
“FULL” MARK.
Never operate the engine with the oil level
below the “Add” mark on the dipstick. Doing
this could damage the engine.
5. Install and tighten the oil fill cap and the dipstick
before operating the engine.
3.2 CHANGING THE ENGINE OIL
AND/OR OIL FILTER
• Change the engine oil after the first 25 hours of
operation (after the 25-hour break-in period, see
Section 2.10.1, Page 11). Thereafter, change the
oil every 100 operating hours. Change the oil more
frequently if operating consistently under heavy
load or at high ambient temperatures.
• Change the engine oil filter after the first 25 hours
of operation, and every 100 operating hours there-
after.
To change the oil and/or oil filter, proceed as
follows (see Figure 3.1):
1. Run the engine until it is thoroughly warmed up
(at least five minutes) then shut OFF
the engine.
2. Immediately after the engine shuts OFF, pull the
oil drain hose free of its retaining clip. Remove
the cap from the hose and drain the oil into a
suitable container. Loosening the oil fill cap will
allow the crankcase to drain faster.
3. After the oil has drained, replace the cap onto the
end of the oil drain hose. Retain the hose in the clip.
4. With the oil drained, remove the old oil filter by
turning it counterclockwise.
5. Apply a light coating of clean engine oil to the gas-
ket of the new filter.
6. Screw the new filter on by hand until its gasket
lightly contacts the oil filter adapter. Then, tight-
en the filter an additional 3/4 to one turn.
7. Remove the dipstick and wipe it dry with a clean,
lint-free cloth. This will be used later to check the
oil level.
8. Remove the oil fill cap on the rocker cover and
slowly add the proper type and amount of rec-
ommended oil (see Section 1.5.4, Page 6).
Periodically use the dipstick to check the oil level
and continue to fill the crankcase until the oil
reaches the dipstick “Full” mark. DO NOT FILL
ABOVE THE “FULL” MARK.
9. Install and tighten the oil fill cap and the dipstick
before operating the engine.
10. Start the engine and check for leaks.
NOTE:
Check the oil level and fill to the “FULL” mark
after checking for leaks. The filter will retain some
oil.
!