


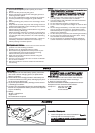
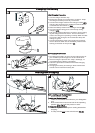
Before starting your Hedgetrimmer.
1. Remove blade cover (E).
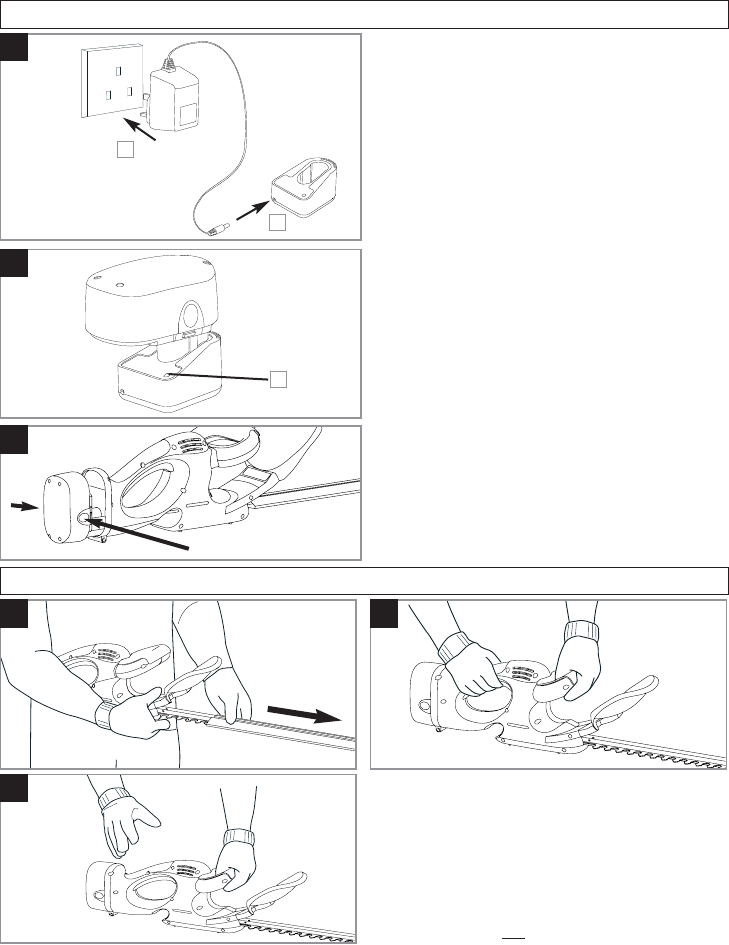
To start your Hedgetrimmer
1. There are two switch levers fitted to your Hedgetrim-
mer.
2. Both switch levers need to be held in the operating
position (See Fig F) for the product to start.
To stop your Hedgetrimmer
• Move Hedgetrimmer away from cutting area before
stopping.
1. To stop, release one
of the switch levers.(Fig G)
Starting and Stopping
E
F
G
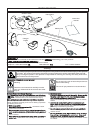
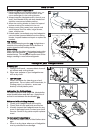
Charging the Battery
Initial Charging Procedure
1. Use the charger indoors only.
2. Ensure the charger is not exposed to moisture. Keep
the charger and the product dry at all times.
3. Connect the charger cable to the Charger Cradle (B1).
and plug the Charger into a suitable household electri-
cal wall socket and switch on (B2)..
4. Place the Battery Pack into the Charger Cradle.(C).
5. The red indicator lamp glows continuously during
charging.(C1)
6. Full charge will be achieved in 5-6 hours During charg-
ing the charger becomes warm. This is normal and
means the charger is operating correctly. When the Bat-
tery Pack is fully charged, the red indicator lamp will
change to green.
7. Connect the Battery Pack to the product by pressing
the two buttons either side of the Battery Pack and at-
taching to the back of the product.(D)
Re-Charging Your Product
1. Re-charge the battery as soon as the cutting power of
your cordless product begins to die and slow down.
2. Avoid running the product into "deep" discharge, i.e.
avoid flattening the battery completely.
3. Follow the procedure outlined in the Initial Charging
Procedure.
4. Charging the battery according to these instructions
should ensure maximum battery life.
B
1
2
C
1
D