


8
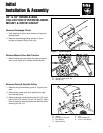
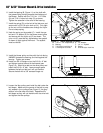
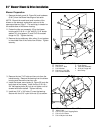
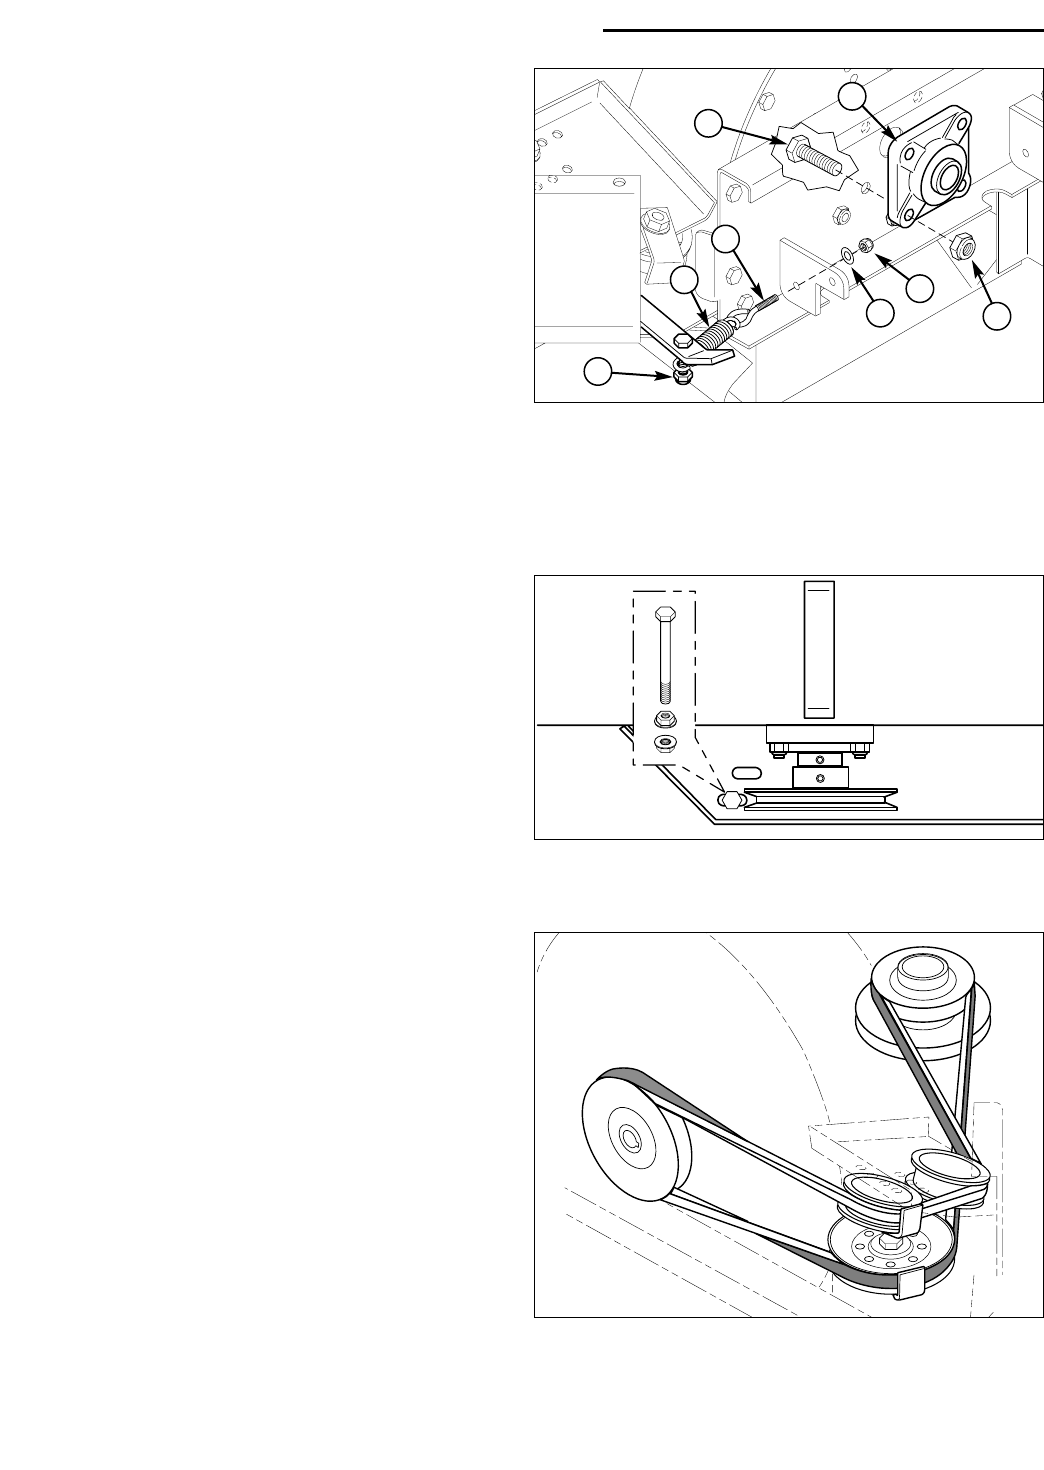
Figure 11. Install Bearing & Eyebolt
A. 7/16” x 1-1/2” Capscrew (4) E. 1/4” Washer
B. Bearing F. 1/4” x 1” Eyebolt
C. 7/16” Nylon Lock Nut (4) G. Spring
D. 1/4-20 Nylon Lock Nut H. 5/16-18 Nylon Lock Nut
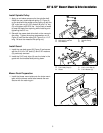
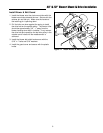
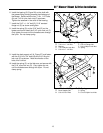
Figure 12. Install Blower Pulley & Guide Bolt
6. Install the bearing (B, Figure 11) on the shaft with
the grease fitting pointing towards the discharge of
the blower. Secure with the 7/16-14 x 1-1/2” bolts
(A) and 7/16-14 nylon lock nuts (C) as shown.
Tighten the setscrew in the collar of the bearing.
7. Install the spring (G) on the bolt of the idler arm and
secure with a 5/16-18 nylon lock nut (H). Only tight-
en the nut until the threads come through the nylon.
Do not clamp spring.
8. Hook the spring on the eyebolt (F). Install the eye-
bolt and 1/4” washer (E) on the blower mount plate
and secure with the nylon nut (D) as shown. The
nylon nut (D) must be fully tightened so the eyebolt
is drawn up tight against the mount. The eyebolt
must be vertical.
9. Install the blower pulley and key with the hub facing
INWARD towards the bearing, and hold against the
bearing. Tighten set screws.
10.Install one 3/8-16 flange nut on the 3/8-16 x 6” bolt
and tighten against the end of the threads (see
Figure 12). Install drive belt on the drive pulley and
install the 3/8-16 x 6” bolt. Leave enough space
between the belt and bolt so it will not interfere.
Secure the bolt with a 3/8” serrated flange nut.
A
B
C
D
E
F
G
H
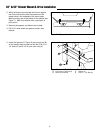
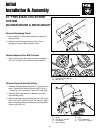
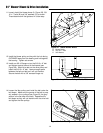
48” & 52” Blower Mount & Drive Installation
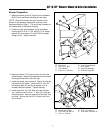
11.Loosen the idler pulleys and install the belt under the
belt keeps. Make sure the groove of the belt is prop-
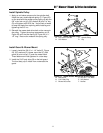
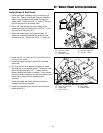
erly seated in the v-pulleys (see Figure 13, the gray
section is the flat side of the belt). Reposition the
belt keeps so they will not interfere with the drive belt
and tighten the idler pulleys.
Figure 13. Belt Routing