


Not for
Reproduction
43
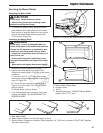
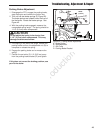
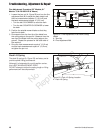
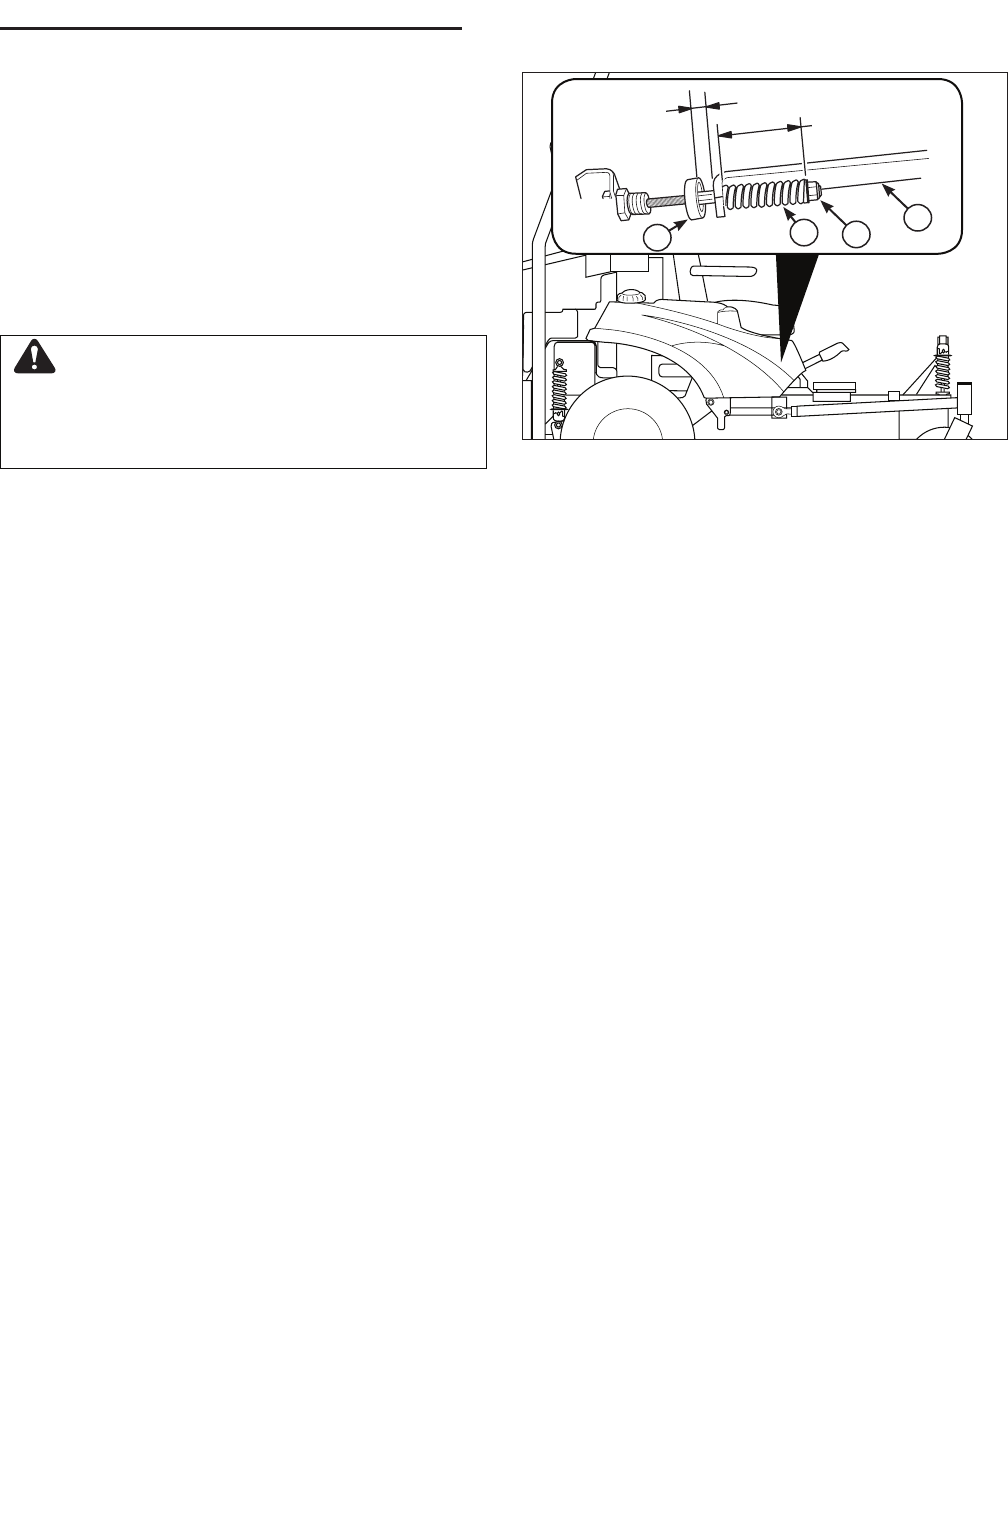
Figure 42. Parking Brake Adjustment
A. Brake Spring
B. Adjustment Nut
C. Set Collar
D. Parking Brake Bracket
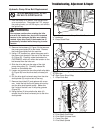
Parking Brake Adjustment
1. Disengage the PTO, engage the parking brake,
stop the engine and remove the ignition key.
2. This unit has two brake springs (A, Figure 42).
The brake springs are located under the front of
the fuel tanks. Locate the brake springs. See
Figure 42.
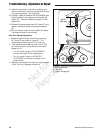
4. With the parking brake engaged, measure the
compressed spring length. The spring should be
1-1/8” (2,9 cm) when compressed.
5. If the spring is not within this range, release the
parking brake and turn the adjustment nut (B) to
compress or release the spring.
6. Engage the parking brake and re-measure the
spring.
7. Position the set collar (C) 1/4” (0,25 cm) away
from the parking brake bracket (D) and tighten.
If this does not correct the braking problem, see
your Ferris dealer.
Troubleshooting, Adjustment & Repair
CAUTION
Do not adjust the spring to be shorter than
1-1/8” (2,9 cm) when compressed. This may
damage the brake mechanism.
2-3/4”
(7 cm)
1/8”
(0,3 cm)
1-1/8”
(2,9 cm)
B
A
1/4”
(,25 cm)
D
C