


OPERATING INSTRUCTIONS OPERATING INSTRUCTIONS
Assembly of Vacuum
Assembly of Blower
Fig. 6
Ridge for
bag
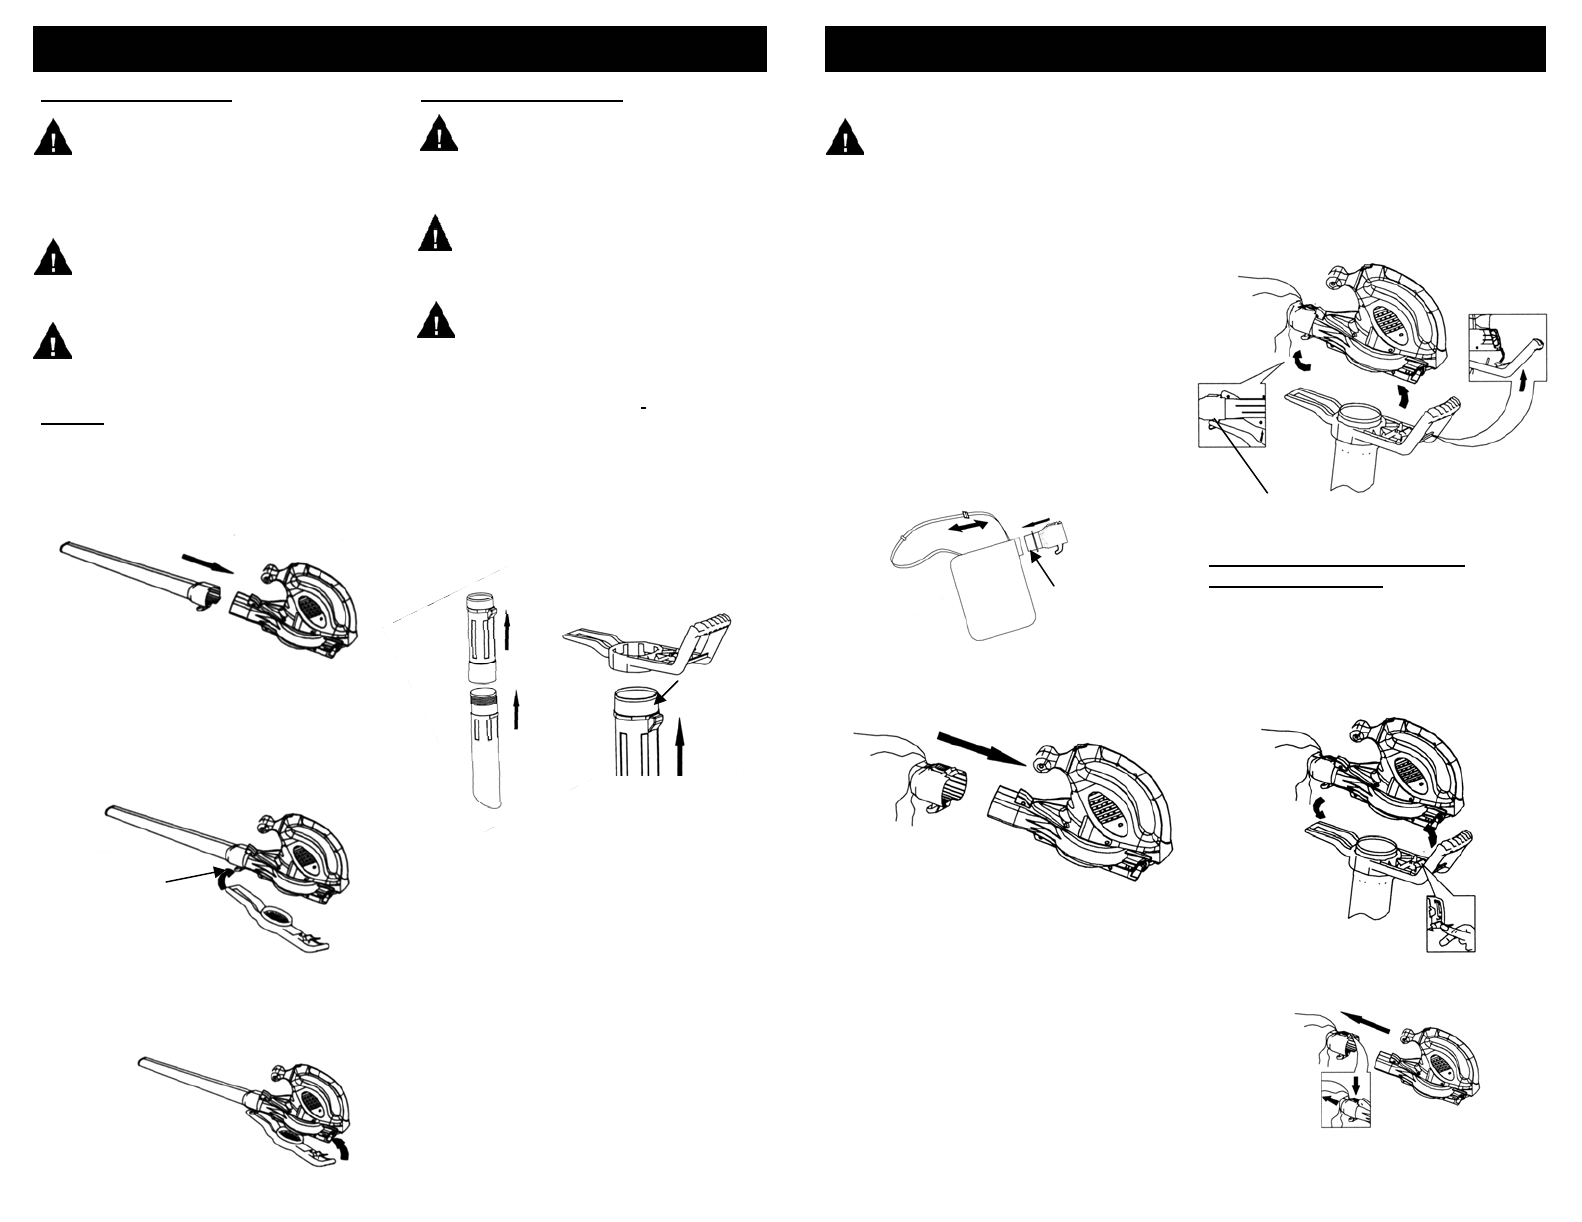
Attach collector debris bag to Motor when
you wish to use unit as a vacuum.
Once the tubes and easy grip handle have
been attached you can proceed to attach
bag to blower outlet.
1. Loosen velcro strap on debris collector
bag.
2. Place narrow end of adapter into
debris collector bag. There is enough
space for collar of bag to sit above
ridge created for bag cuff.
3. Pull velcro strap to tighten cuff on
adapter. Ensure that bag is properly
attached to avoid debris from being
thrown out of opening. (Fig. 6)
Fig. 7
NOTE: Bag adapter must be in position
before vacuum tubes can be attached.
5. Angle motor to allow hook on bag
adapter to securely hook onto last
bar of easy grip handle.
6. Lift easy grip handle to secure
locking tab in place. (Fig. 8)
Converting Your Unit From
Vacuum to Blower
1. Unplug unit and ensure all parts
stop moving.
2. Press on locking tab near handle to
remove easy grip handle from
motor. Angle motor to release
hook from locking bar. (Fig. 9)
Hook bag onto
Last bar of easy grip
handle
Locking tab to
easy grip handle
Fig. 8
Fig. 9
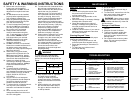
WARNING: Remove the plug
from the power source before
assembly of leaf blower. This will help
prevent accidental starting of the unit
which could result in serious injury.
4. Align locking tab with motor’s
locking tab holder and slide onto
blower outlet until you hear a click .
(Fig 7)
Attaching Vacuum to Motor
WARNING: Remove the plug
from the power source before
assembly of leaf blower. This will
help prevent accidental starting of
the unit which could result in serious
injury.
CAUTION: The impeller rotates for
a few seconds after you turn off the
blower and will cause injury. WAIT until
all parts stop moving.
WARNING: Do not remove the
bottom inlet cover when the motor is
running or when the unit is plugged into
power outlet.
NOTE: Instructions must be followed in
order.
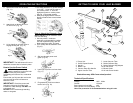
1. Ensure unit is unplugged and all
parts have stopped moving.
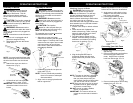
2. Slide blower tube onto the blower
outlet. (Fig. 1)
Fig. 1
WARNING: Remove the plug from
the power source before assembly of
vacuum. This will help prevent accidental
starting of the unit which could result in
serious injury.
WARNING: Do not remove the
bottom inlet cover when the motor is
running or when the unit is plugged into
power outlet
CAUTION: The impeller
rotates for a few seconds after you
turn off the blower and will cause injury.
WAIT until all parts stop moving.
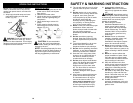
To assemble vacuum tubes
instructions
must be followed in order:
Fig. 4
Fig. 5
Tab on Tube
1. Align tabs on upper and lower
vacuum tube ensuring that the guide
is also aligned. Forcefully slide lower
vacuum tube onto upper vacuum tube
until upper tube is at end of lower
tube. Once in place these tubes are
permanently attached.
Fig. 2
4. Lift handle to lock inlet cover into
place at rear of motor. (Fig.3)
IMPORTANT: The blower will not run
unless the bottom inlet cover is
locked in place.
NOTE: You must install the blower tube
before installing the inlet cover because
the inlet cover hooks onto the blower
tube.
3. Attach inlet cover onto hook on
blower tube. (Fig. 2)
Hook on
blower tube
2. Push easy grip handle into place on
upper tube. (Fig. 5)
NOTE: This is a permanently assembly,
there is no reason to take apart
after assembled.
3. Align notch on easy grip handle with
tabs on upper tube.
NOTE: The strap on the bag is adjustable
for comfort of use. It is suggested
that you place strap across your
chest. Attach Vacuum to Motor when
you wish to use unit as a vacuum.
NOTE: Only use vacuum to pick up small
dry debris such as: grass clippings,
dry leaves, or small twigs.
DO NOT vacuum up glass, pebbles,
gravel, or large sticks.
IMPORTANT: The vacuum will not run
unless the vacuum tube is locked in
place.
3. Press on locking tab to remove bag
adapter from unit. (Fig. 10)
Fig.10
Fig. 3
7
6