


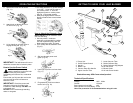
OPERATING INSTRUCTIONS GETTING TO KNOW YOUR LEAF BLOWER
Fig. 11
Fig. 12
Fig. 13
WARNING: If you do not fully
seat the extension cord on the inlet
plug, the loose plug could lead to
overheating and cause a fire, or electrical
shock.
Ensure that you fully seat the cord on the
plug and use the cord lock feature to
secure the cord.
IMPORTANT: Check the power cord
frequently during use for holes in the
insulation or other damage. DO NOT use
a damaged cord.
DO NOT run the cord through standing
water or wet grass.
1. The switch has three (3) power settings.
‘O’ is OFF. ‘I’ is for low air power or
low suction power. “ll” is for the
highest air power or suction power.
See Fig. 14 for power speeds.
2. Always use high power for vacuum
feature of leaf blower to ensure best
results.
Fig. 14
Fig. 15
Fig. 16
Hook for
power cord
Fig. 18
4. Latch loop of power cord onto hook.
(Fig. 17)
Fig. 17
NOTE: DO NOT use an extension cord
over 150 feet long.
1. Use only with a 2 conductor
extension cord intended for outdoor
use with a polarized plug, with one
blade larger than other, UL listed.
2. Form a loop with the extension cord.
(Fig 15)
4. Slide blower tube onto air outlet.
(Fig. 11)
1
4
6
7
10
6
8
9
11
2
3
5
12
5. Attach hook on blower to bar on
air inlet cover. (Fig. 12)
How to Attach the Extension Cord
6. Lift up handle on air inlet cover to
engage locking tab. (Fig. 13)
3. Slip loop through power cord
guide. (Fig 16)
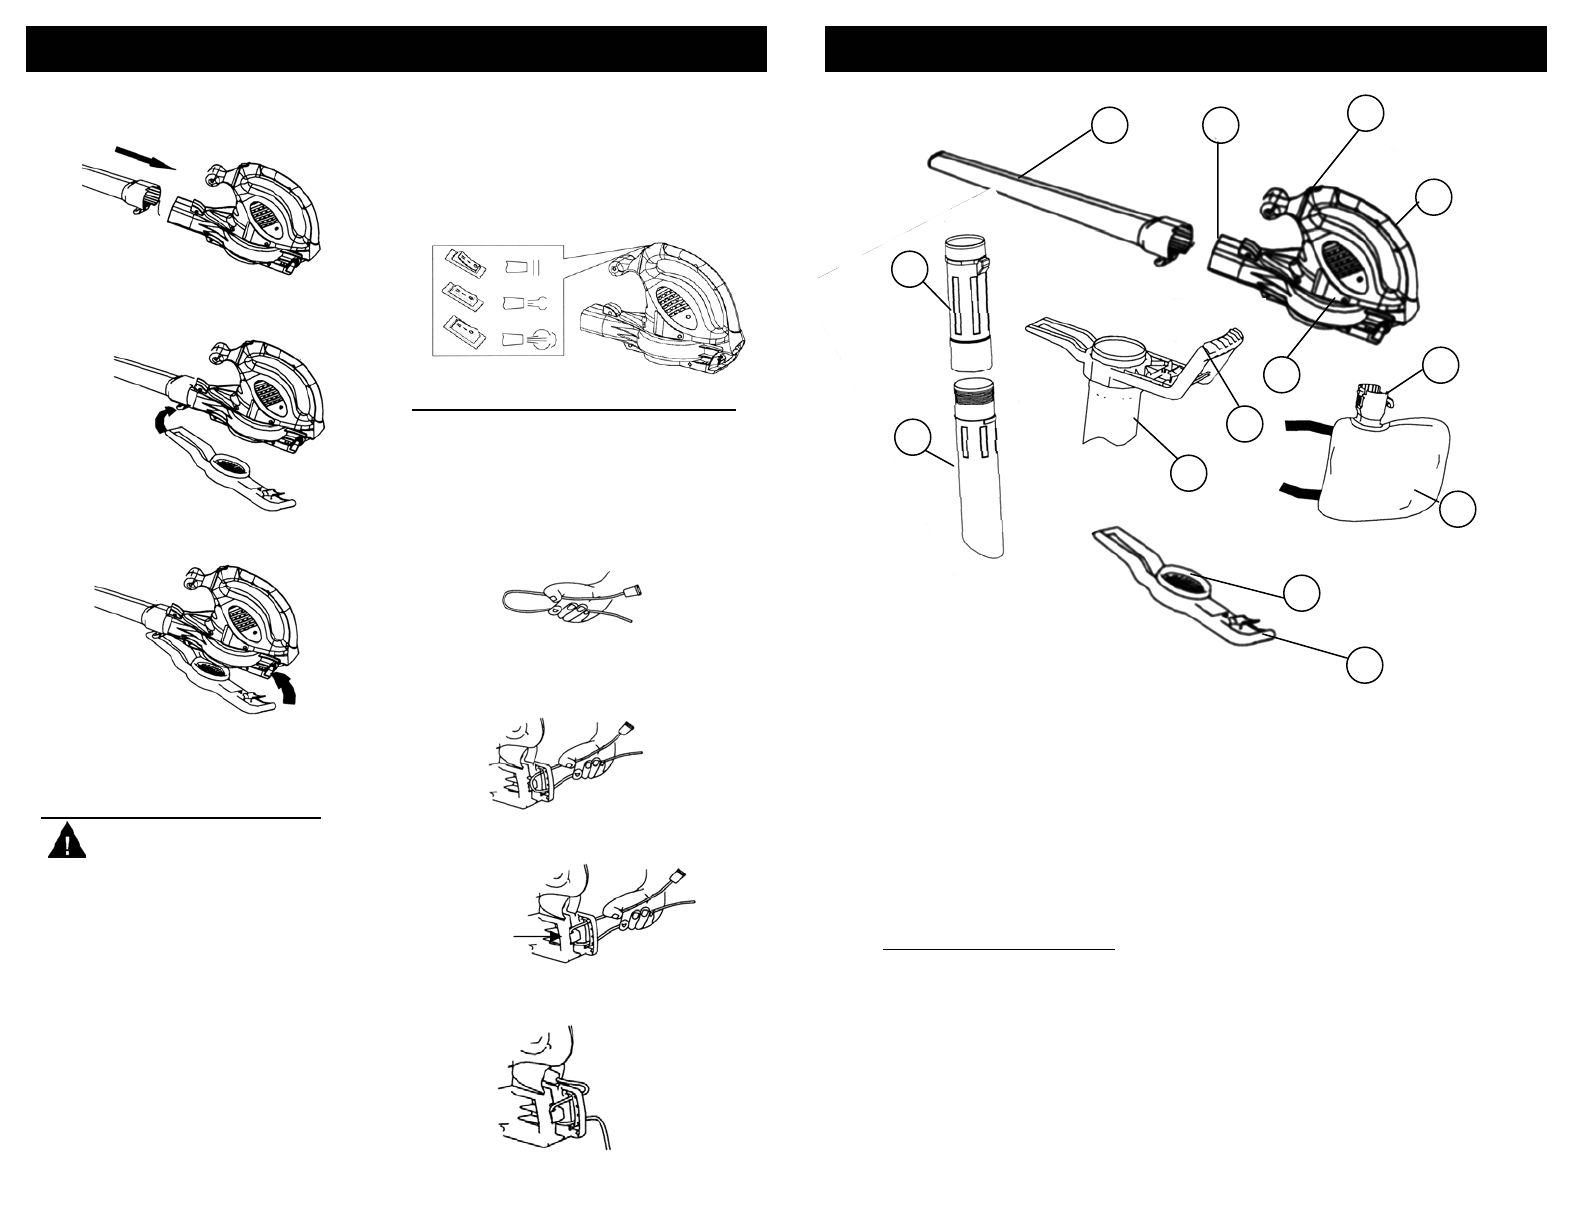
7. Lower Vacuum Tube
8. Debris Collector Bag
9. Debris Collector Bag Adapter
10.Air Inlet Cover
11.Blower Outlet
12.Air Inlet Cover Handle
1. Power Unit
2. On/Off, Speed Control
3. Handle
4. Blower Tub
5. Vacuum Easy Grip Handle
6. Upper Vacuum Tube
IMPORTANT: The leaf blower will not run
unless the vacuum tube is locked in place.
How to Use the Power Switch
Illustrations may differ from actual product.
Technical Specifications
Voltage: 120V., 60Hz.
Current: 12 Amps.
Sound pressure level (dB): ≤ 92
Sound power level Lwa (dB(A)): ≤ 105
Use of ear protection is recommended when using this unit.
5. Plug extension cord into outlet on
back of unit. (Fig. 18)
58