


Maintenance
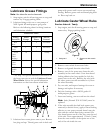
9. Insert the assembled nut and axle into the wheel
on the side of the wheel with the new seal and
bearing.
10. With the open end of the wheel facing up, ll
the area inside the wheel around the axle full of
NGLI grade #1 multi-purpose grease.
11. Insert the second bearing and new seal into the
wheel.
12. Apply a thread locking adhesive to the 2nd spacer
nut and thread onto the axle with the wrench ats
facing outward.
13. Torque the nut to 75-80 in-lb (8-9 N-m), loosen,
then re-torque to 20-25 in-lb (2-3 N-m). Make
sure axle does not extend beyond either nut.
14. Reinstall the seal guards over the wheel hub and
insert wheel into caster fork. Reinstall caster bolt
and tighten nut fully.
Important: To prevent seal and bearing damage,
check the bearing adjustment often. Spin the
caster tire. The tire should not spin freely
(more than 1 or 2 revolutions) or have any side
play. If the wheel spins freely, adjust torque on
spacer nut until there is a slight amount of drag.
Reapply thread locking adhesive.
Check Spark Plugs
Service Interval: Every 160 hours
Remove spark plugs, check condition and reset gaps,
or replace with new plugs. See Engine Owner’s
Manual.
Change Fuel Filter
Service Interval: As required
A fuel lter is installed between the fuel tanks and the
engine. Replace when necessary.
Replacement Filters
Kawasaki
Kawasaki P/N
49019–7001
Change Hydraulic System
Filter
Service Interval: After the rst 250 hours
Every 500 hours/Yearly
(whichever comes
rst) thereafter
(Every 250 hours/Yearly if
using Mobil 1 15W50)
1. Stop engine, wait for all moving parts to stop, and
remove key. Engage parking brake.
2. Locate the two lters under the transmissions.
Remove lter guards.
3. Carefully clean area around lters. It is important
that no dirt or contamination enter hydraulic
system.
4. Unscrew lters to remove and allow oil to drain
from drive system.
Important: Before reinstalling new lter,
apply a thin coat of Exmark Premium Hydro
oil on the surface of the rubber seal.
Turn the lters clockwise until rubber seal
contacts the lter adapter then tighten the lter
an additional 1/2 to 3/4 turn.
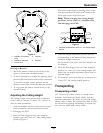
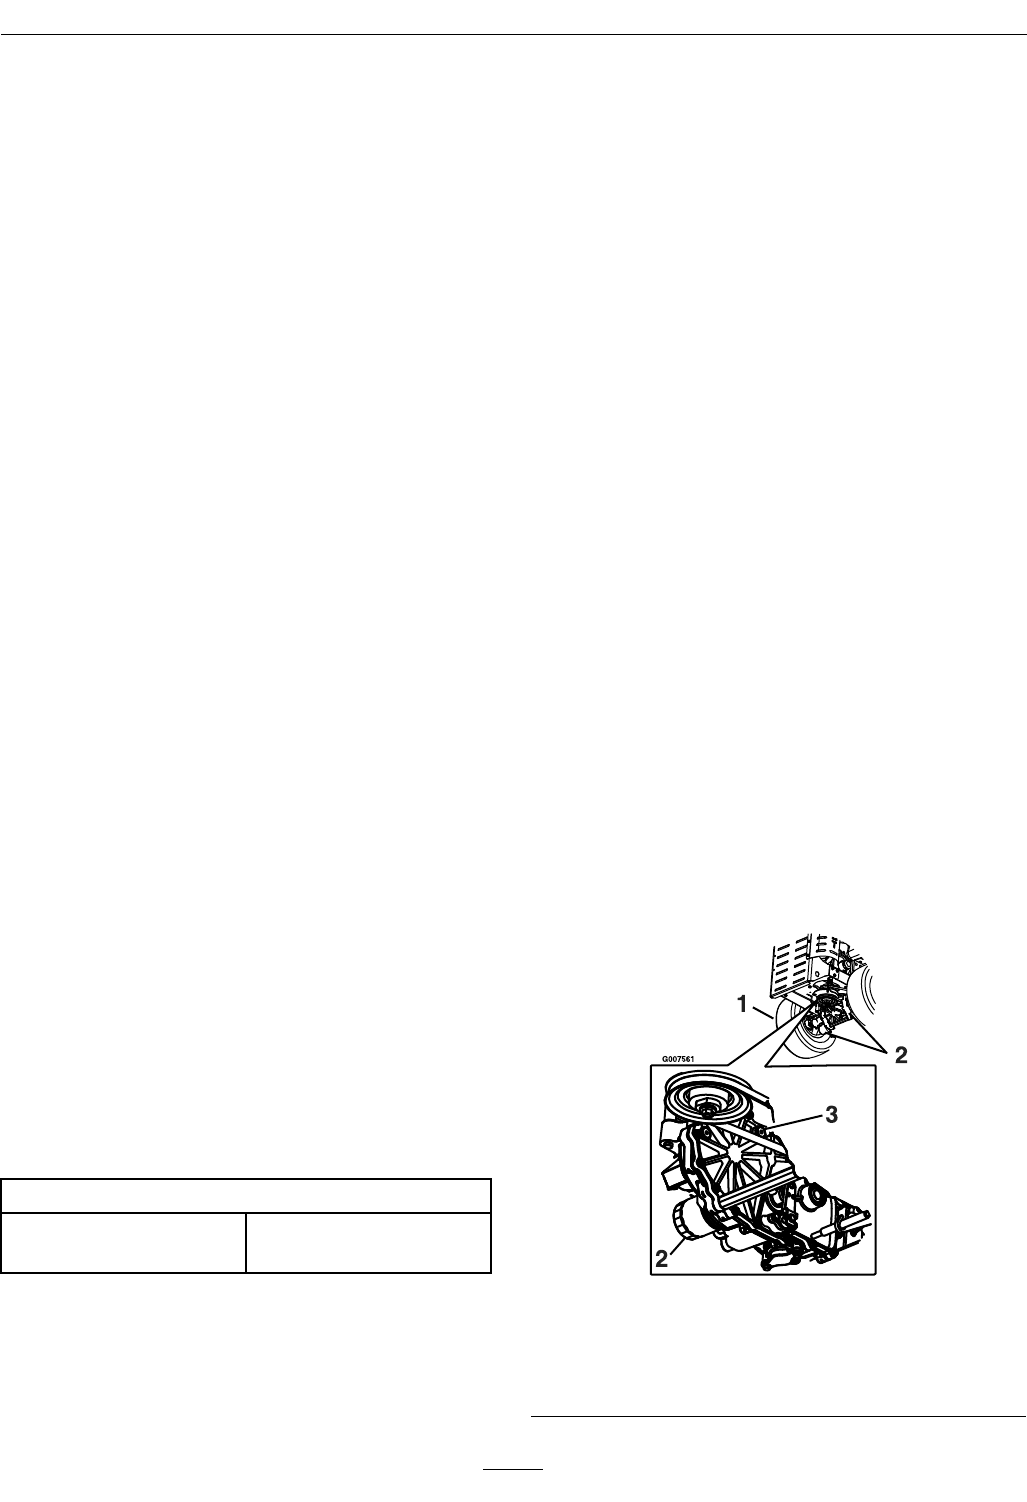
5. Remove the vent plug on each transmission and
ll through expansion reservoir, when oil comes
out of vent reinstall plug. Torque plugs to 180
in-lbs (20 N-m).
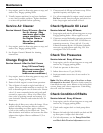
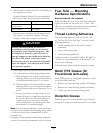
Figure 10
Left Side Shown
1. Left rear tire
3. Vent plug
2. Oil lter
26