


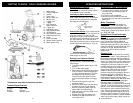
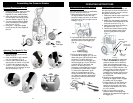
Fig. 2
Wheel
Lock
Wheel
Axle
Front
Support
Screw,
1” long,
nickel plate
Wheel
1. Carefully take all the parts out of the
packaging container and place
together on a flat, stable surface.
2. Insert the wheels onto the wheel
axle and push in the wheel lock to
lock the wheels in place. (Fig. 2)
3. Turn the pressure washer upside
down and slide the front support
onto the unit. (Fig 2)
4. Using the 1” long nickel plated
screw, secure the front support to
the unit.
Attaching The Wheels To The
5
Pressure Washer
Assembling the Pressure Washer
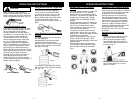
Attaching The Handle To The
Pressure Washer
1. Place the handle on the unit as
shown in Fig. 3.
2. Push the handle in at the bottom
until it is in position. (Fig. 4)
3. Let the handle slide down to its
resting place as shown in Fig 5 & 6.
4. To secure the handle to the unit,
screw 1 1/4” screw at the top hole
and the two (2) 7/8” screws on each
side of the handle. (Fig. 7)
Fig. 4
Fig. 5
Fig. 6
Fig. 7
1 1/4”
SCREW
7/8”
SCREW
7/8”
SCREW
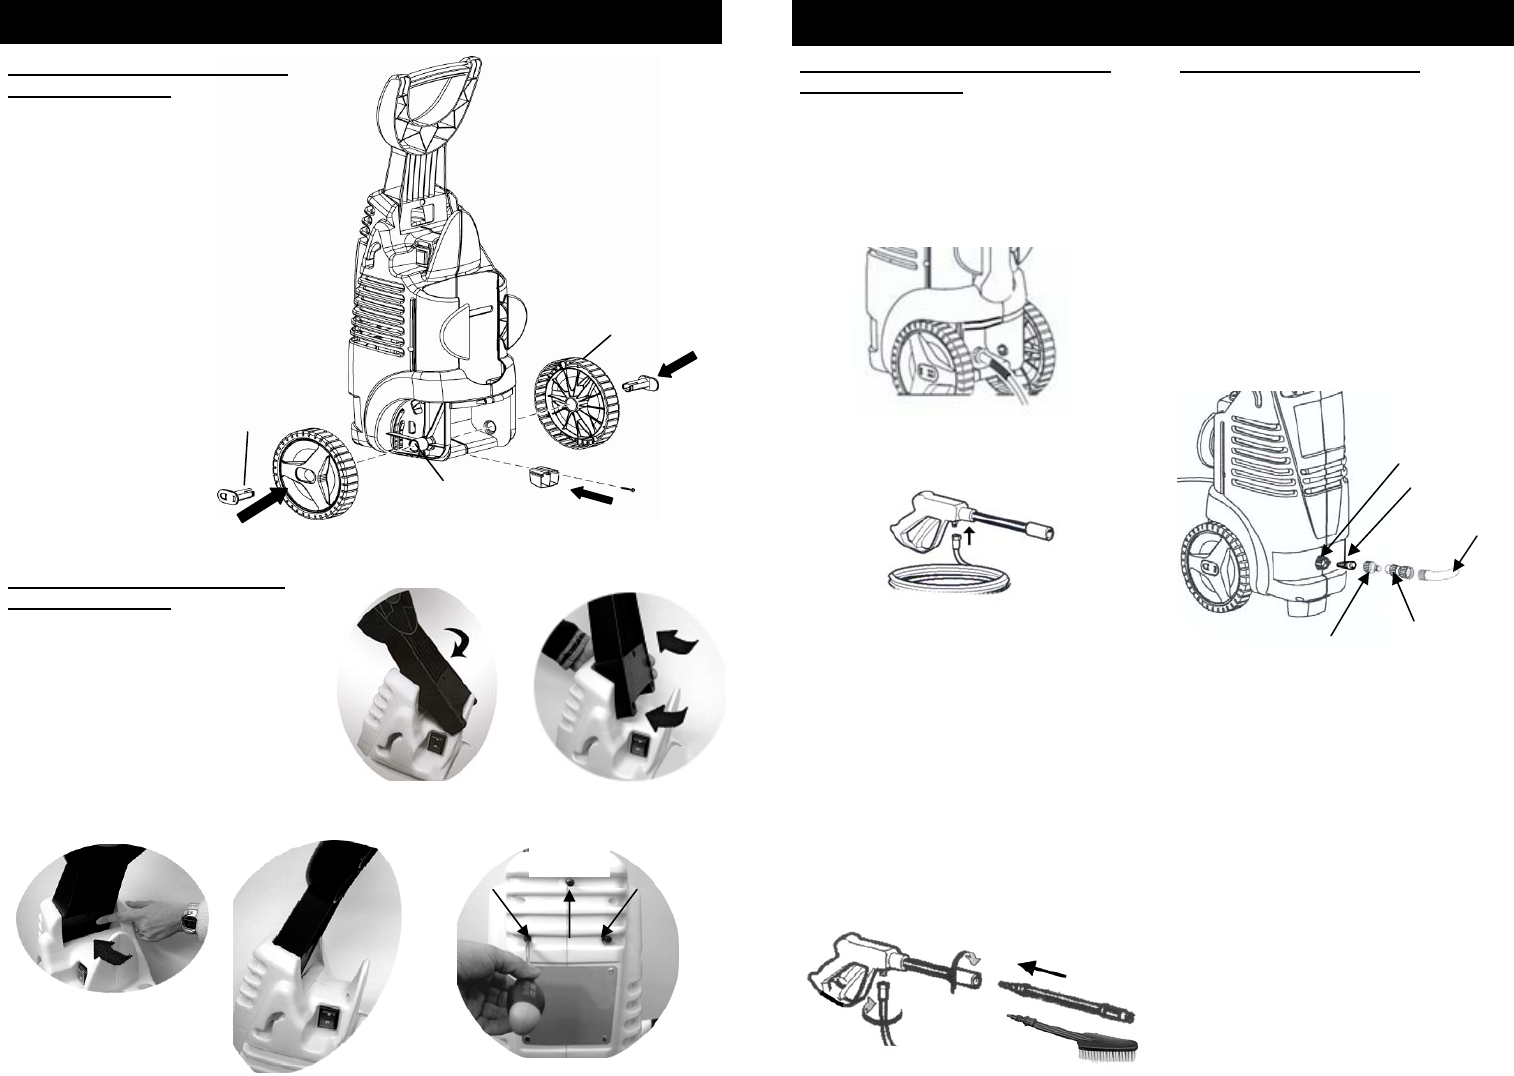
OPERATING INSTRUCTIONS
Attaching High Pressure Hose to
6
Pressure Washer
Once the pressure washer is assembled,
you are ready to use the unit.
1. While facing the rear of the unit attach
the high pressure hose to the high
pressure output connector on the back
side of the unit. Twist on tight to avoid
leakage. (Fig. 8)
Fig. 8
2. Then attach the other end of the high
pressure hose to the high pressure
hose connector on the trigger gun.
(Fig. 9)
Fig. 9
Fig. 10
Garden Hose Connection
Once all the desired attachments and
the high pressure hose are attached to
the pressure washer, you can connect
the garden hose to the unit.
1. Make sure that the water intake filter
is inside the water intake inlet.
(Fig. 11)
2. Attach the male adapter (supplied)
to the water intake connector on the
front side of the unit. (Fig. 11)
3. Attach the female hose coupling to
the garden hose. (Fig. 11)
4. Connect the female hose coupling
to the male adapter making sure
that it is tightly secured in place.
(Fig. 11)
5. After all the connections have been
made and
BEFORE you plug the
pressure washer into an electrical
outlet, open the water supply and
press on the trigger switch in order to
remove any air which may be in the
hose or pump. Continue to press on
the trigger switch until you get a
constant flow of water coming out of
the trigger gun. Allow water to flow
for 30 seconds.
6. Once this is accomplished, stop
pressing the trigger switch. Engage
the safety lock on the trigger.
7. Ensure that the "On/Off" switch, at
the side of the unit, is on the "Off"
position, then plug the unit into an
electrical outlet and turn the unit to
the "On" position.
8. Now you are ready to use the
pressure washer. Disengage the
safety lock and depress the trigger on
the trigger gun.
Fig. 11
Water inlet
Water intake
filter
Garden hose
(not supplied)
Hose
connector
Garden hose
coupling
3. Once the high pressure hose is
connected to the trigger gun, you can
attach the lance and accessories that
you desire. To attach either the
lance or the brush to the trigger gun,
hold the trigger gun in your left hand
insert the lance or the brush and
push it in all the way into the
connector on the trigger gun and turn
it clockwise 60° until it locks in place.
To remove the attachment, push
down on the attachment and turn
counter-clockwise 60° and then pull
out. Make sure that the attachments
are securely locked in place before
use. (Fig. 10)
Fig. 3