Assembling Your Cordless Sweeper
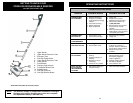
Your cordless sweeper will require very little assembly. You should remove it from the
carton and familiarize yourself with all the components listed per the exploded view
drawing (page 2). This will help you in the assembly and operation of your cordless
sweeper.
Note: The charging adapter is shipped inside the packaging.
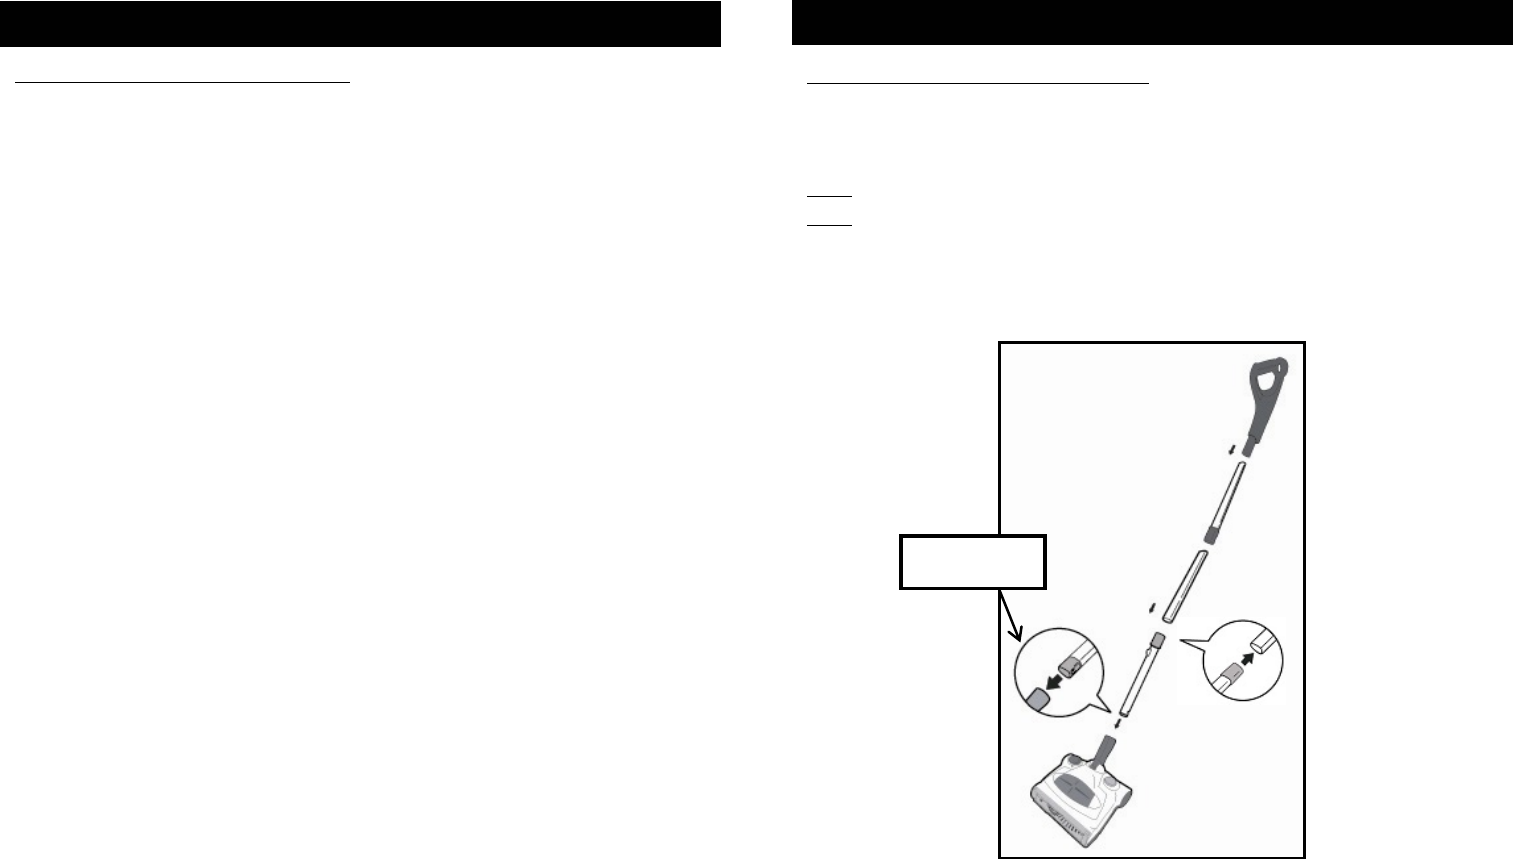
Note: The lower extension tube has the dust cup empty button on it. This tube
should be inserted into the lower handle.
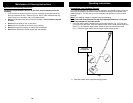
1. Insert the lower handle extension tube into the lower handle. (Fig. 1a) Push until
you hear it click into place. Push the extension tube into the lower handle extension
tube. (Fig. 1b) Insert the upper handle extension tube into the extension tube.
(Fig. 1) Insert the upper handle into the upper handle extension tube.
3
Operating Instructions
2. Place the handle into the upward storage position.
10
Maintenance & Cleaning Instructions
Fig. 1
Fig. 1a
Fig. 1b
Insert into
lower handle
Maintenance and Cleaning Instructions
To improve the performance and life of your unit, we recommend you do the
following:
1. Once a month clean the unit with a dry cloth, including the chamber which the
dust cup container fits into. Remove any hair, fiber or other materials that may
have built up in the chamber, and on the rotating brush.
2. Do not use abrasive materials to clean the sweeper. Do not immerse the unit
in water.
3. Do not pick up liquids or use on wet floors.
4. Do not use on concrete, tar or similar rough surfaces.
5. Do not pick up pieces of string or fabrics with the sweeper.
6. Do not clean tasseled or frayed carpets with the sweeper.


