


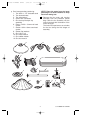
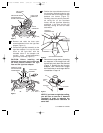

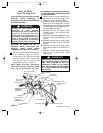

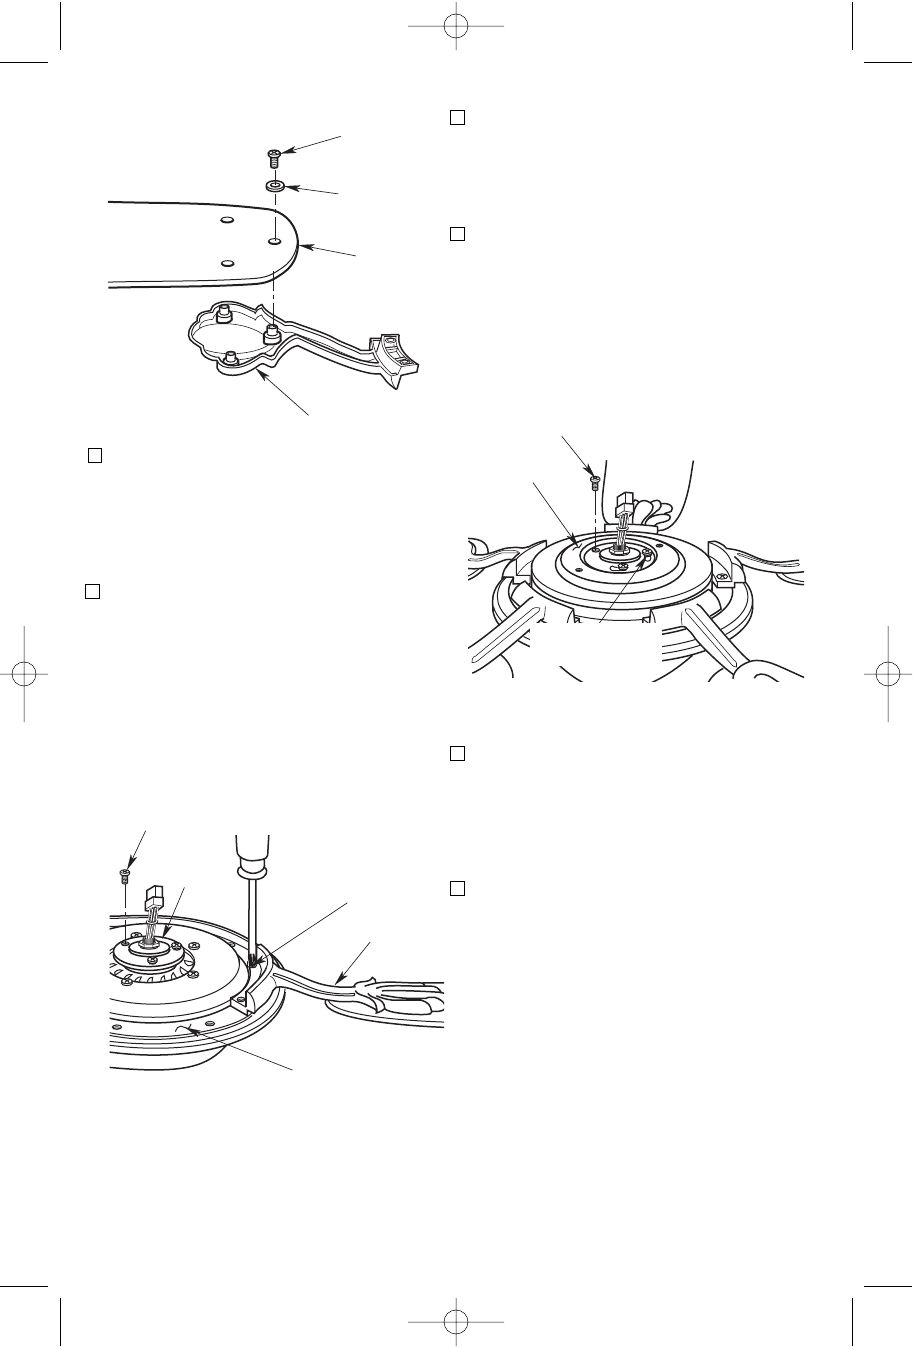
4. Remove and retain one of the three
pan head screw/lockwashers from the
motor flange (Figure 2); loosen the
other two pan head screws three or
four turns.
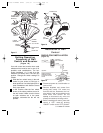
5. Position the light fitter adapter on the
motor flange so that the two screws
mate with the two keyhole slots in the
light fitter adapter (Figure 3).
NOTE: Make sure that the lockwashers
are positioned between the screw head
and the light fitter adapter.
6. Turn the light fitter adapter clockwise
and tighten both screws (Figure 3).
Reinstall the other pan head
screw/lockwasher (previously remov-
ed) in the remaining hole in the light
fitter adapter.
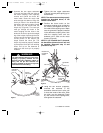
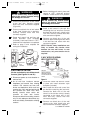
7. Carefully rest the light fitter assembly
on the adapter, then engage the light
fitter connector with the motor
connector (Figure 4). The two
connectors are keyed and color-coded
and must be mated correctly (color-to-
color) before they can be engaged.
Make sure the connectors are engaged
properly.
6
10-24 x 8mm
TRUSS HEAD
SCREWS (3)
FLAT
WASHERS (3)
FAN BLADE
BLADE FLANGE
Figure 1
1/4-20 x 13mm OVAL
HEAD SCREWS (2)
MOTOR
FLANGE
BLADE
FLANGE
MOTOR HUB
REMOVE AND RETAIN ONE PAN HEAD
SCREW/LOCKWASHER; LOOSEN TWO PAN
HEAD SCREWS
Figure 2
REINSTALL ONE PAN HEAD
SCREW/LOCKWASHER
LIGHT FITTER
ADAPTER
TIGHTEN TWO PAN
HEAD SCREWS
Figure 3
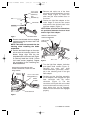
2. Remove and discard the four shipping
retainers securing the motor hub in the
motor housing.
NOTE: Take care not to scratch the fan
housing when installing the blade
assemblies.
3. Position the blade flange on the motor
hub so that the mounting holes in the
blades flange align with the two
threaded holes in the motor hub (Figure
2). Securely install two 1/4-20 x 13mm
oval head screws (supplied). Repeat
this procedure for the remaining four
blade assemblies.
U.L. Model No.: CF240
BP7359 VININGS CF240 9/19/07 11:13 AM Page 6